3D printers technically ARE CNC machines because they use “Computer Numeric Control” systems, but when it comes to CNC routers we start to see some major differences between the two types of machines.
Almost all consumer facing 3D printers are FDM (Fused Deposition Modelling) 3D printers, laying down layer by layer of molten plastic to create 3D objects. They use a variety of mechanical systems to move a nozzle which extrudes out the molten plastic to build up that object.
CNC routers work in a similar way, except starting with a block of material and removing material using a rotating cutting bit until you’re left with a object.
Before we dive into how the Mill One was converted it’s important to point out some major differences between CNC routers and 3D printers.
The most important is the differences between the mechanical intent of these machines. CNC routers experience huge amounts of force during milling and rely heavily on the stiffness of the mechanical systems to maintain accuracy. This makes them significantly heavier and slower than a 3D printer. 3D printers on the other hand need to move the extruder nozzle quickly, and because they are relatively lighter than a router or spindle, the mechanical systems lighter and are much more nimble.
While there are several 3D printers which can act as a CNC milling machine, due to the different mechanical requirements of each machine, they are either slow at 3D printing or underpowered as a CNC router. It’s up to the customer to choose if they want a machine that can do one thing really well, or a few things so so.
Regardless of this fact, we still went ahead to see what would happen if we turned the Mill One into a 3D printer!
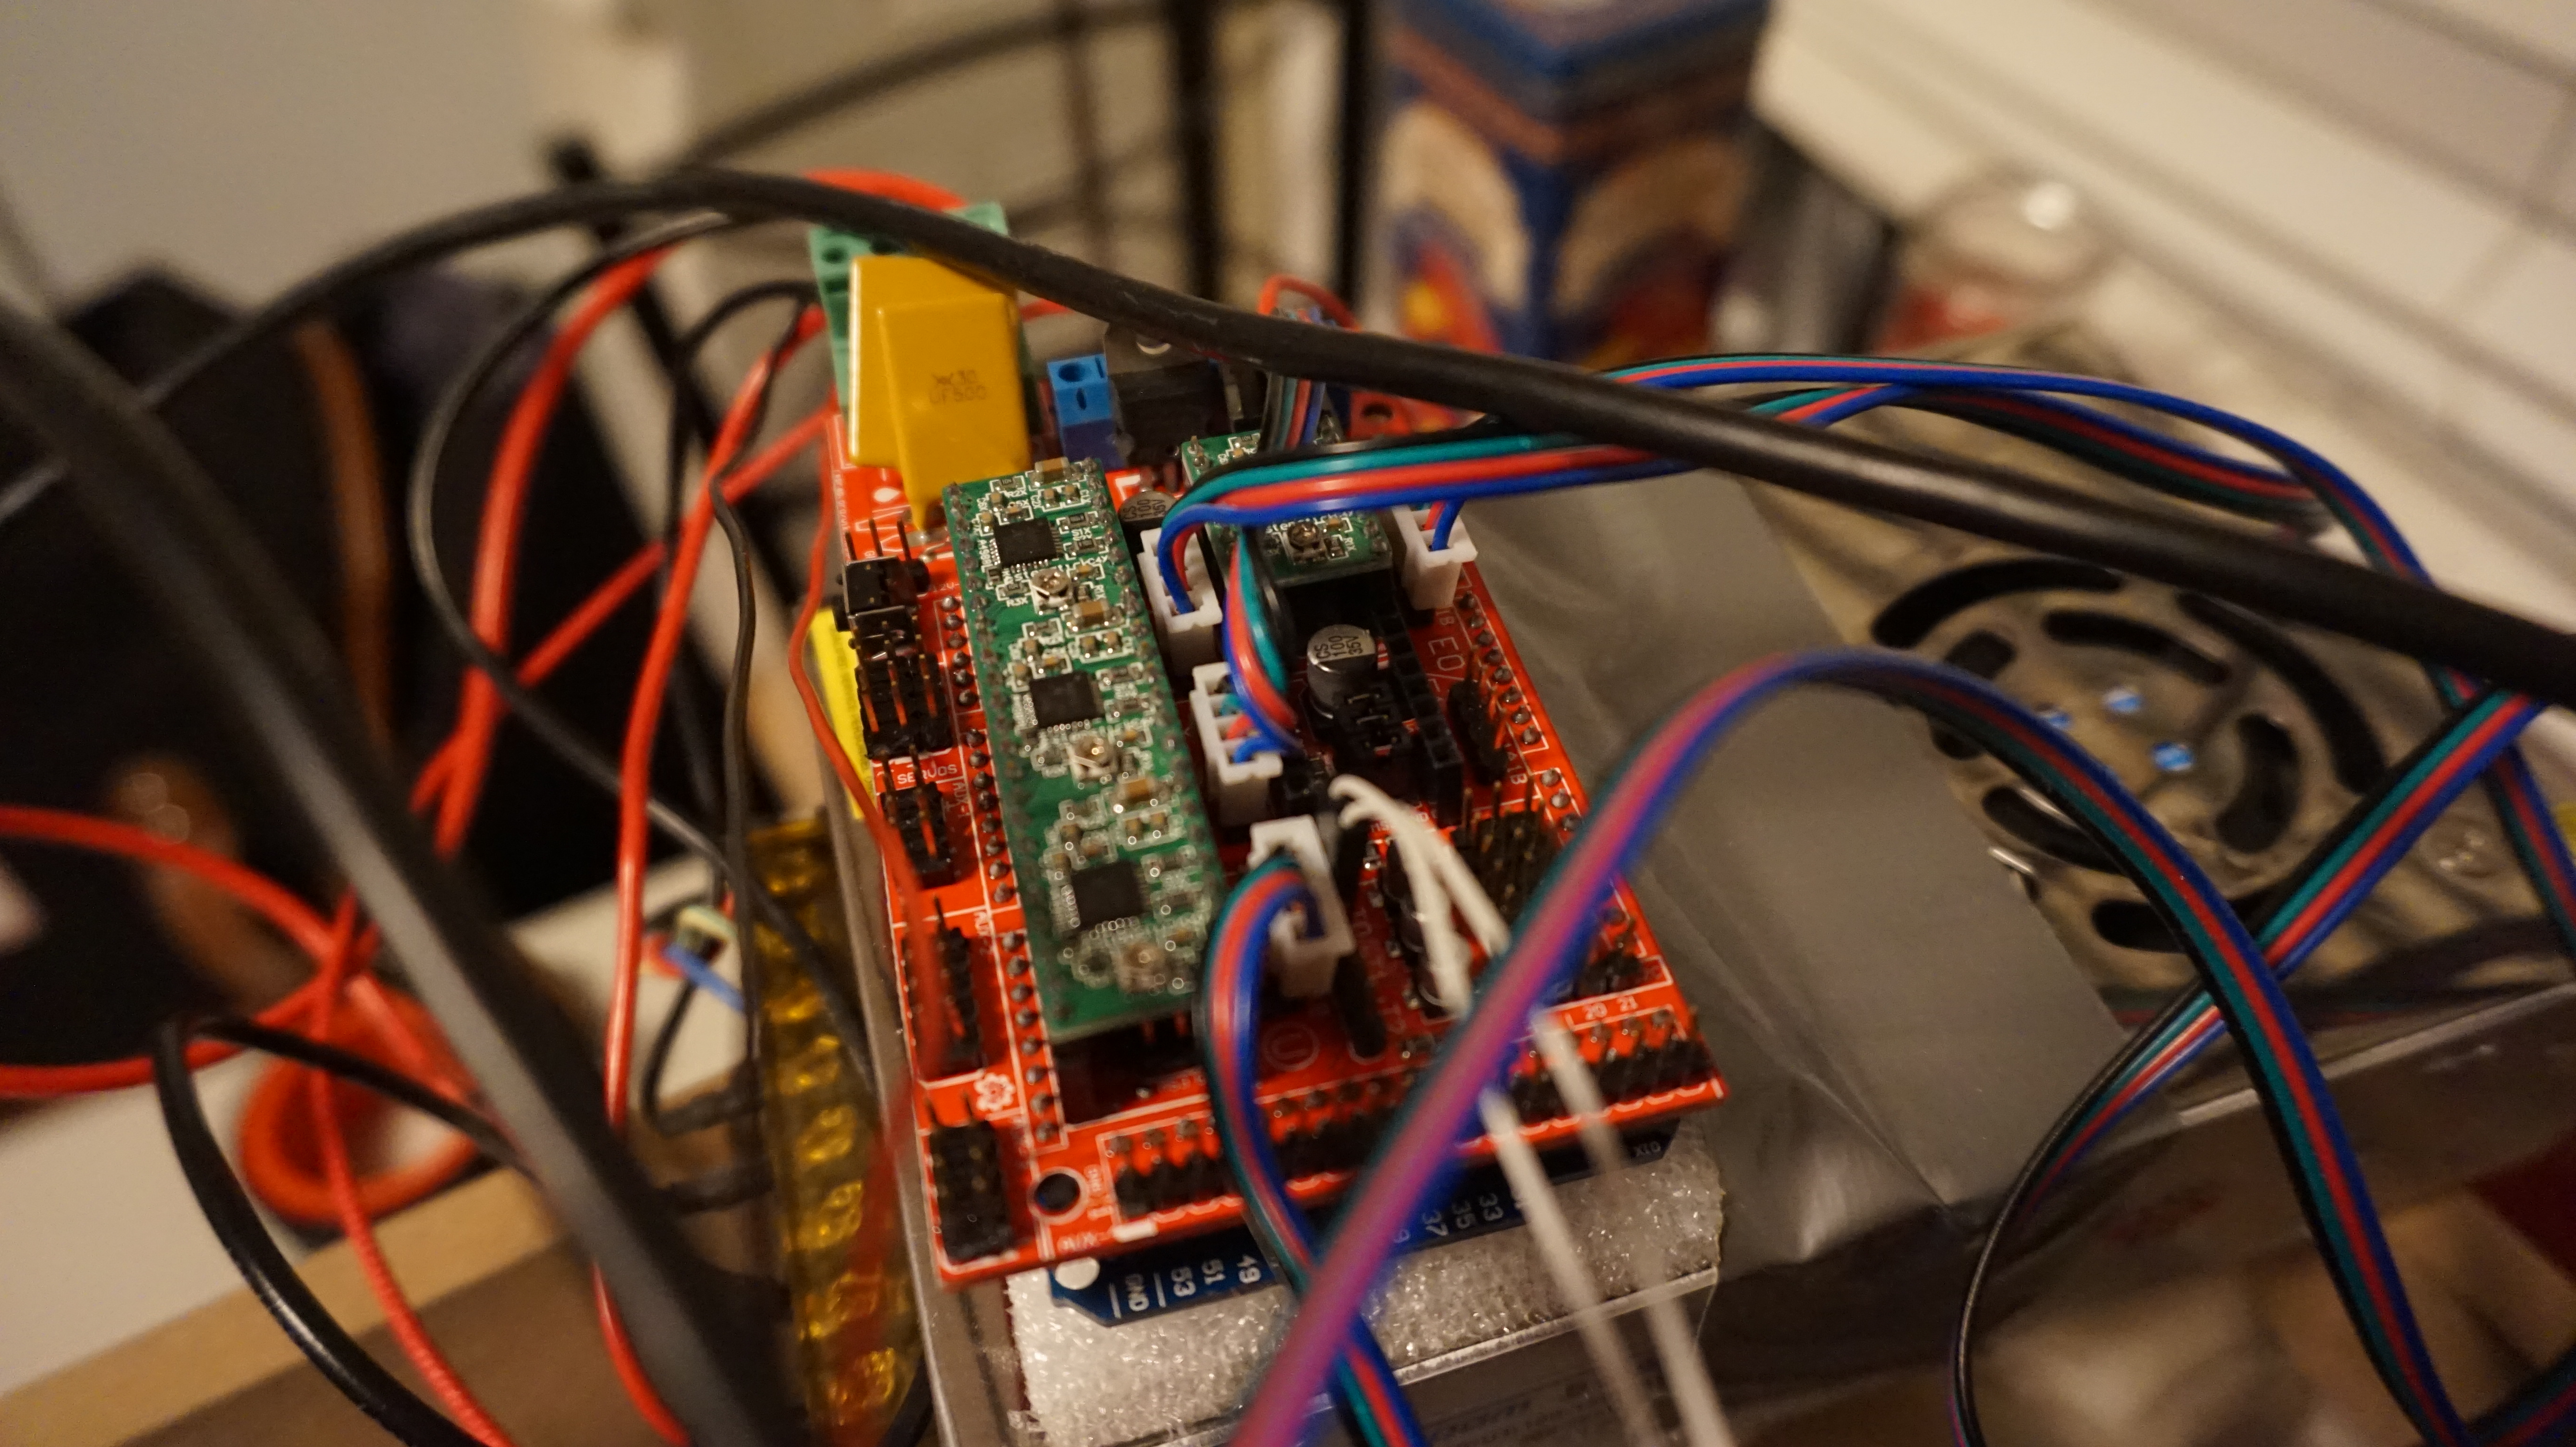
The first step to modding the Mill One into a 3D printer is to find the right electronics. We had a RAMPS 1.4 control board on hand so we chose to use this. The RAMPS 1.4 has all the sockets and pins needed to control all the periphery devices of a 3D printer (like a hot end, extruder, homing switches). You can find newer, more powerful control boards with many more features that the RAMPS, but the RAMPS is fairly easy to find and can be found inexpensively online.
We followed this dossier to help me wire the RAMPS together and wired the 3 motors which power the X, Y, and Z axis, as well as a spare extruder we had lying around from the old, out of commission Tevo Tarantula. It was quite busted, and some hot glue was to put it together.
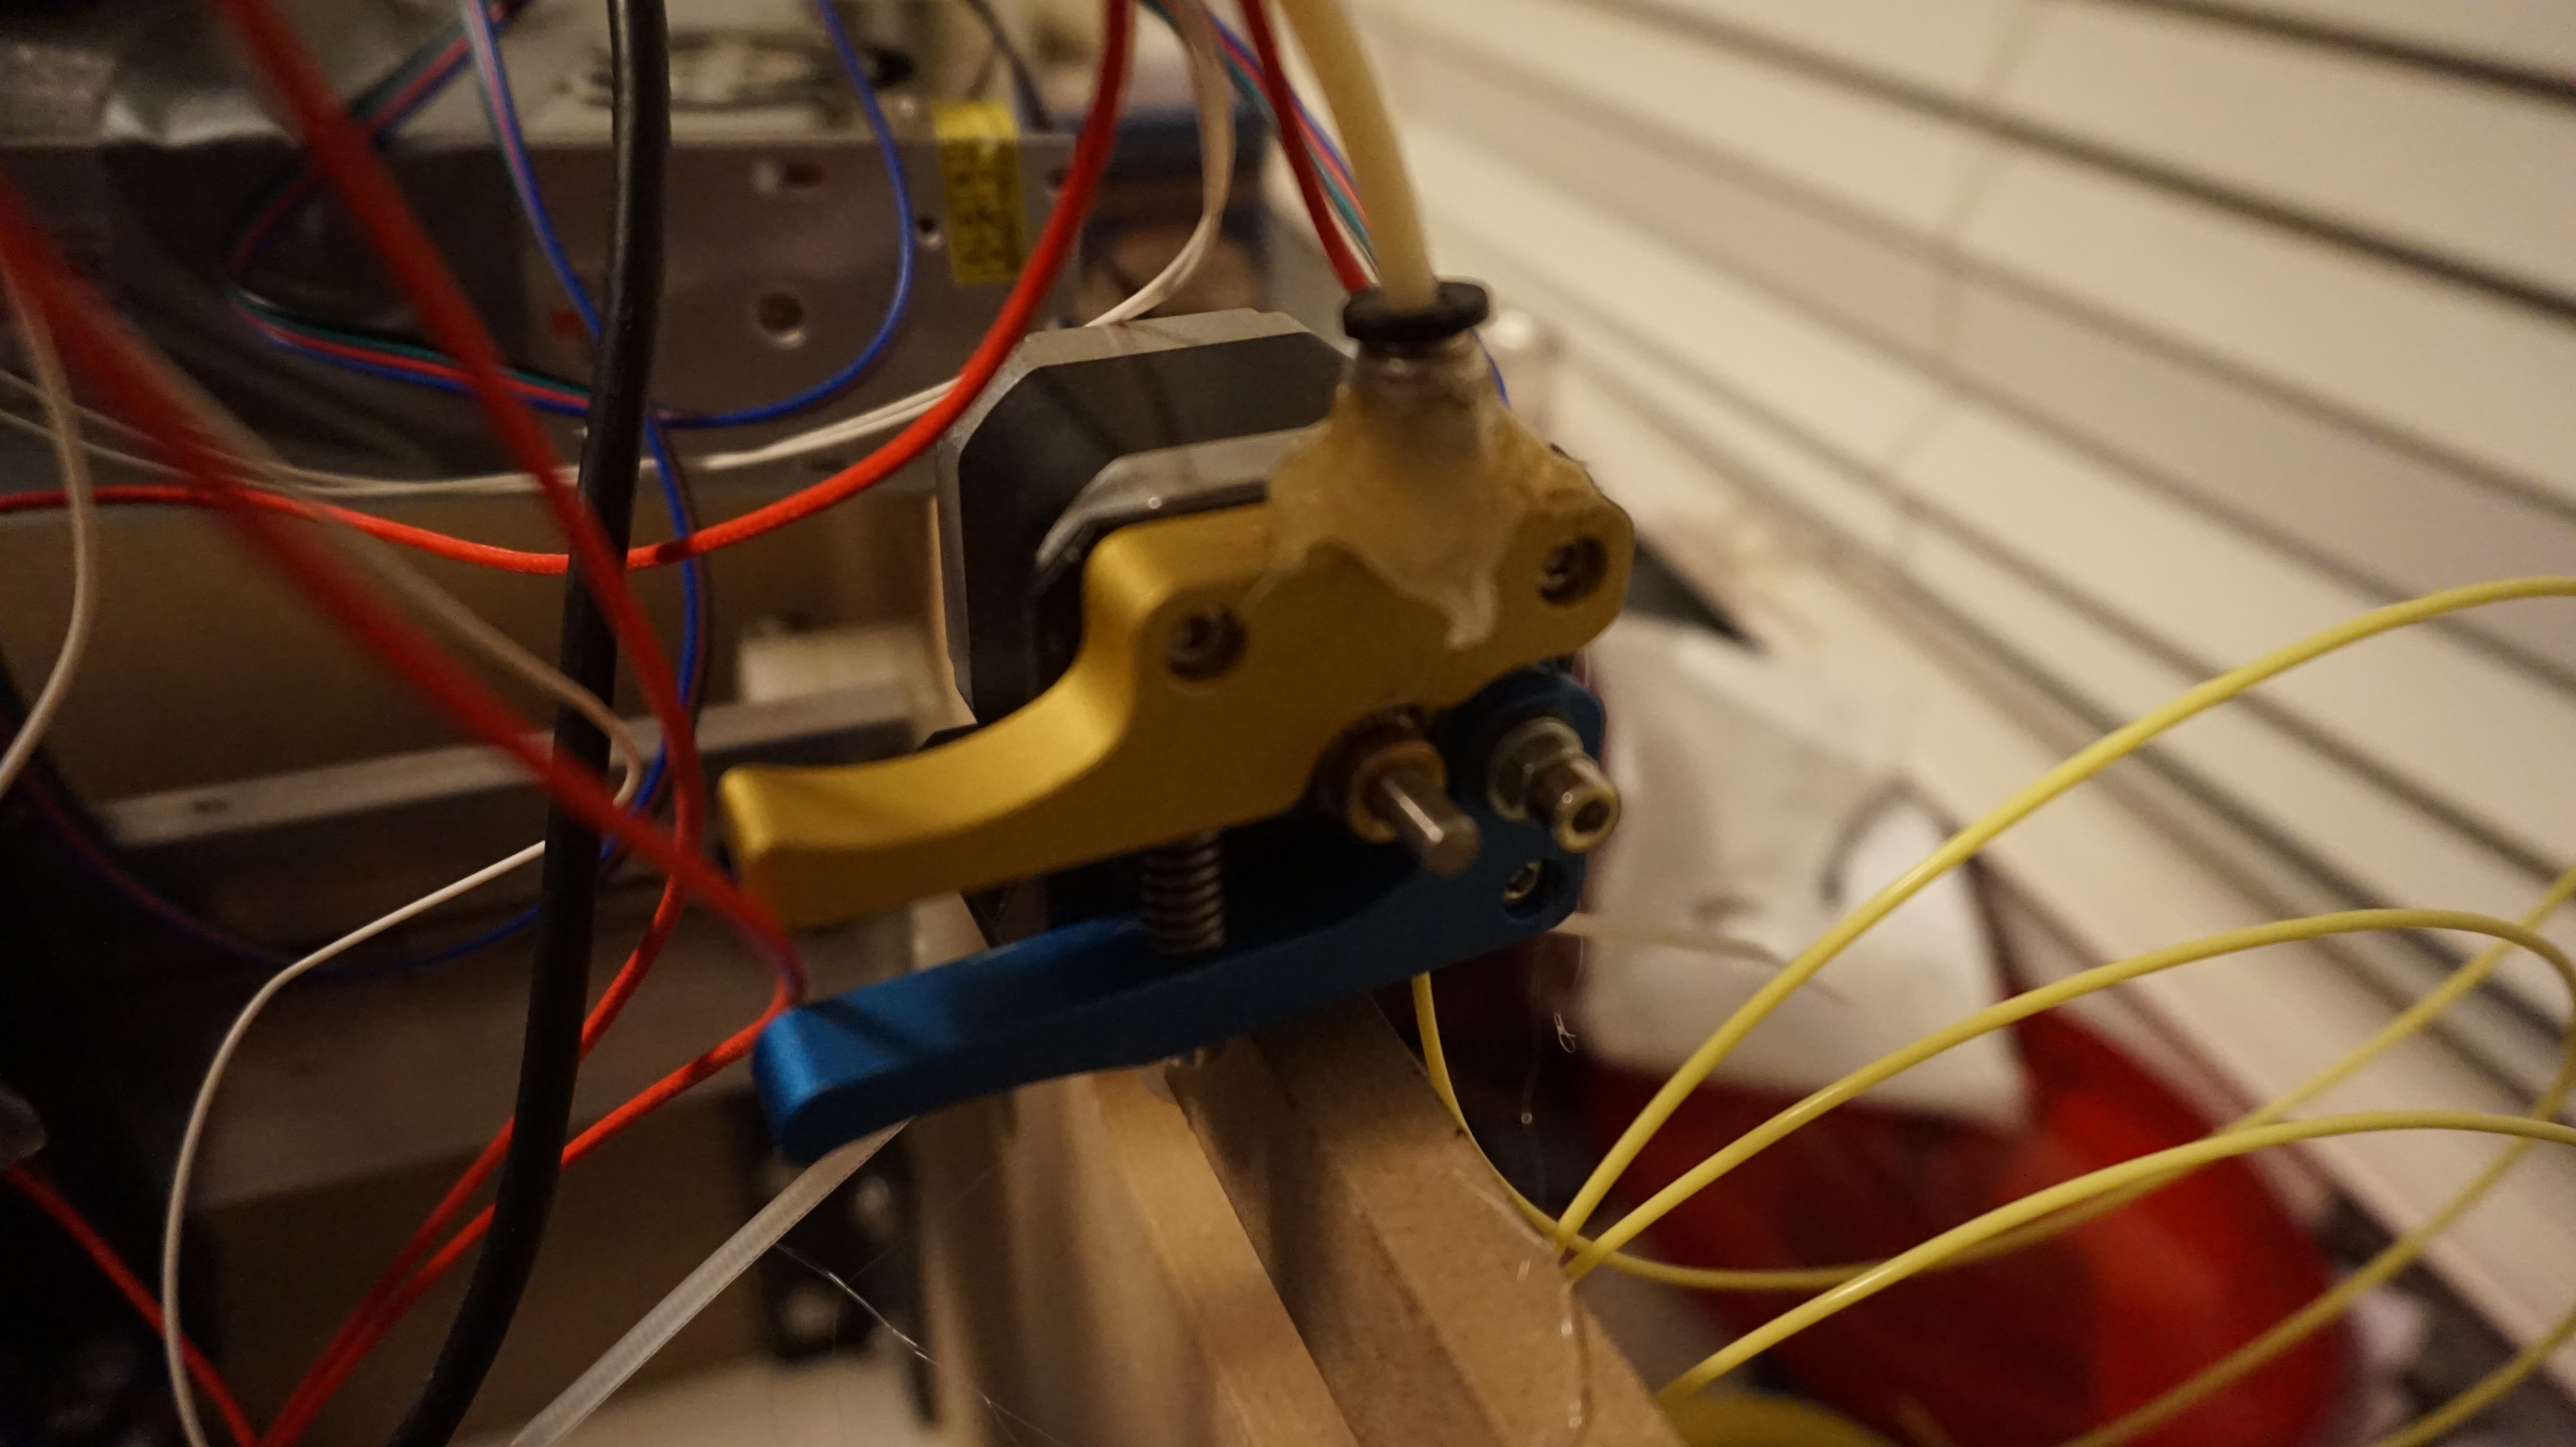
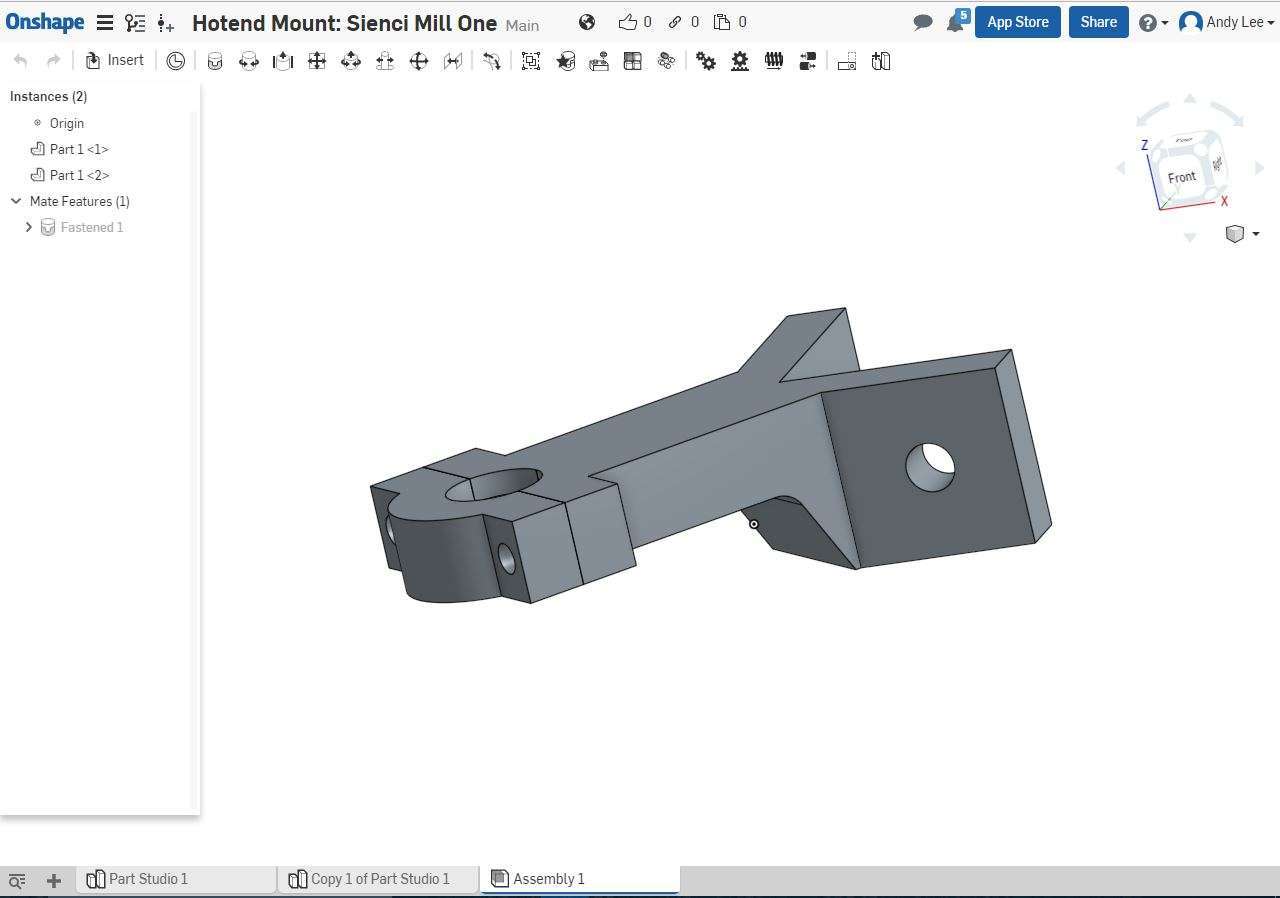
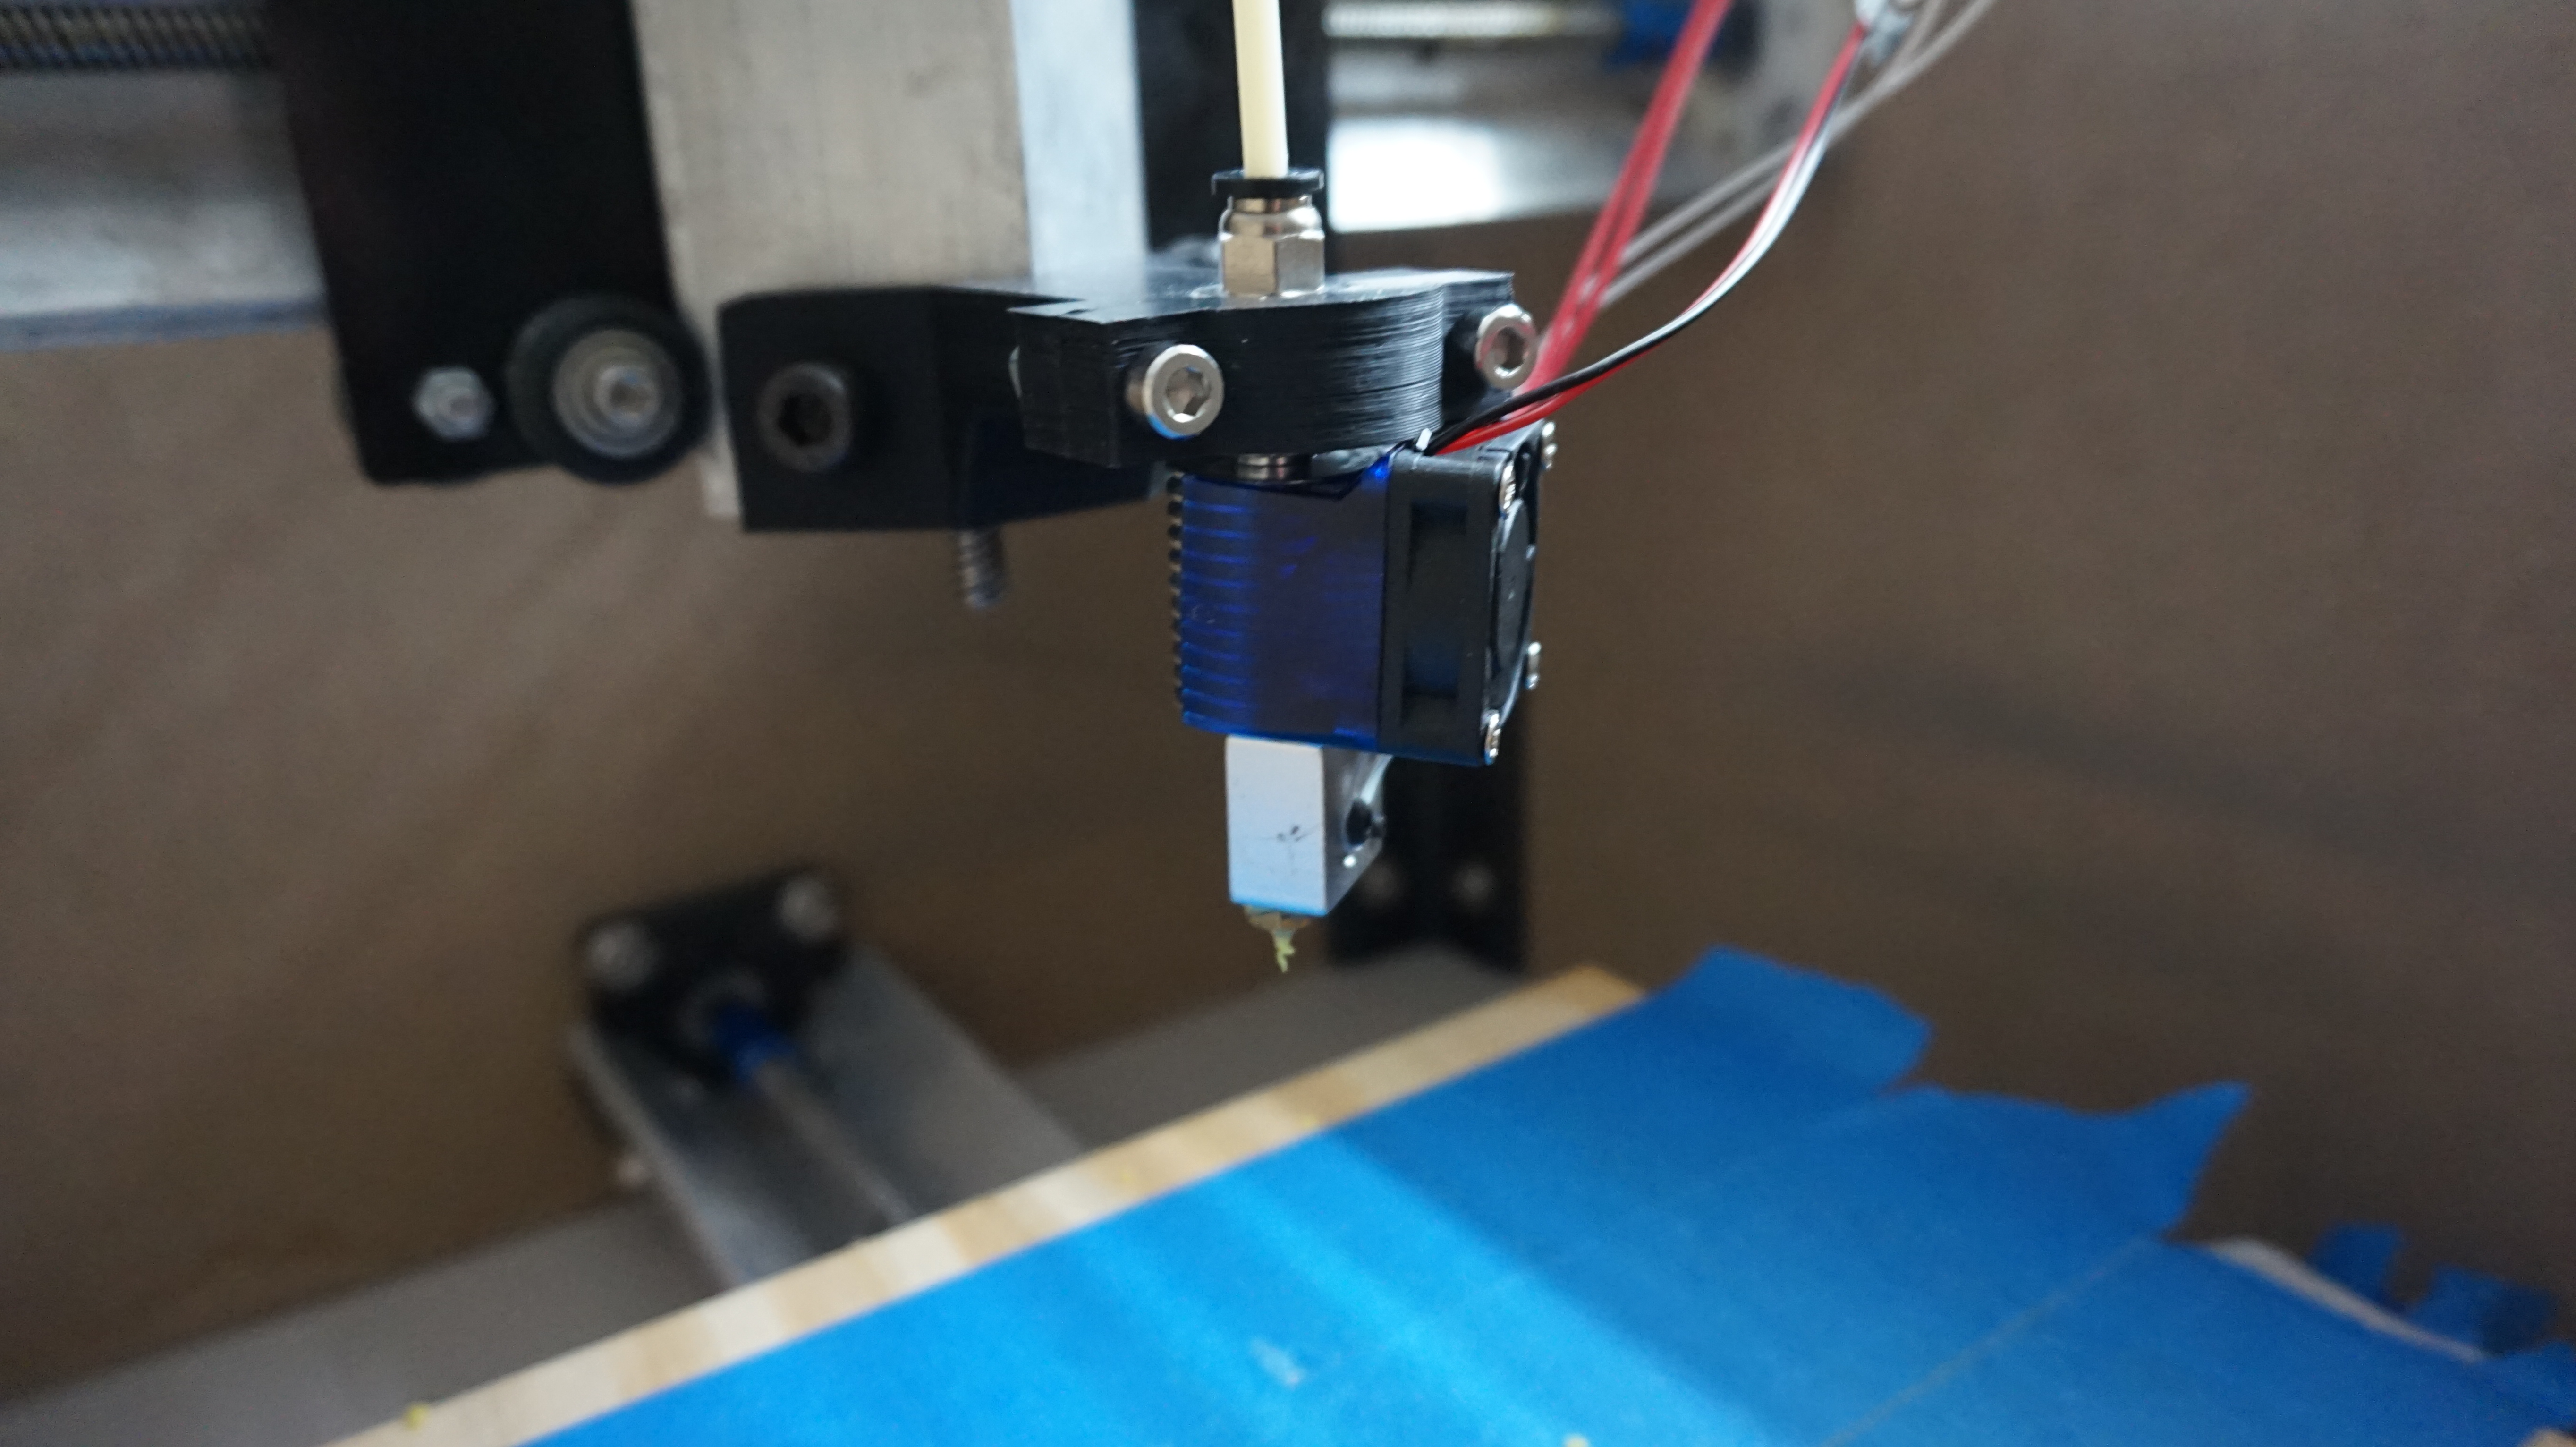
Next we made a hotend mount on Onshape (https://cad.onshape.com/documents/52436466fea12dac661480ae/w/b7dc1b1b106c004039ce4fb9/e/b29df9762dbf3a03104811ec) to mount the hotend and set that up as well. We printed it out on the 3D printer.
As for the hotend, we bought a E3D Volcano hotend clone online for a few dollars. It works pretty well, although if you do use this hotend, make sure to use the fan included otherwise it will clog.
Last thing to do is upload the firmware to the Arduino Mega in the RAMPS 1.4. We used this tool to configure the firmware, which will help you configure the firmware to match the rest of your hardware. It took a bit of trial and error to select the right settings. You can also change some of the settings through the EEPROM settings in Repetier Host (the gcode sender/slicer) we used, in case you need to fine tune things.
Installing the firmware is as easy as selecting the right port and device on the Arduino IDE, extracting the downloaded firmware ZIP file, and opening the Repetier.ino file. Simply click “upload” and the firmware should install onto the Arduino.
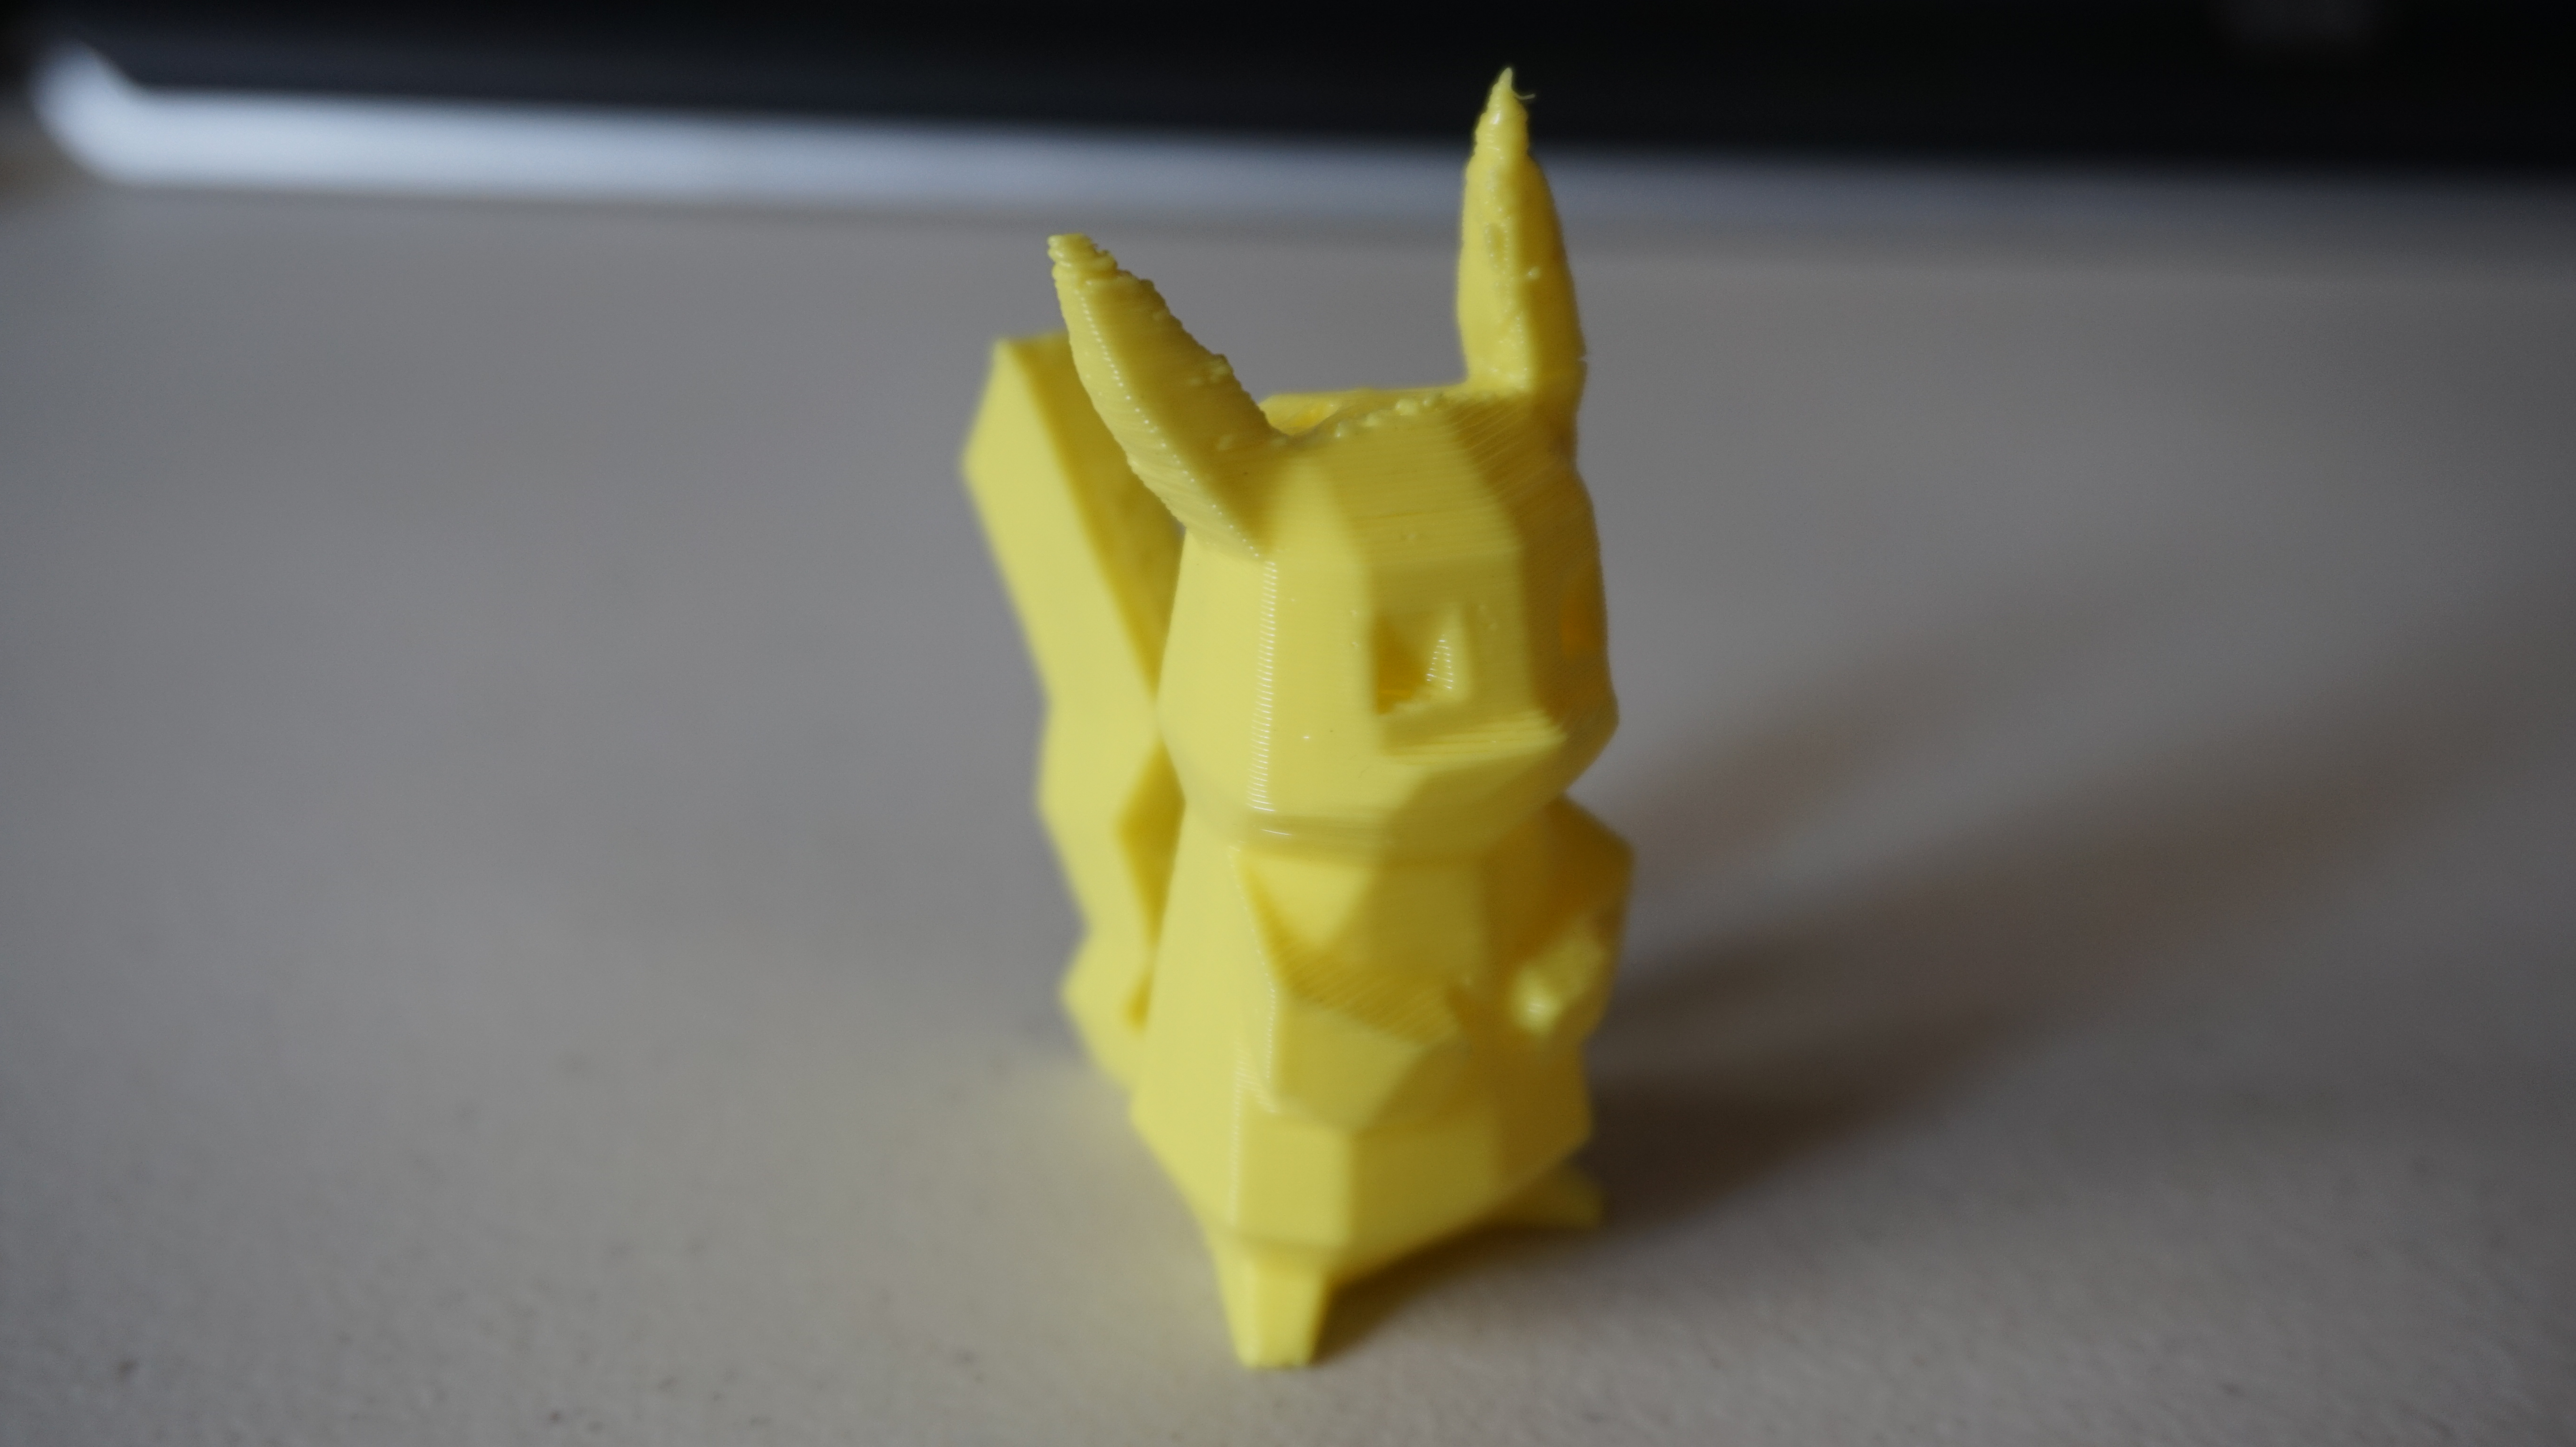
There’s a couple more things we could add, like a part cooling fan, homing switches, heated bed, etc. However, we wanted to keep things simple and just prove that it was possible to turn the Mill One into a 3D printer. All in all, the Mill One did a decent job at printing out this little low poly Pikachu. You can see there is some blobbing, which can be fixed with fiddling with retraction settings, and we can improve the pointiness of the ears by adding a part cooling fan.
In comparison to a regular 3D printer, the Mill One is a little bit slower and a little bit louder, but it can still produce high quality prints because the mechanical systems are more rigid and more precise. It was a really fun modification to make and the total cost in parts, had we purchased everything new would be around $60, making it a pretty inexpensive mod as well.
Until next time…