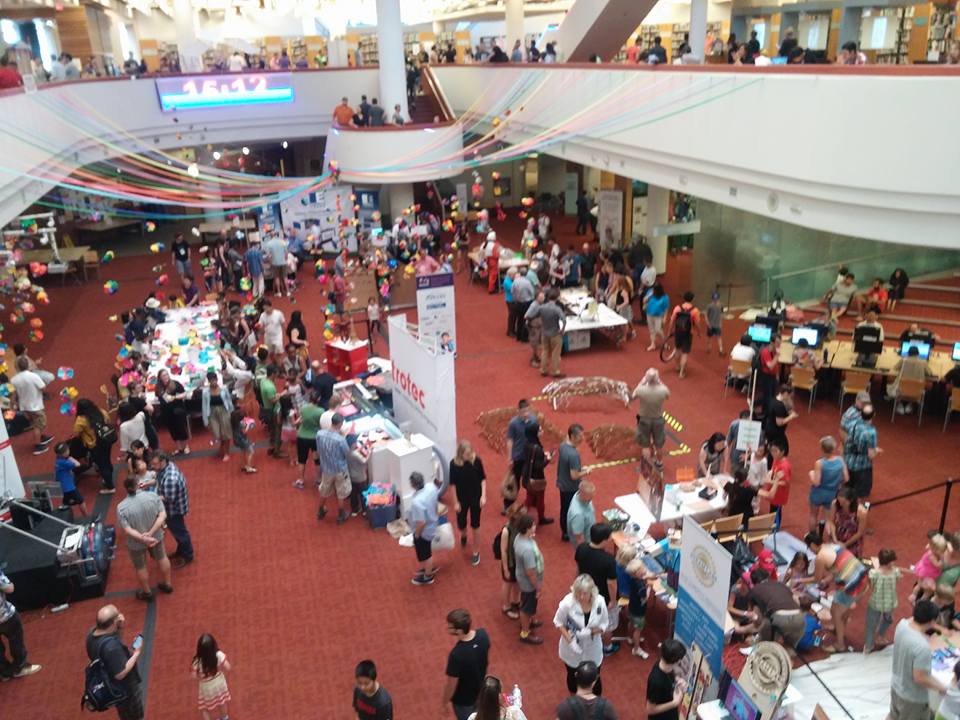
Thank you for everyone who came out to Maker Festival to support us and the greater maker community! It’s exciting to see amazing projects like stair climbing robots, hyper fast bikes, and leather origami.
It was great to get so much interest, feedback, and ideas. For everyone who have asked to place orders, we will be getting in touch with you soon!
I went out to laser cut the frame on Friday and put the machine together today to see how it looks and test it out. The machine is designed to have 1 inch thick material for the frame (either wood or HDPE) but I just wanted to make a quick frame mock up using 1/4 inch acrylic.
Check out our video of our dry run!
Next step is to put together the wiring and electronics box for the machine. We’re really close to milling some actual parts so make sure to stay tuned for more updates on that!
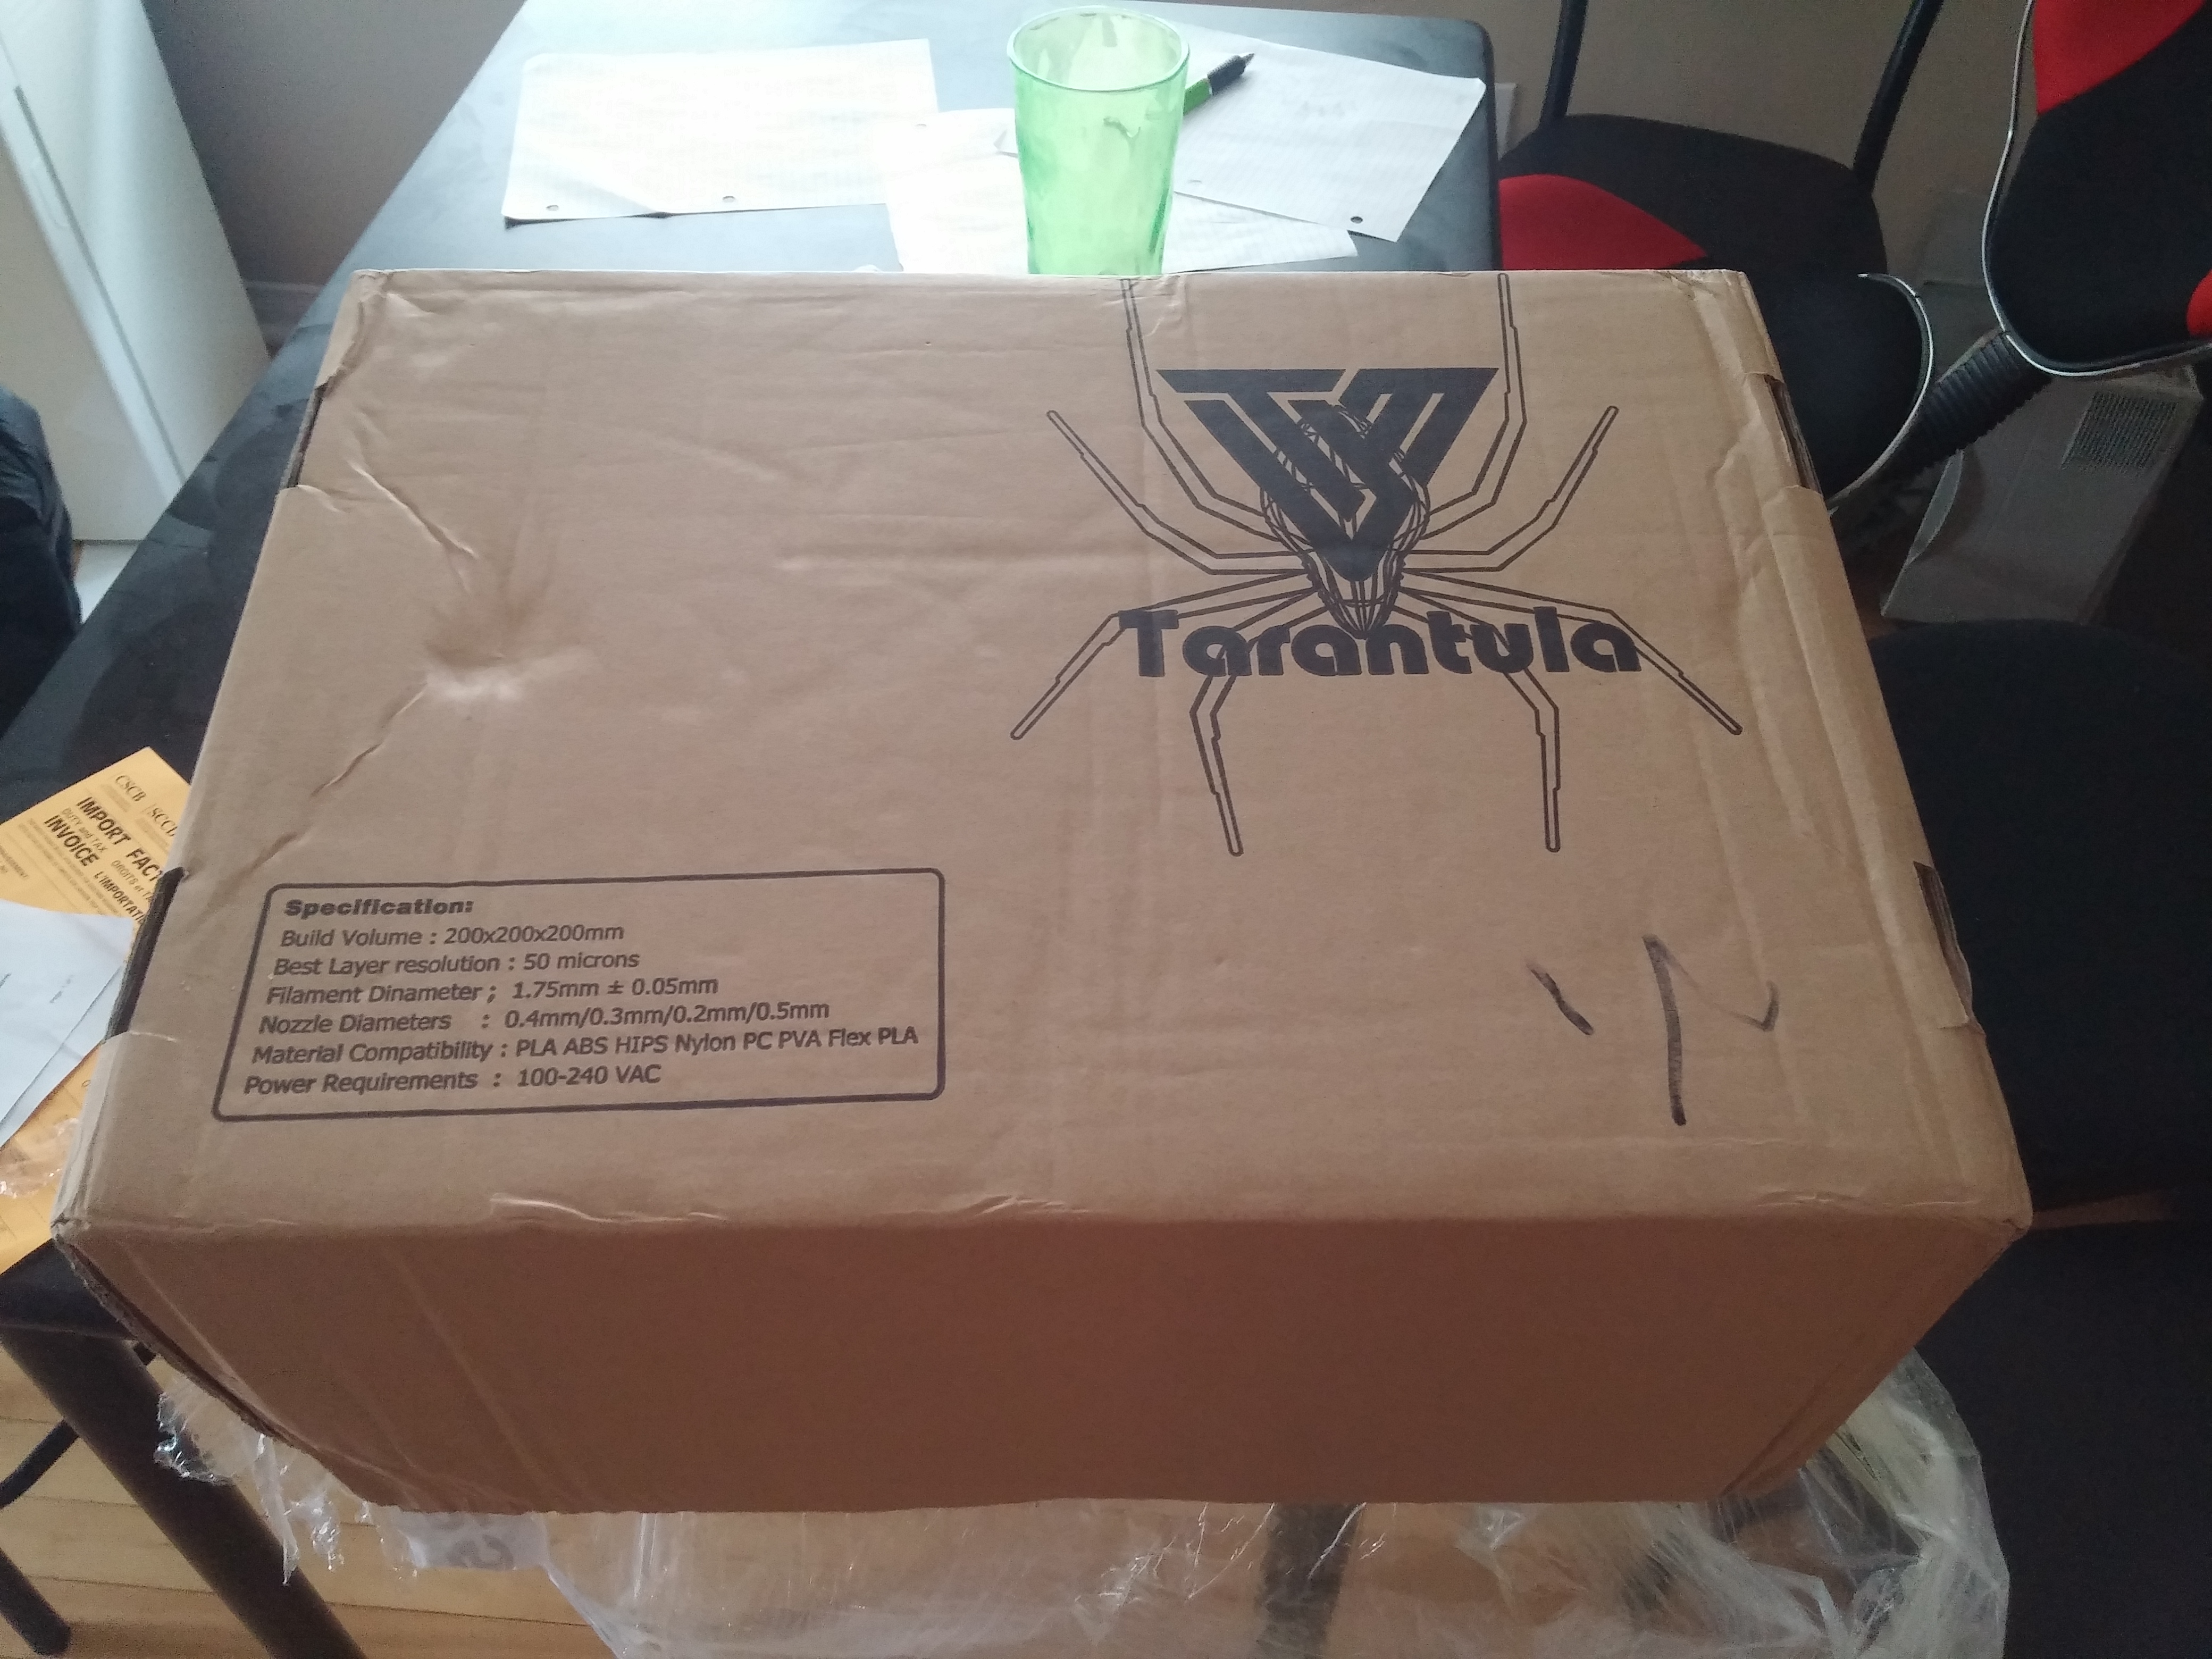
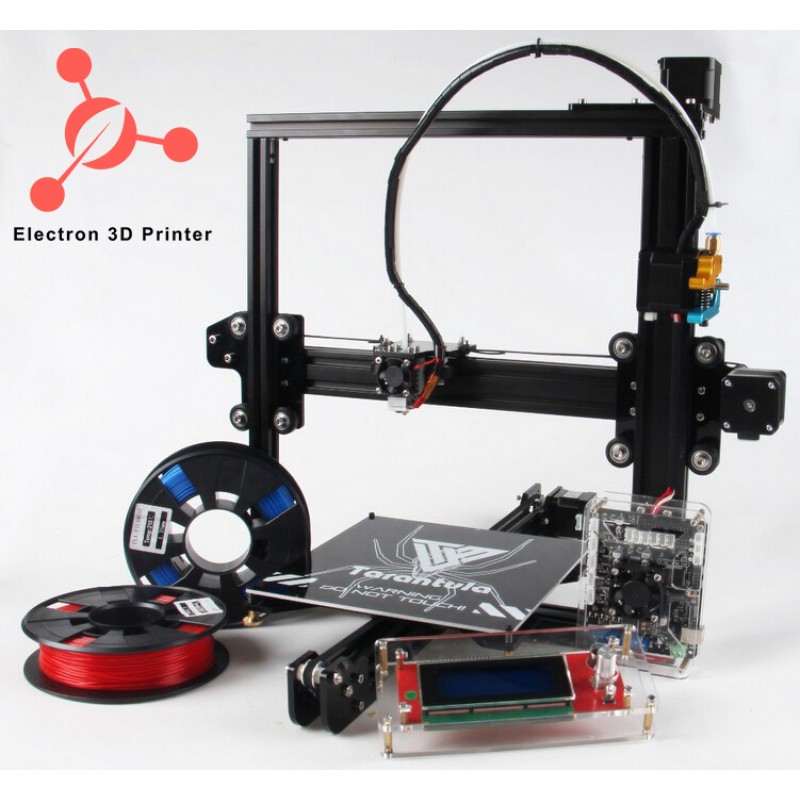
Our 3D printer has finally arrived here in Waterloo all the way from Guangzhou! It’s a Tevo Tarantula that we picked up for just under $400 CAD.
We’re moving into exam season so the project will be slowing down for a few weeks until we can move into working on it full time, but hopefully the 3D printer will be fully assembled and printing so we can have stuff being made while we study!
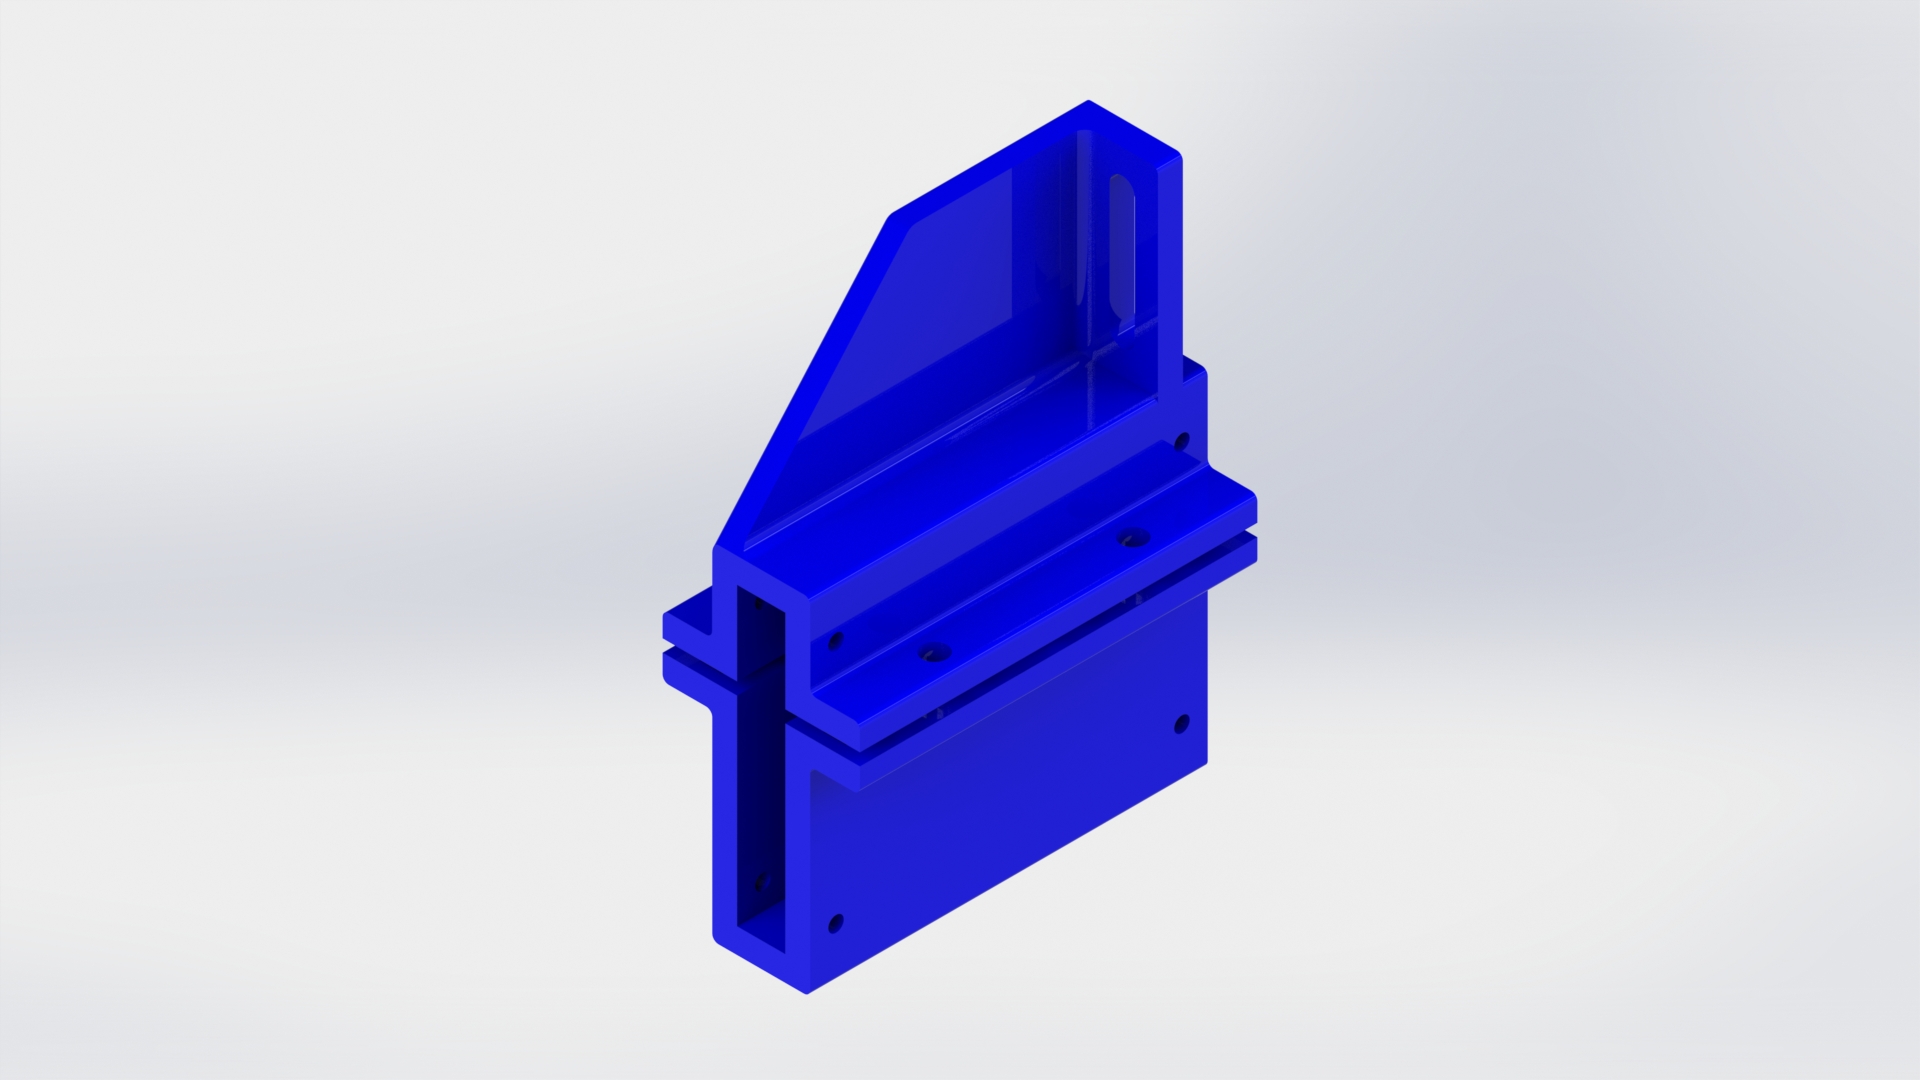
I’ve been working on improving stiffness in all of the axis. Here’s a 3D render of the X and Z axis assembly. I found that the biggest issue with the previous iteration was that it was difficult to reach the fasteners, so it was a bit tricky to get everything as tight as possible.
We ordered linear rods and bearings, lead screws and nuts, and some other fun stuff to play around with, so this design is going to implement them. Lets hope they get here soon.
In the meantime, Chris is printing out some new parts for us to test out, and so we should know how they do in the next couple of days.
Our project page is public. Please check it out and like/share our page!
The Hackaday Prize is a competition synonymous with creating for social change. Using your hardware, coding, scientific, design and mechanical abilities, you will make big changes in peoples’ lives.
It’s time to leverage your talent and find solutions to address technology issues facing humanity today. With a new technical design challenge every 5 weeks, you are expanding the frontiers of knowledge and engineering.
Design an impactful project that suits you, or collaborate with someone else to do it. With our global collaboration platform, your project can be moving forward at all hours of the day. Create things like a better radiation monitoring system, a better calorimeter, open source instrumentation, digital logging scales and exercise trackers. Or go beyond that and create something that has never been seen before.
Hi everyone! We’ve put together a prototype and it looks pretty, but there’s a couple of things we want to touch up to get the best performance out of our machines, so we’re going into the second full round of design. Our new 3D printer is due to come in the next week or two, and so are all the extra parts we ordered, including couplers, leadscrews, bearings, and more.
We learned a bunch of new things from our first design, and what we plan to do with our second design iteration will make Sienci 1 even better. We plan to give more support to all of the v wheels, lower the y axis gantry and raise the corner supports, and experiment with thicker or wider rail materials.  We also plan to make the X axis calibration much easier by allowing it to split, as well as making all of the fasteners easier to access and tighten.
Here’s a CADÂ rendering of what the Y axis gantry might look like:
There’s definitely quite a few things to do to really perfect the design, but every day is a (micro) step towards achieving our goal.
Tim and I needed a new 3D printer, so we ordered one online last night. Can’t wait to make some new prototypes and new machines!
It’s a cheap one we got online for about $310 CAD. 3D printers have gone down in price a lot over the last few years. I’m excited to see what this one can do and if it’s worth the money.
We’re going to be going into another design iteration to improve the performance on all axis with some new gantries, and this printer should help us make those parts. Also, we’re planning to take some of the parts off this guy later on and throw it on the Sienci 1 to make a GIANT 3D PRINTER.
The rotary tool came in the mail today, and so Chris and I printed a mount for it. We did a pretty good job of it because the tool is super snug and there’s absolutely no play. We’re just gonna have to work on wire management, perhaps put an outlet at the top of the Z axis or something.
We haven’t tested out cutting yet except with a bit of acrylic. I suspect we’re gonna have to throw on a router or a spindle to cut metal, so stay tuned in for that!
So we’re still waiting on our aluminum shaft couplers and lead screws to come in the mail, so in the meantime, I hooked up a shaft coupler that I made at the machine shop and a 1/4″ threaded rod to the Z axis to see how things are working.
Things look pretty good! Since I didn’t do a very good job in making the coupler straight, the threaded rod is bent, and I need to tighten the v-wheels a bit more, there’s a lot of wobble in the Z axis. Once the lead screws come in however, I’m expecting way better linear movement on this thing.