IMPORTANT: This blog post will be updated with more details once we receive the first batch of prototype nuts. They are expected to arrive in the first week of February.
UPDATE TO IMPORTANT: We received the nuts for testing. Good news is that the T8 nuts are pretty good, but the T12 nuts have threading issues. We should be able to fix some of them and have them available for sale pretty soon, and we are working on making sure for full scale production they will have this ironed out.
Back in August 2023, we shared with the world a new “spring-loaded anti-backlash nut”. The basic idea was to address some of the pain points of the original Delrin Anti-Backlash nut which we’ve been using on LongMills since the first machine was released.
Early prototypes showed a lot of promise, so we decided to move forward on iterating on the design and moving it forward. However, throughout the project, we ran into different issues and roadblocks like all development projects.
We now are in the process of producing the first batch of nuts, and we plan to eventually phase in this new design for new machines. Additionally, customers can purchase ones to replace the nuts they already have in their machine. In a way, I hope that this can be sort of a “best-of-all-worlds” solution, over belts and ball screws because:
- Unlike belts, lead screws don’t stretch over time
- Unlike ball screws, they don’t need lubrication and are dust resistant.
- A lead screw plus spring-loaded anti-backlash nut is cheaper than a ball screw and easier to assemble, and also pretty comparable in cost with less complexity compared to a belt drive system (personal opinion kind of)
The only downside of this system is that technically this system is less precise than a ball screw, but in the context of hobby CNCing, totally acceptable and in practice, indistinguishable in this type of woodworking.
My hope with this new design is to primarily address two main issues with the old version of the Delrin anti-backlash nut. The first is the need to adjust the nut. Because the old version uses a screw to push apart the threads and is fixed in place, the user must adjust the screw as it wears down. In practice, this isn’t a big deal since the nut wears down slowly and the difference is minimal, but the issues arise when they are adjusted too tightly, causing premature wear, or not tight enough, introducing more backlash and thus sloppier machining.
The “original” T8 Delrin Anti Backlash Nut and the history behind T8 lead screws
So this is my sort of knowledge behind the history of this lead screw design and how it came to be, at least in our context. Back when we first started the company in 2016, home consumer 3D printing was still a pretty new concept but had established itself in the market enough to have some standardized components used between most 3D printers. One of these standard components was the T8 lead screw.
At the early days of building CNC machines, notably the Mill One, we used standard 3D printer components, namely the T8 lead screws as power transmission for the gantries. We also used these brass nuts that were also standard between 3D printers like the one below:

One of the main issues with these nuts was that since they had no backlash compensation, they would lack some accuracy, especially if it wore out.
We also used some spring-loaded versions of these as well, but they also sort of sucked, mainly because the springs were not strong enough to resist backlash at higher loads.

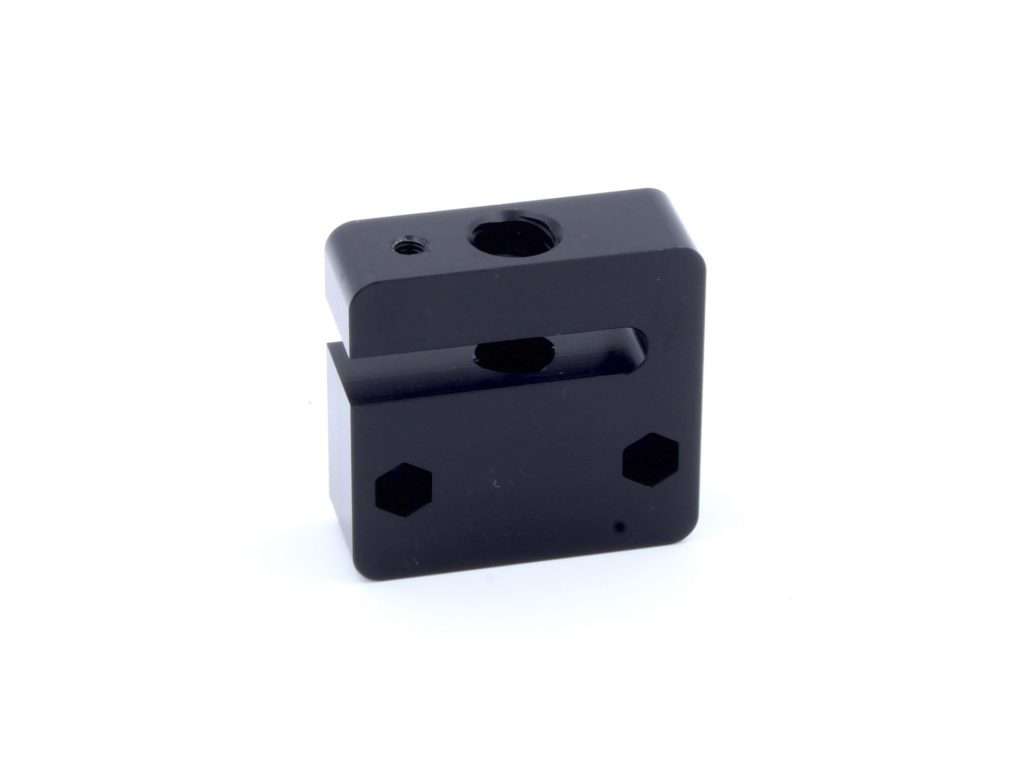
Going into designing the LongMill, we recognized that using the brass nuts wouldn’t cut it for a larger more powerful machine, so we found another nut design created by OpenBuilds that addressed the backlash issues. And they did work pretty well without many issues. Additionally, there were a lot of manufacturers that were making these for cheap so it was a pretty affordable option in the application, although, over time, we ended up manufacturing them custom to improve the quality of the nuts.
The idea behind the spring-loaded nut
One of the main weaknesses of the original Openbuilds nut is that you need to adjust it over time using only a single screw that is easy to under-tighten or over-tighten, causing issues due to being adjusted incorrectly. We see the issue of motors stalling because of this, especially for first-time users. If we could design a long-lasting nut that didn’t need any adjustment, then we could eliminate this main pain point.
We found some interesting designs in the market that use a “radially” loaded design, which basically pushes the threads into the root of the lead screw. Some of the main benefits of doing so is more even wear in the nut, leading to a longer life and higher precision. Here’s a good example of another radially loaded anti-backlash nut.
The initial designs that we came up with uses two split-threaded “arms” to pre-load the nut. We chose this because it allows us to keep the profile that we need to drop into where the old nuts were.
Prototype 1
In August 2023, we launched the first version of the new, spring-loaded anti-backlash nut. This was a limited batch of 100 sets, which were sold as working beta version of the product so that we could get real-life testing and feedback. Out of the 94 orders shipped to customers, we had fairly promising results.
The main feedback that we got was that the nuts feel a bit “loose”, and the main suggestion was to use stiffer springs, as well as a lot of people wanting a T12 version to come out as soon as possible.
Here’s some thoughts and notes on the responses and results from our own internal testing:
From our testing wearing down the nuts, the springs were able to account for backlash, but because of the angle at which the forces were being applied and the stiffness of the springs, there was a concentrated area of wear that would affect the performance of the nut.
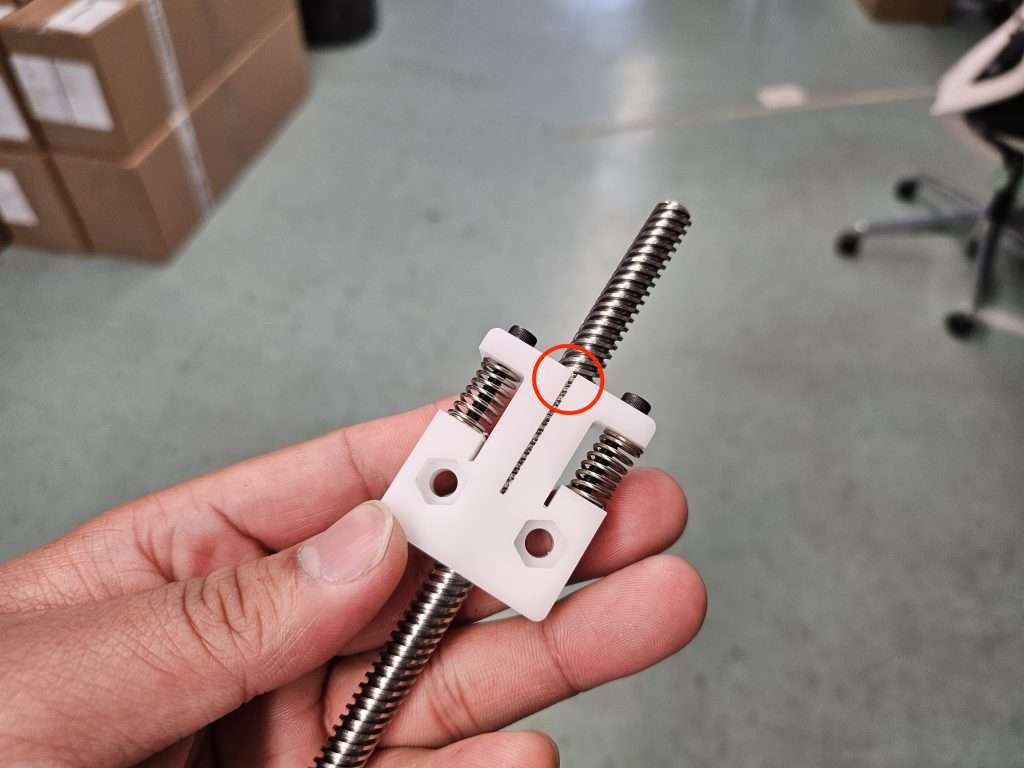
Overall, they did work, and pretty well for the most part. However we felt that if we were going to invest in this system in the longer term, that improvements to the design should be made before full scale production.
Prototype 2
To address the issues from the first prototype, we tried a whole bunch of different ideas to find ways to improve the nut. Some of these include:
- Using a flexure, but due to the limitations of injection molding and machining, was scrapped
- Using a circlip as a spring, which worked well but was not easy to determine and adjust the spring force.
We did however try making changes to the bending areas of the arm by tapering them down and having the spring push horizontally rather than vertically.
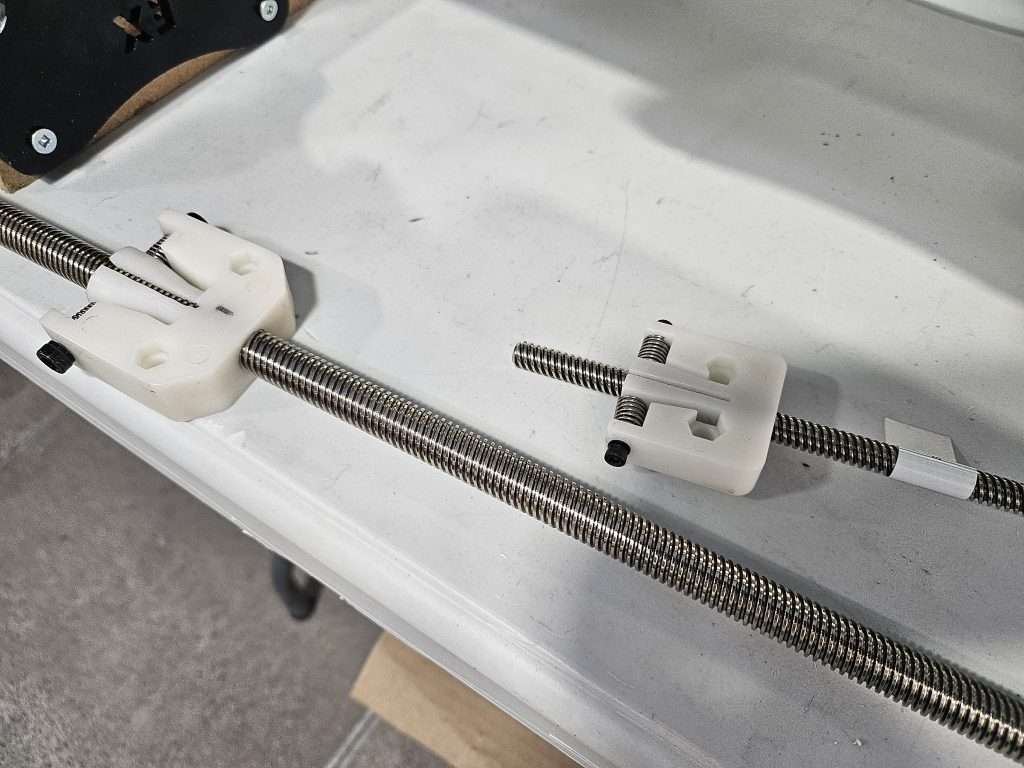
Additionally, it’s worth noting that one of the other main differences between this nut and the old version is the manufacturing complexity. We have several slots and features that make it a bit more complicated and expensive to make, so we started exploring making injection molding a blank for the nut itself and machining in the critical features.
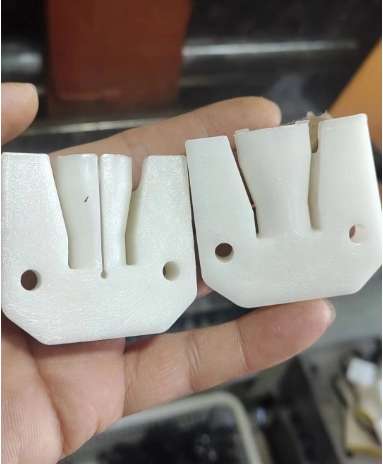
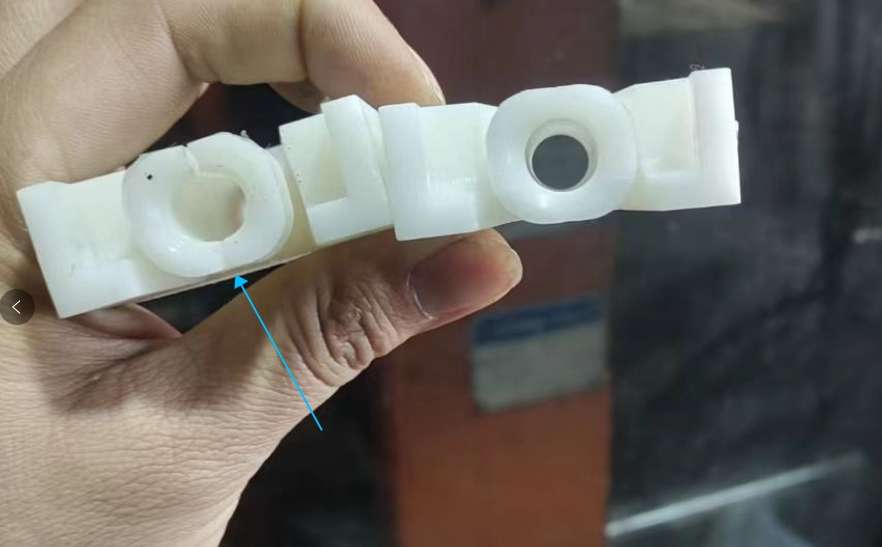
This allows us to reduce the bulk of the machining, which is a significant part of the part cost, enough so that we can keep the same cost for the new nuts as we old ones.
The main issue with the first batch was that there was deformation in the nut itself causing the dimensions to be warped. This meant that the threads were ok on some nuts and way too tight on others. Secondarily the threaded hole did not center properly causing the lead screw to be off-center as well. Thus through testing, we found that this would cause issues with binding.
After discovering this, we went back to the manufacturer, who made changes to the mold, machining, and clamping processes. We also sent them additional documentation for proper mounting to share the context of where the critical tolerances were. After a week of tweaking, you can see in the new video from the manufacturer that the nuts thread on much more smoothly.
Conclusion
At the time of writing, the first batch of final production nuts is on the way, and we will test, assemble, and post them available for sale when they arrive.
We plan to sell this first batch to current users, and if the nuts work well and people are happy with them, we can transition to having them available for kits as well. However, we don’t expect this to be the case for another 6 weeks since we are in production for the complete batch.