General Tips on LongMill Troubleshooting

Hey everyone, it’s Andy here. Over the past few years, we’ve welcomed many thousands of CNC users into our community. Of course, with any electro-mechanical machine, some degree of troubleshooting is to be expected.

For the first year and a half since the launch of the LongMill, I had taken on the large majority of troubleshooting from customers directly through email. This was an excellent experience for me as it opened my eyes to observe almost all of the issues that were possible, as well as giving me the chance to learn and communicate with customers better. Even to this day, I am regularly checking on customer tickets and working with our support team to tackle new or more complicated support issues, although it’s typically no longer my day-to-day role.

What has been interesting to see over this period of time has been not just how we collect data and information about issues over time, but also our understanding of the human nature of users when it comes to identifying and troubleshooting issues.

One of the things we’ve come to recognize is that there are a number of misconceptions to address in terms of troubleshooting the LongMill. This article covers some of my personal recommendations for helping you troubleshoot issues on your LongMill.

Our custom dashboard tracking what types of tickets we receive and the frequency of certain issues

Tip 1: Listen and look at your machine carefully

Simply listening and looking at what your machine is doing can help a lot in identifying problems. Is the machine making a weird sound? Do you hear the motors stalling? Is the machine stopping and starting irregularly? Is there a component that is slipping? Making a close observation can help identify the cause of an issue.

It’s important to note that the large majority of issues for the LongMill are mechanical. This means that for most issues, you can physically, hear, or feel issues. A few extra tips for this tip:

  • Jog your machine manually on each axis and check for smooth motion. I recommend running at the highest speed for each axis as stalling is more likely at higher speeds
  • Run your project in the air. Look for any irregularities and odd behavior.
  • Try turning lead screws and moving your gantries by hand. This can help identify looseness or binding.

Tip 2: Most issues are simple issues

The large majority of issues are caused by something simple. Always start with simple fixes first before trying something more drastic. This will save you time and give you statistically the best chance in fixing your issue.

99% of issues that our users have can be found in the Common Issues and Fixes section of our resources. I encourage everyone to read through it carefully as it covers everything that we know that may help you solve your issues. This section is updated regularly with new issues and fixes when they are found.

From my experience, users often have a tendency to jump to the conclusion that if they run into an issue, it’s a rare, complicated, or unknown issue. Sort of like being a…LongMill hypochondriac? This means that many people try to troubleshoot their issues in the wrong place and become frustrated with the machine, rather than checking the most simple reasons for issues. For example, you’d be surprised at how many people reach out to us because their machine won’t work at all because they just never turned on the machine in the first place.

Tip 3: Mechanical and electrical issues happen randomly. Software issues happen exactly the same way over and over again.

The main differentiator between a mechanical and electrical issue versus a software issue is that mechanical and electrical issues seemly happen at random and software issues happen the same way over and over again.

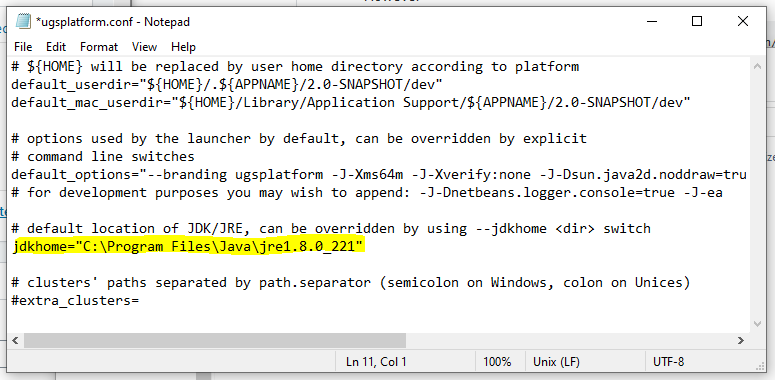
While mechanical and electrical issues can be caused over time by loose fasteners and connectors, wear and tear, and power fluctuations which can happen seemly randomly, software works in a series of exact pieces of code that is rigidly defined. While double-checking firmware settings and reinstalling gSender can help eliminate those as being the issue, if your issue seems random, it’s more likely to be a mechanical issue and updating or reinstalling gSender will not help.

I sometimes joke to Chris that many users use gSender as a scapegoat, as many pin their issues on gSender when they aren’t sure what’s going on. I suspect it’s because its easy to blame something that people don’t feel as comfortable with (aka the software). Sometimes it feels like gSender is messing something up randomly, however, the reality is that the vast majority of issues come from something mechanical.

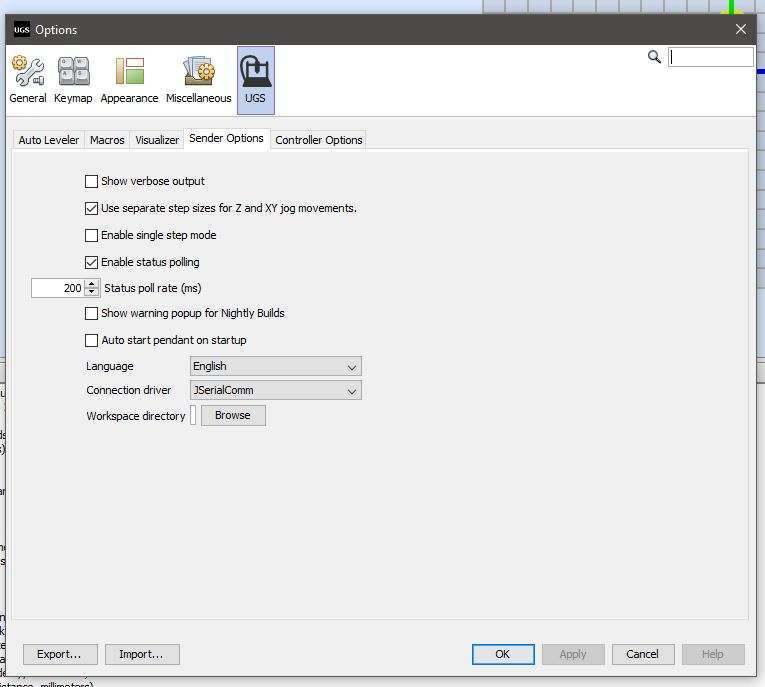
If you are running into issues with gSender, additional help and documentation can be found here: https://resources.sienci.com/view/gs-feedback/.

Tip 4: Static and EMF cannot cause a machine to lose steps

It is a common misconception that static and EMF can cause a machine to stall or lose steps. The main symptom of static and EMF is a complete disconnect between your machine and CNC. Issues caused by static and EMF will likely cause your machine to disconnect or stop completely. Additionally to note, due to the high draw of tools such as routers and dust collectors, its easy to mistake brown-outs for static and EMF, even though they are completely separate problems.

If your machine is losing position or steps randomly, it’s best to check out the mechanics of the machine first, as static and EMF does not cause the machine to lose its position. Use the process of elimination by turning on and off different tools and dust collectors in your shop while running your machine to identify the culprit.

Tip 5: Let us help you

Don’t forget that our technical support team is here to help answer any questions and help tackle technical issues. Sending us a message with detailed information, videos, and photos of your issue through our Contact Us page.

When you send a ticket, you’re talking to:

  • One of our team members or engineers who designed a certain part of the machine
  • Someone with hundreds, if not thousands of hours of CNC experience
  • The whole technical support team, as tickets and information can be shared between all members

We also use tickets to collect data and improve the quality of our products and make adjustments to our resources.

Reaching out directly to our technical support team is typically the fastest and most reliable way to solve technical issues.

A note from Jason Kent, our Customer Support Manager

Provide as much information as possible. Information such as recent changes or updates made to the machine or software is useful to include.  When reaching out for customer support, please add images or videos relevant to the issue. While family photos are cute, images of the issue help us to diagnose your problem faster.

TLDR:

Tip 1) Observe the mechanics of your machine carefully, such as the sound and the movement, as mechanical issues are the most common in LongMills.

Tip 2) It’s statistically more likely that an issue is caused by something simple. Always troubleshoot by checking basic things first. Troubleshooting guides in our Resources contain fixes for 99% of issues around the LongMill and are regularly updated.

Tip 3) Understand that if the problem happens randomly, it’s most likely a mechanical or electrical issue. Software does not cause random problems.

Tip 4) Static and EMF does not cause stalling or missing steps. Static and EMF causes the machine disconnects or to stop completely.

Tip 5) Don’t forget to reach out to us directly! We can help too!

Vectric VCarve Desktop vs Carveco Maker – Which Should You Choose

Hey everyone, a quick announcement to make. Carveco recently got in touch with us about reselling and promoting their software. You can subscribe to Carveco Maker ($15USD/month) and get your first month for free. For more details, please visit the product page.

If you’re not sure if you should get paid software or free software for your CNC, please check out our blog post on this topic.

If you’re looking for paid CAM and design programs for your CNC machine, Vectric VCarve and Carveco Maker offer excellent options for beginner users. Today we’ll be comparing the two options to help you decide which software to go with. Aleks and I (Andy) have been using the software for several weeks now and we hope to offer a good comparison between the two.

Please note, we make money from each sale of software. That being said, I will aim to be as unbiased as possible for both of the software we will be discussing today. We also try to be as accurate as possible to compare the two programs,

We will be primarily focusing on Vectric VCarve Desktop and Carveco Maker as we feel like they are the most applicable for hobby use, but will touch on other versions that are available.

Introduction

CNC software traditionally focused heavily on industrial applications, which came with large price tags and very complicated features. Software like HSM and MasterCAM cost thousands of dollars per seat but power the machines that make car parts and airplanes. Even though full-featured software is compatible with LongMills and other hobby-level CNCs, they are generally too complicated and expensive for most people to use.

Having recognized that, software companies have moved to offer lower cost alternatives to their industrial software for use with hobby and semi industrial machines over the last couple years as smaller, budget-friendly machines become more popular.

Independent developers and CNC manufacturers now offer a wide range of free and low-cost CAM software that are generally very simple and are designed for hobby level projects. Some include Kiri:Moto, EstlCAM, and MakerCAM, which are free or very inexpensive compared to industrial software, but come with limitations that would make it unsuitable for industrial applications.

On the other hand, Vectric and Carveco are offshoots of an industrial-focused software created by Delcam called ArtCAM. From there, both companies created their offshoots from their flagship software to other software better suited for beginners to capture a larger audience, thus containing higher-end features originally found in industrial software that has been simplified for consumer use.

I expect that there will continue to be growth and additional competition in this space as CNC becomes more popular with hobbyists especially as CNC hardware continues to improve over time.

Features

Both programs have similar basic software feature sets such as:

● Easily switching between 2D and 3D views
● Importing vector and raster 2D files (with automatic image tracing)
● Importing a wide variety of 3D files for relief carving
● Full 2D vector creation and control (lines, text, graphics)
● Basic manipulation of imported 3D files (moving, scaling)
● Include a library of premade relief models
● A variety of milling toolpath types – profile, pocket, v-carve engrave, drilling, inlaying, chamfering, fluting
● Fully animated toolpath simulation with a variety of materials

Overall, both software provide a full set of features that you should look for your CAM.

For full details for each software, please visit:

https://www.vectric.com/products/vcarve-desktop

https://carveco.com/carveco-software-range/carveco-maker/

Some of the unique features that each software offers that the other does not include:

VCarve Desktop

  • 2 sided machining
  • Thread milling
  • 4th axis machining
  • Laser module (extra $50USD)

Carveco Maker

  • Vector doctor/repair
  • Laser toolpaths

There is a major limitation to VCarve Desktop, at least in our opinion, that may contribute to your choice between the two software, which is the 24″x24″ size limitation. While Carveco Maker does not impose a size limitation, the maximum project size that VCarve can do is 24″x24″, which means that everyone with a LongMill 30×30 will lose a small chuck of their working area.

This is something I have talked to Vectric about and something that they are considering, but it may be some time until an alternative comes out.

If you like VCarve Desktop, but need the extra inches, you will have to upgrade to VCarve Pro, which does not have any size limitations. The price for VCarve Pro is $699USD (double the price of VCarve Desktop).

Price

VCarve Desktop: $349USD

Carveco Maker: $15USD/month or $180USD/year

One of the major differences for Vectric Desktop and Carveco Maker comes down to not just the price but the pricing structure.

Vectric offers their software for sale as a perpetual license that can be used as long as you’d like without ever paying another cent. Vectric offers free upgrades to the latest version of your software for 12 months from the date of your purchase. You also can easily upgrade between higher tier products by paying the difference.

Carveco on the other hand provides both monthly subscription options as well as perpetual license options, but for the Maker tier option, only a monthly or annual subscription option exists. The lowest cost perpetual licence, the Carveco Maker Plus, costs $1200USD.

It should be noted that you get all updates for free while subscribed to Carveco, which is great if you want to stay up to date with new features and bug fixes.

If having a perpetual license is important to you, Vectric generally offers more options for perpetual licenses, and their two higher tier options, VCarve Pro and Aspire, run for $699USD and $1995USD, which may be worth considering over Carveco Maker Plus for $1200USD.

Otherwise, Carveco Maker at $15/month offers a very affordable option that is within the budget for most hobbyists.

Trial Period

VCarve Desktop: unlimited trial, with limited saving and export options

Carveco Maker: First month free with a subscription that can be cancelled at any time

Vectric highly recommends their customers to try out their software before purchasing by allowing you to evaluate the software for an unlimited period of time. However you are limited to being able to export their own trial projects and there are some restrictions on being able to save and export projects.

Carveco Maker on the other hand only offers a 1 month free subscription, which requires you to sign up with a payment method, and if you don’t cancel within the first month, you’ll be charged with another month’s worth of subscription at $15USD/month.

I feel that one month of either software provides more than enough time to evaluate which program you like better, which I would recommend folks to do.

Ease of use

From our initial use, we found both software to work very similar to each other, especially in workflow.

Both programs start with asking you to choose your material/working size, then allow you to either design and upload designs in 2D and 3D.

Generally I have preferred to use the 2D vector tools on VCarve, but working with 3D reliefs was a bit smoother of an experience with Carveco Maker. Overall I feel that the differences are minor, especially if you are going to be using outside programs to do your modeling.

The general online consensus (just from our research) seems to indicate that VCarve is a little bit easier to use. It also offers more online resources and tutorials, likely due to being on the market for longer than Carveco Maker.

Conclusion

These are my personal opinions of each software and my recommendations for each of them. I still highly recommend downloading both programs to test run them before choosing one. Both programs are excellent and there are many happy customers for both.

Overall, I have preferred the experience working with Vectric software, as overall it feels more intuitive and better laid out, especially with some of the toolpath creation and vector editing. Some exclusive features are nice to have, such as flip-milling. There are also a lot more tutorials and other resources available which I feel should help improve the user experience for beginners.

However, due to the 24″x24″ limitation with VCarve Desktop, I feel like for LongMill 30X30 users, using Carveco Maker may be a better option since I find that often times my projects extend all the way to the full working area of the machine. Alternatively, consider getting VCarve Pro to utilize the full extent of your machine.

so…..

If you’re on a budget and want the lowest cost option

Go with the Carveco Maker subscription for $15USD/month. It should provide you with most of the features you need to get started, and you can cancel anytime if you want to switch software or decide to upgrade. However, if you are going to use the same software for over 2 years, it will cost less to buy Vectric VCarve Desktop in the long run.

If having a 24″x24″ size limitation doesn’t matter to you

Then get Vectric VCarve Desktop. It’s easy to use with lots of resources. If you eventually want to work with projects larger than 24″x24″ (without tiling), then you can upgrade to the VCarve Pro later by paying the difference between the two products (around $350USD).

If you want the full 30″x30″ working area but don’t want to spend $699USD

Carveco Maker is the way to go as it does not have size limitations.

Buy VCarve Desktop here: https://sienci.com/product/vectric-vcarve-desktop-v10/

Subscribe to Carveco Maker here: https://sienci.com/product/carveco-maker-subscription/

Connecting your LongMill to UGS

I’ve decided to create this post as the most common issue people run into when starting up their LongMill for the first time is with connecting their machine with UGSPlatform.

From my personal experience helping LongMill users, if you are running into problems with UGS, it is likely just with choosing the right port. However I do cover some of the very very rare cases that other issues might be happening.

This post should cover in detail on connecting to your machine. You can also use some of the tips and info from this if you ever want to use a different g-code sending software as well.

Please note that as long as you follow the instructions in the LongMill resources you should be fine. This post will help you guide you through some of the lesser common issues and go into more detail on how things work.

Before you begin

There are a couple of issues that you may have with your machine that is not caused by UGSPlatform. This can include:

  • Motors not running correctly or the right amount
  • Issues with accuracy
  • Power to the controller

I figured I would mention this in case you are troubleshooting your machine.

Choosing ports

With UGSPlatform, you must choose the correct port to ensure that your software and machine are communicating properly.

So what is a “port”. Well essentially it is the address or location of each of the USB ports and can also include other input and output options on our computer such as Bluetooth and Ethernet.

On most Windows computers, each port is called COM then a number. For example, you may have a connection with COM3 and COM8. On most MacOS computer, the ports can be called other things, such as “cu.usbmodem14101” or “tty.Bluetooth-Incoming-Port”. There may be different designations for different computers but this is typically the most common format.

Your computer must 1) recognize that there is something plugged into your computer port 2) know how to communicate to the device that is connected to that port 3) use the correct port to communicate with the device.

For both Windows and MacOS, the baud rate is set to 115200.

Drivers

For the large majority of computers, the drivers needed to communicate to the Arduino inside the controller comes pre-installed or is automatically installed when you plug in the controller. However, in the rare case that it is not, it is possible to manually install the driver.

Although we found that it is possible to just download the driver itself, we found that it is easier to download and install the Arduino IDE which comes with all of the drivers needed to connect to the Arduino. We can also use the Arduino IDE later on if we need to do additional troubleshooting.

To download the latest version of the Arduino IDE, visit the site here: https://www.arduino.cc/en/main/software

Before you open UGSPlatform

I recommend connecting your controller via USB to your computer before starting UGSPlatform. This allows your computer to download and install any drivers the first time you connect before UGSPlatform starts, as well as allowing the software to check each port for the Arduino as it loads.

Selecting your port in Windows:

Click the refresh icon then the drop down to choose a port. If you have multiple items connected, you may have more than one port available. You can try each port until you find the right one.

When you’ve connected to the correct port, you’ll get a series of messages and other info come through on the “Console” module. This window is typically on the bottom right area of the program. You may also hear a characteristic “clunk” sound when you connect as well.

In some cases, you can connect to each of the different ports, but if you are not connected to your LongMill you will not see the messages in the console.

If you have tried all of the ports and still cannot connect to your machine, you may either need to install the drivers or may need to flash the firmware onto your controller (discussed later in this post).

Selecting your port in MacOS

Click the refresh icon then the drop down to choose a port. If you have multiple items connected, you may have more than one port available. You can try each port until you find the right one. For most Mac computers the USB port is typically denoted by “cu.usbmodem” followed by a number so your best bet is to start with those. The ports with “Bluetooth” or “WirelessAP” are typically for the wireless connection so I would recommend skipping testing them.

When you connect to the right port, you should see a string of messages on your console.

If you still cannot connect

If you try all your ports and have no response, you can check if your Arduino has its firmware flashed.

All the instructions on flashing firmware can be found here: https://sienci.com/dmx-longmill/grbl-firmware/

Troubleshooting Java

UGSPlatform uses Java, and thus, you must have Java installed on your computer to make UGSPlaform work. The large majority of computers will already have Java installed as it is typically needed in conjunction with other softwares and your browser to do other things.

You can download the latest version of Java for your operating system here: https://java.com/en/download/manual.jsp

Because of the way MacOS is built and since you don’t have to choose between a 32 bit or 64 bit option, we won’t cover fixing issues with Java since I have not heard of or experienced any issues with Java on Mac.

However, due to the way Java and UGSPlatform work together, you may encounter some issues on Windows.

I highly recommend installing Java first before you run UGSPlatform for the first time, as it will ensure that UGSPlatform can run Java to open the program the first time.

Java not found/access error

When starting UGSPlatform, you may get a “Java not found” or similar message. This can mean several things.

First, you may not have Java installed. If that is the case, make sure to download the latest version online.

Second, UGSPlatform might not be able to find where Java was installed on your computer. The easiest way to solve this issue is to delete all of the files for UGSPlatform and reinstall a fresh version. This will typically point the program to the right direction.

Sometimes if you run into issues such as being able to open UGSPlatform, you can also uninstall and reinstall Java to try to fix this issue.

If you do not wish to delete and reinstall as you will lose your settings and layout on UGSPlatform, you can also follow these additional instructions as well to point UGSPlatform to the right location of where Java is installed:

If USG is still not able to open due to a Java access error, then there is another program on your computer blocking UGS from opening properly. UGS is usually able to automatically detect where Java is located on your computer, but since this detection is being blocked the way to fix this is to explicitly inform UGS where Java is. First you’ll need to locate Java. You can usually find it by going to the Windows file explorer under ‘This PC → Windows (C:) → Programs Files → Java → jre### or ‘This PC → Windows (C:) → Programs Files (x86) → Java → jre###. Once inside the ‘jre’ folder, left-click the navigation path at the top of the file explorer then right-click the selected text and left click the ‘Copy’ option to copy the path.

Once the path is copied, navigate to where you downloaded UGS; this will normally be located inside your ‘Downloads’ folder. Once there, go to: ‘ugs-platform-app-2.0-SNAPSHOT → ugsplatform → etc’. In this folder should be a file called ‘ugsplatform.conf’. Opening this with a text editor like Notepad, you’ll want to find the line which says: “#jdkhome=”/path/to/jdk“, delete the ‘#’, then replace the text within the quotes with the Java path by right-clicking and selecting ‘Paste‘. The completed edit should look like this: 

To confirm the changes, click ‘File‘ in the top bar and ‘Save‘. With all this done, once you go back to the UGS .exe launcher you should now be able to get UGS to start up without any errors.

The 64 bit version of UGSPlatform does not open but the 32 bit version does on Windows

This part of the post is if you can run the 32 bit version of UGSPlatform (which in practice should not matter), but might not be able to open the 64 bit version. This is likely because you have the 32 bit version of Java installed but not the 64 bit. You can try downloading the 64 bit version of Java on their website here: https://www.java.com/en/download/manual.jsp

You may need to delete and redownload UGSPlatform for it to start working if it doesn’t work right away when you click on the .exe file.

Other topics

JSerialComm

UGSPlatform allows you to choose different connection drivers. I’ve been using JSerialComm which is working well. However, some users may want to try a different driver if they are finding that connection is being lost.

USB Cables

Shielded USB cables with ferrite chokes or other noise reduction cables can help ensure that the connection to your machine is noise free.

The standard USB cable on the LongMill comes with ferrite chokes and shielding and has been working well for customers, however, some customers who have been using non-stock cables without extra protection have reported some issues with UGS. Excess electromagnetic interference can cause UGS to freeze or error out. If you need a longer/new cable, I would recommend a USB cable that come with features to limit EMI.

Other machine interfaces

UGSPlatform is not the only machine interface that is compatible with the LongMill. You can try other ones as well: https://sienci.com/dmx-longmill/machine-interface/

Some programs may have features you might like, or may be built on a platform that is better suited for your particular computer and hardware.

Alarms and errors

Many alarms and errors can be attributed from changes in the LongMill firmware settings. You can double check that your settings are correct by confirming them here: https://sienci.com/dmx-longmill/changing-eeprom-settings/

Arduino coming loose

If your Arduino is coming loose inside your controller, you may have connection/control issues.

You can either use a non-conductive tool to push the Arduino in through the grates of your controller, or take the panels off to get to it more easily.

CH340 Drivers for Mac OS 10.12 Sierra

If you are using an Apple computer with the latest OS (10.12 Sierra) you may find that plugging in a CH340 chip based Arduinos (used to control the Sienci Mill One) may cause your computer to crash. Luckily there is a driver that makes everything work thanks to Adrian Mihalko.

You can find a link to drivers at https://github.com/adrianmihalko/ch340g-ch34g-ch34x-mac-os-x-driver. I have tried this on my Macbook Air and have been able to connect the CH340 based Arduinos with no issues.

If you are a Windows user, there should be no driver issues. Plug your Arduino in, and if you don’t already have the drivers installed, the computer will auto-download them over your internet connection.