Sienci Mill One V3 Updates

The Sienci Mill One V3 comes with both major and minor changes to the Mill One V2 design. A special thanks to our customers, engineers, and community of makers who have helped by contribution ideas and designs that have made its way into this new iteration.

Please note: some of these updates have been iterative and may already be in place in your Mill One V2 machines. Please check your included Changelogs for more information.

Updates:

  • New two-part Y axis bed design. The Mill One now comes with a lower gantry plate on the Y axis with mounting points so that users can bolt on the standard size wasteboard (included in the kit) or make their own custom workholding solutions. The wasteboard design has been created to allow users to easily mill them at home out of any 1/2″ or thicker material. The two-part bed system is significantly more rigid.

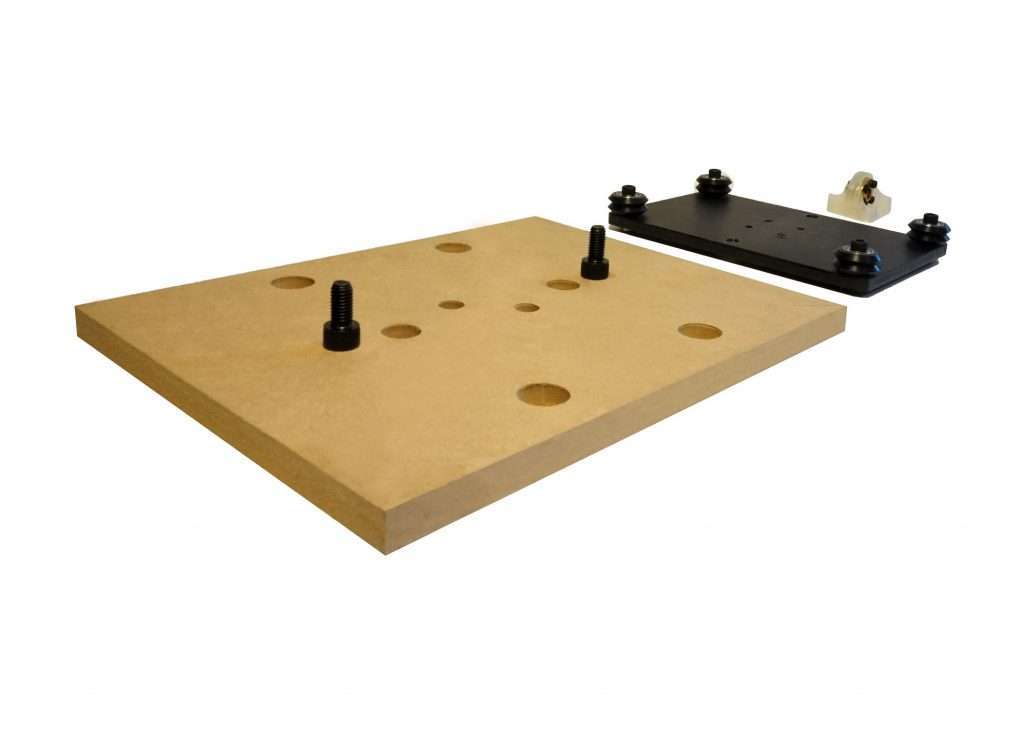
You can read our post about it here


  • New XZ gantry design. The addition of notches allows the Mill One to travel further along the X axis, increasing the total working area of the Mill One. ¹

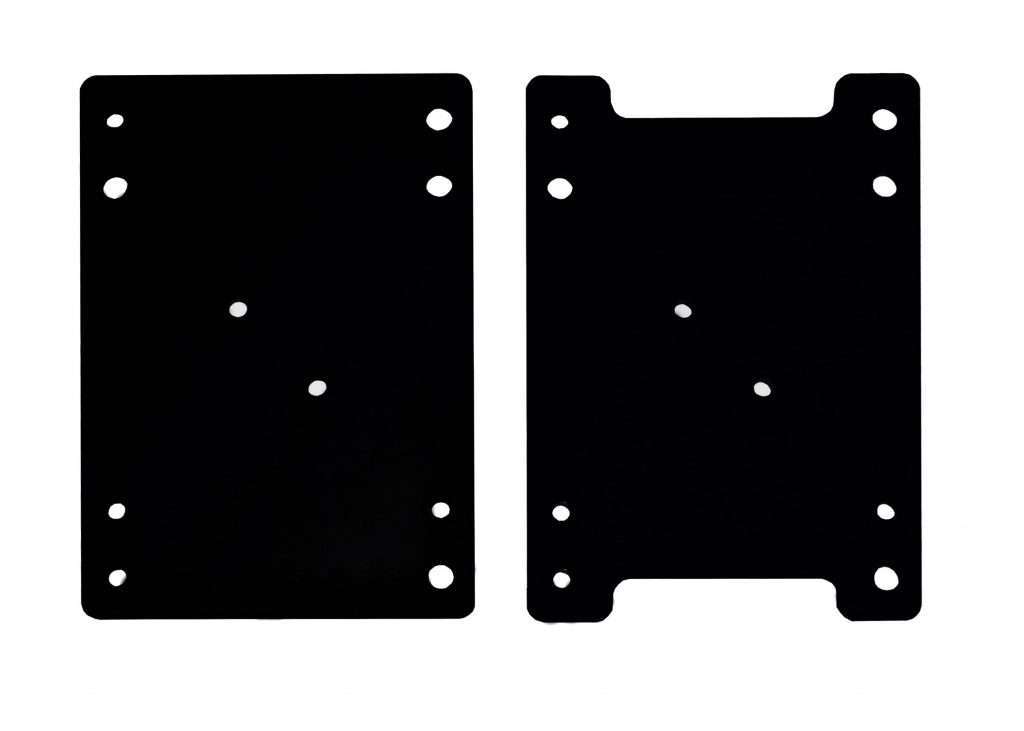
Credits to David Whiddon for the design suggestion.


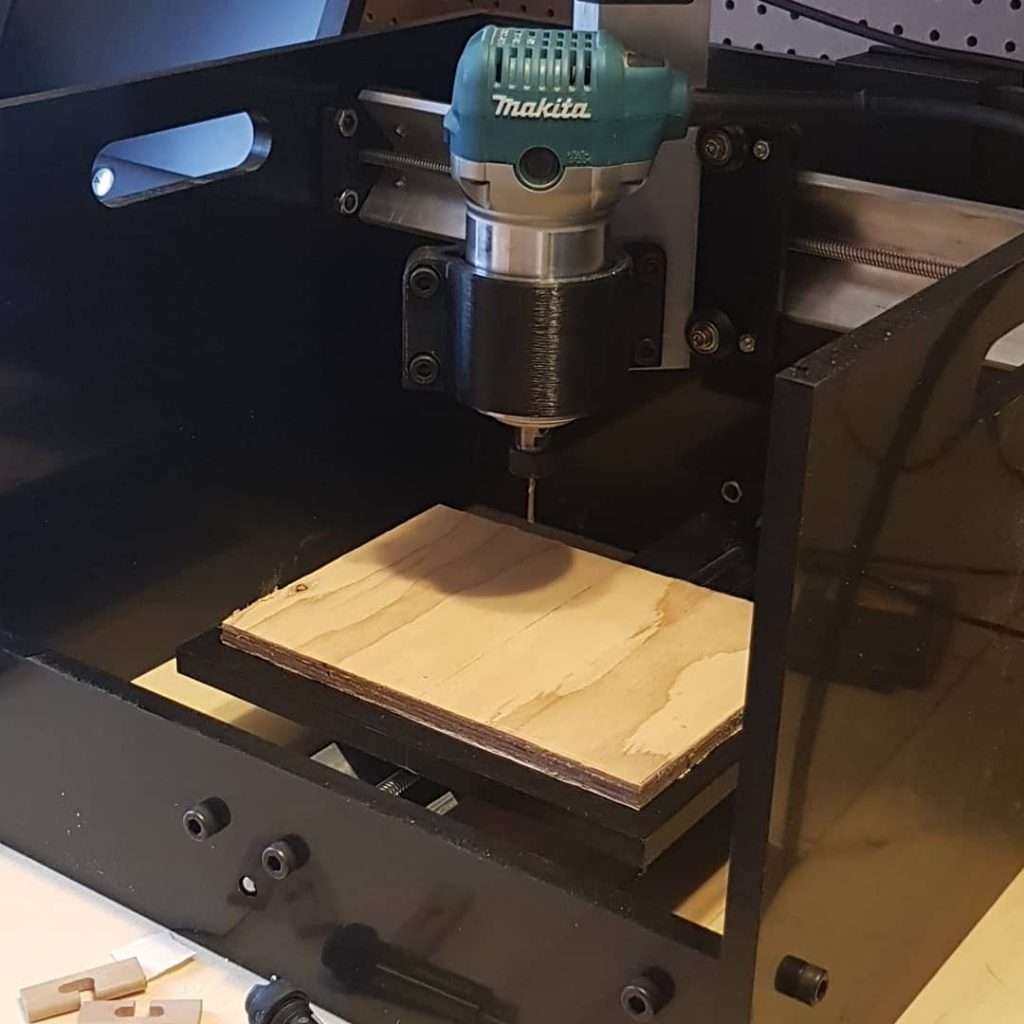
  • Additional mounting holes on the Z axis for the router mount. Increases rigidity and allows for more mounting options. ²
  • Leadscrew on the Z axis has been shortened slightly, allowing more clearance under the router.

Credits to Tom’s 3D for the suggestion and contribution


  • Change from 45mm to 48mm tall NEMA 17 motors with longer cables.

(Left: new model with better torque use in V3)  (Right: model used in V2)

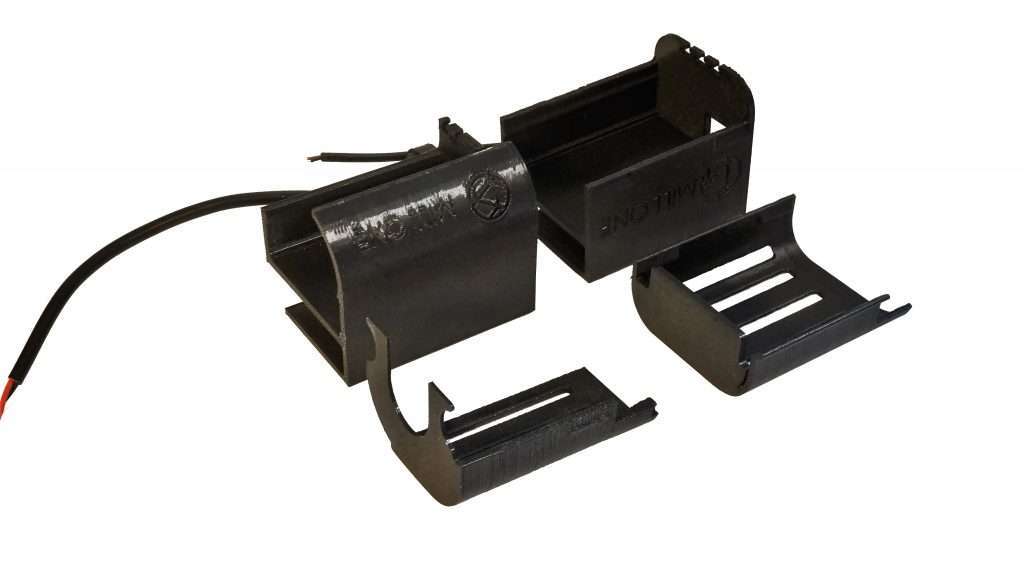
  • New clip-on type electronics holder, which is less prone to falling off.
  • Improved ACME nut mount design. Prevents cracking during assembly. ³
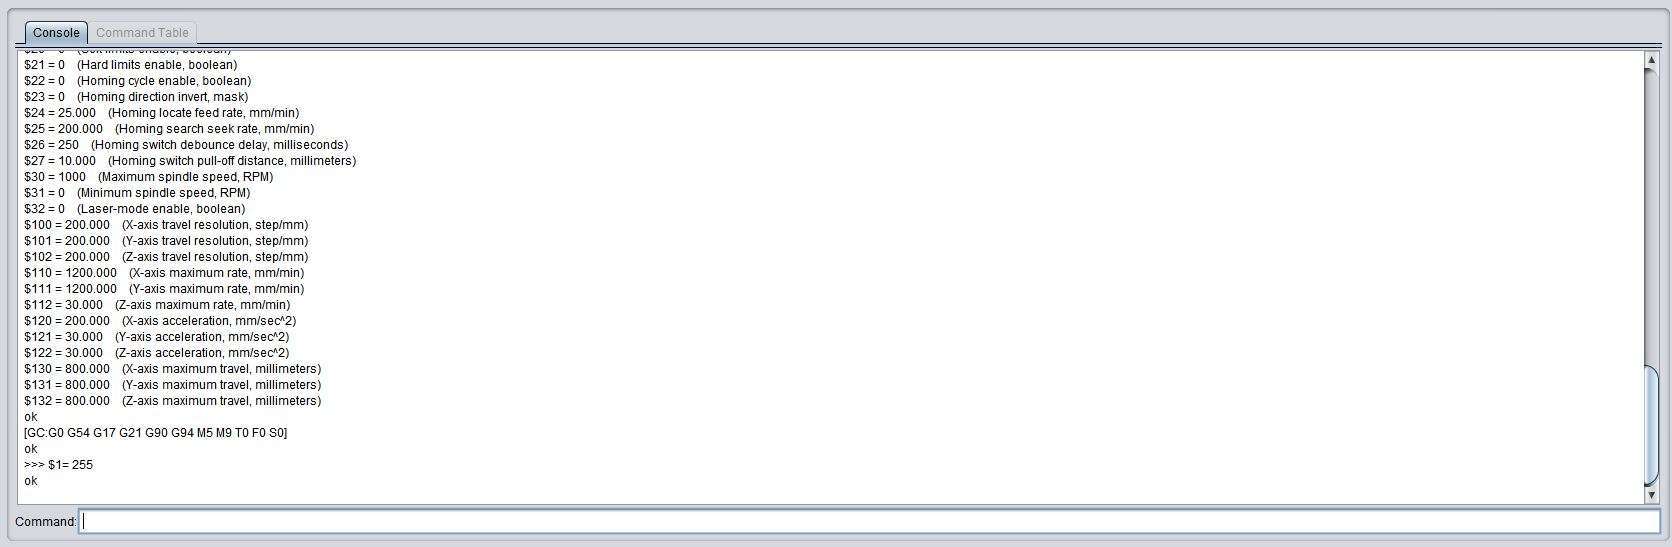
  • Update from GRBL v1.1e to v1.1g, with faster acceleration and max feedrates. You can read about it here.


Community shout-outs:

  1. Credits given to David Whiddon, who recommended adding notches to the gantry plate design expanding the Mill One’s work area.
  2. Credits for Josh Kubassek and Tom’s 3D for the contribution to adding extra mounting points for the routers to improve rigidity.
  3. Credits to Ilya Nikiforov for sharing his unboxing experience and identifying areas for improvement with our ACME nut mount design.


Firmware Update: GRBL v1.1g

We’ve released a new firmware update for the Mill One. This update will work with all Mill Ones. Download it here:

https://sienci.com/wp-content/uploads/2018/07/GRBL-1.1g-Sienci-Mill-One.zip

This firmware update increases the speed and acceleration settings of the Mill One. GRBL v1.1g has general improvements and bug fixes that improve reliability and performance.

Things to know about this update (please read this carefully if you are updating your Mill One since there are some specific instructions):

  • This firmware update takes the Mill One from running GRBL v1.1e to v1.1g. You can learn more about the development of GRBL on the GRBL Github.
  • You can update your firmware the same way as you uploaded it the first time. Instructions can be found on our Resources pages.
  • Before you start, make sure to clear your EEPROM. EEPROM is where the Arduino stores all of the GRBL settings. Some settings from GRBL v1.1e may persist if you do not clear the EEPROM. An Arduino program in the downloaded firmware folder can be uploaded to the Arduino to clear the EEPROM.
  • If you have installed a library into Arduino for an older version of the firmware, you will have to delete it and replace it with the new version. You can find the old libraries in the “Arduino” folder, which can usually be found in the “Documents” directory. Go to the “Libraries” folder and delete the “grbl” folder. This will delete the library and will let you install a new ZIP library.
  • Installing this update will undo and delete all your old settings. If you made any changes to the firmware, make sure to save all your settings. You can look at your settings by sending the command “$$”. If you need to make changes to your settings after the update, you can refer to the GRBL Configuration wiki.
  • If you run into issues with the firmware, please let us know.

If you want to revert back to GRBL v1.1e, you can download the firmware here.

An update on our HDPE frame testing

Over the last couple days, we have been testing the performance of the black HDPE frames. We’ve gotten a lot of interest in a plastic-based frame over MDF. However, we have found several issues with making the frames out of HDPE that leads us to believe that it is not a good option for our customers and we will not move forward with manufacturing them. If you want to learn why and our impressions of using this material to make the frames, please continue to read.

Stiffness

One of the biggest disadvantages of using HDPE is the fact that it is not as stiff as MDF. This makes the machine less rigid. Initially, we believed that this would be negligible, especially based on our previous experience using the material. However, when we assembled a prototype, we found that the reduced rigidity in the HDPE introduced decreased performance and reduced quality in milled test parts.

One of our tests was to make aluminum bitcoin tokens. On the bottom is the test piece milled on the HDPE frame machine. The one on the top is made on a machine with an MDF frame. You can immediately see that there is a clear difference in the finish between them. Both were made using the same gcode, with 1000mm/min feedrate at 0.35mm stepdown using an 1/8″ bit.

Both samples (above)

Sample milled on HDPE frame machine (below)

Sample milled on MDF frame machine (below)

We noticed far more chatter and experienced a more difficult time milling with the HDPE machine. This is also reflected in the milled part quality.

Warp

When we received the parts for the frame from our manufacturer, we noticed substantial warp in the material. We decided to go forward with testing since we believed that some of the warp would be taken up when the machine was assembled. The warp would be pulled straight by the brackets and rails. For the most part, this did occur, but the fit with the acrylic shield was still subpar. There was a sizable gap with the groove for the shield.

In the future, we would need to look into a more dimensionally stable material or have the material stress relieved to prevent warping. This introduces more cost and perhaps would make this upgrade uneconomical.

Conclusion

Although HDPE looks nice and has great water resistance, due to its lack of stiffness compared to MDF, as well as warping issues, it is not a suitable material to make frames out of. Further research and development will be needed to create a frame that avoids those issues and offers performance comparable or better than MDF. As of right now, we will not be moving forward with manufacturing HDPE frames. Please stay tuned for more updates on frame development, and if you have any suggestions for other materials we can try, make sure to get in touch!

We’ve reached 1000 likes on our Facebook page!

Can you believe it? We’ve reached our 1000th like on Facebook! I want to thank everyone who have been with us and supported us throughout the last two years.

To celebrate, we’re giving out free anti-backlash nut kits with every Sienci Mill One order (first 30 units) with coupon code “YAY1000”. To use the coupon, make sure to add a machine and an anti-backlash nut kit to your cart before using the coupon, and you’ll get a $25USD discount (the value of the anti-backlash nut kits).

Here’s to the next 1000 likes! If you haven’t yet, make sure to like us and help us get there: https://www.facebook.com/siencilabs/!

Improved print quality, new printers

One of the key areas that we strive to improve on in our manufacturing process is with the quality of the 3D prints in the Mill One kits. Our 3D printed part quality is an area that has a lot of room to grow in terms of improving quality. We have worked with our customers and listened to their suggestions to improve print quality, and over the last couple of months, our prints have become stronger, more consistent, and more precise. Making these improvements have involved testing different print settings, nozzle sizes, bed surfaces, and materials.

One other step that we have taken in improving print quality has been to update our printer farm with two new Prusa i3 MK3 printers. This is to increase our print capacity, as well start replacing printers from our aging fleet. One of our longest lasting printers has close to 3000 hours of printing on it.

If you’re familiar with Prusa as a company, they build industry-leading printers known for their consistency and reliability. They are currently being used to print the ACME nut mounts and the angle mounts, which are parts that require good layer adhesion to provide high strength. Based on our initial tests with the ACME nut mounts, it appears that these new mounts are stronger and less prone to cracking than mounts made by other printers. We have one printer that has been working fairly reliably but still need to fix some things on the other Prusa to have it up and running properly.

Here are some other things that we have improved over the last couple months:

  • Reduce Z banding on the electronics holder and cover
  • Improve bed adhesion for the angle mounts
  • Adjust tolerances on the nut catches on the ACME nut mounts
  • Switch from using the Cetus printers for printing the ACME nut mounts over to the Wanhao i3 or Prusa printers to have a smoother bottom surface (the raft on the Cetus leaves a rough bottom surface)


We’re excited to be using these new printers for creating better parts and continually improving our kit!

Sienci Mill Ones on every continent (minus Antarctica)

Hey guys, it’s been a while since I’ve posted. It’s been really busy at Sienci Labs, sending out machines and working on some new cool things. But we do have some really cool news that I want to share.

We now have Sienci Mill Ones on every continent (minus Antartica)! Although we actually met this milestone a long time ago, we only just realized it when we got orders from Puerto Rico and India this past week. This is a really amazing milestone for us, especially how we’ve seen the diverse number of applications that the Mill One has been used in almost 30 different countries.

If you have any friends in Antartica who might need a small desktop CNC machine, make sure to let them know about us!


My Z axis keeps dropping! A simple guide on using $1= 255

A couple of users have reported that their Z axis drops during situations such as when the machine stops moving, or when they turn on the router before a cut, which can be really annoying.  While the machine is supposed to have enough resistance from the v wheels and the leadscrew’s resistance to back drive to support a router, some machines may have such low friction in their Z axis that the weight of the router actually exceeds the resistance. You can either rotate the eccentric nuts to allow for more resistance on the Z axis, and/or the rest of this post will talk about another option.

This is where $1= 255 comes in. $1= 255 is a command that you can send to your Mill One that will hold all of your motors to prevent any of the axis from moving when the machine is stationary. This means that if you are experiencing your Z axis moving down, you can use this command to use the motor to hold the axis. Below is a detailed guide on using $1= 255. If you want to learn what $1= 255, and other setting commands mean, check out this page or go to the end of the page.

Step 1) 

Connect your Mill One to your computer and open up Universal Gcode Sender. You can use other gcode senders for this, and the process is the same, but the images below are from Universal Gcode Sender.

If you already have your Mill One connected previously, it is recommended that you open and close the connection.

Step 2)

Give the Mill One a minute to load. You should see the message “Grbl 1.1e [‘$’ for help]” and a string of settings come up in the console.

Step 3)

Into the command box, type in $1= 255.

Press enter. You should see the next entry in the console to say

“>>> $1= 255
ok”

Step 4)

Use the keyboard controls or the onboard jogging controls on Universal Gcode Sender to move one of the axis. You will notice that the motors are now powered on and you cannot move the axis by hand. This will prevent the Z axis from falling when the machine is not in motion.

To turn off motors, follow the same steps, but send the command $1= 25. This will allow the motors to turn off. It is recommended that when you are not using the machine, to unplug the machine from mains power or ensure that the motors are turned off with this command.


How does this work? Here is an excerpt from the Grbl 1.1v configuration page:

$1 – Step idle delay, milliseconds

Every time your steppers complete a motion and come to a stop, Grbl will delay disabling the steppers by this value. OR, you can always keep your axes enabled (powered so as to hold position) by setting this value to the maximum 255 milliseconds. Again, just to repeat, you can keep all axes always enabled by setting $1=255.

The stepper idle lock time is the time length Grbl will keep the steppers locked before disabling. Depending on the system, you can set this to zero and disable it. On others, you may need 25-50 milliseconds to make sure your axes come to a complete stop before disabling. This is to help account for machine motors that do not like to be left on for long periods of time without doing something. Also, keep in mind that some stepper drivers don’t remember which micro step they stopped on, so when you re-enable, you may witness some ‘lost’ steps due to this. In this case, just keep your steppers enabled via $1=255.


Why 3D Print When You Can Mill? – Engineering.com Feature

So this past Christmas, the Mill One was featured on Engineering.com, an engineering news source and blog, as one of the Top 10 Gifts for Engineers. Ian from Engineering.com reached out to us to see if we’d be interested in doing an interview and demo for their site, and we said sure! Coincidentally, they had one of their offices in Mississauga, only about a hour drive from our office in Waterloo. So I head down there with a Mill One to talk to the guys and gals at Engineering.com.

For the occasion, I also made some Engineering.com coasters, which we demo live in the video interview posted in the article.

Read the full article here: https://www.engineering.com/DesignerEdge/DesignerEdgeArticles/ArticleID/16523/Why-3D-Print-When-You-Can-Mill.aspx

Join the Sienci Labs team!

If you’ve been following our work, we do a lot of cool stuff here at Sienci Labs. Thanks to the amazing support from our customers and community, we’ve made great leaps and strides in bringing accessible desktop CNC milling to the people. But this also means having more work to handle than Chris and I can do alone. So we’re looking for people to join our team!


Here are a couple things we want to focus on this year:

-Development of new and innovative ways to mesh software and hardware together to make CNC milling a better experience

-Making our supply chain more efficient and continually improving the quality of our kits

-Create high quality digital content for our resources and marketing


Are you or someone you know passionate about bringing automated manufacturing technologies to the masses? Then we want to talk to you!

Check out https://sienci.com/careers/ for the latest job posts. Or if you feel like you might have a fit somewhere else that’s not listed, feel free to email us anyway with a quick intro.


Latest Mill One mods on the Mill One Group

There’s been a lot of activity on the Mill One Group on Facebook, especially with new mods and addons.

Here’s one by Fred that’s pretty impressive. He’s also written up some details about his project, which are listed down below.
Second Story Write Up

LED Lighting Mill One Update

Another pretty cool mod is the one that David has created by extending the axis to 500mm and creating a new frame around it. .

David has also started a Youtube channel to talk about his CNCing adventures. Make sure to check it out and follow along on his adventure.

Here’s his latest video from yesterday!