Please note that Feb 15 is a statutory holiday and we will be closed on that day.
Lead times for new orders
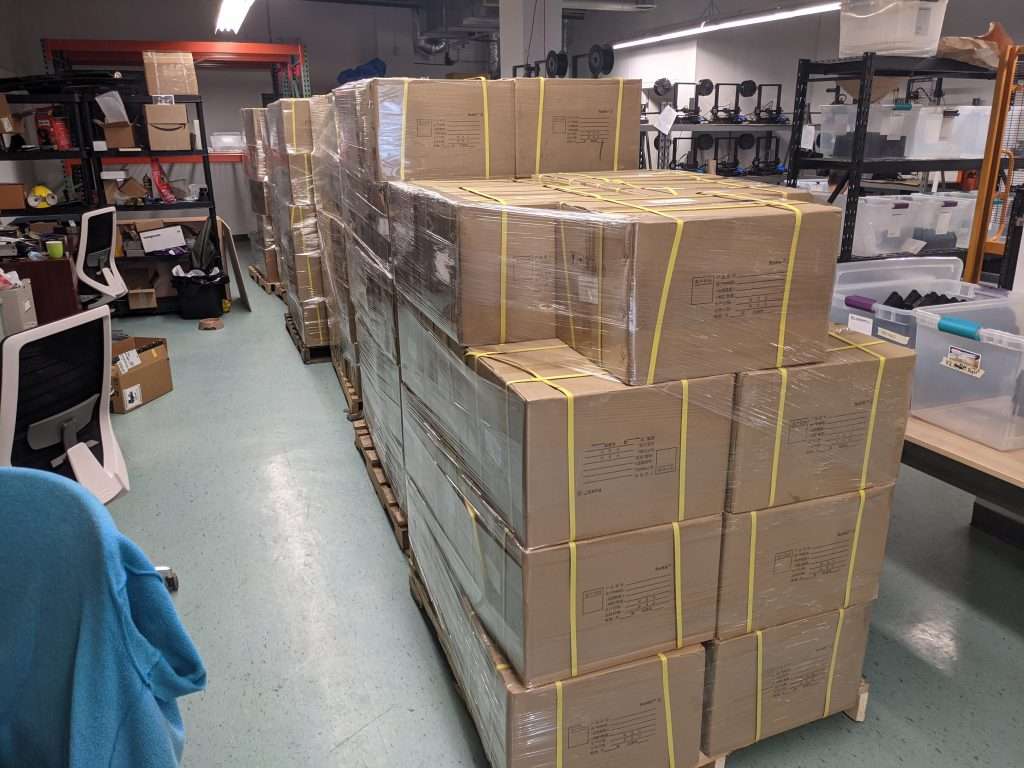
The current lead time for LongMills is 4-6 weeks.
Production has been going at a rapid pace. We have hired 7-8 new staff, 5 of which work in production, packing, and operations to help us catch up on the new backorders.
At the time of writing, just over half of Batch 4 machines have been sold and we are currently in the process of ordering parts for Batch 5.
The current lead time is expected to stay at 4-6 weeks as we expect that our production speed will be limited to a couple of different parts as they are in the process of being manufactured. At the current time these include:
Aluminum rails
ACME locking nuts
Steel gantries
Our manufacturers are working to produce these parts as quickly as possible and we expect to receive these parts in the next couple of weeks.
Some end mills and other add-ons are low or out of stock. We expect some end mills to be back in stock in the next week or two, and the remaining stock to be available at the start of March.
Commonly asked questions
If you are interested in ordering a LongMill please read this section.
Is there any way to skip the line/get my machine faster?
No. To keep things fair for all of our customers, we ship all orders based on when they were ordered. There are no exceptions. The only way to get a machine faster is to order one sooner. If we have updates to the lead time, they will be posted here and on the forum: https://forum.sienci.com/t/list-of-shipped-machines/1215. If you want to see where you are in the queue for your order, please check the forum.
Does it make a difference in when I get my machine if I pick it up?
The only difference it will make will be that you will not have to wait for the shipping/transit time for the machine to ship. Typically, machines take around 1-3 days to ship within Ontario. Otherwise, there is no difference.
When do you charge my card/take payment for my order?
Your card will be charged at the time you place your order. This is to ensure your place in line, purchase parts ahead of time, and have the most accurate estimates on production and delivery.
How can I cancel my order?
You can cancel your order with no penalty any time before your order ships. Please contact us through our website or email us with your order number and a request to make a cancellation. A refund will be processed through your original method of payment.
Can I add other items to my order before it ships?
If you’ve ordered a LongMill and wish to add other items to your order afterwards before it ships, please choose “Local pickup” (for free shipping) and add your LongMill order number. Some items (such as the T-track sets) cannot be combined for shipping.
Production updates
We have been incredibly busy in the recent months, especially as we’ve had our team grow by over 50% since the beginning of the year.
Here are some changes that we’ve made to improve production:
Dedicated staff for inventory tracking, QA, and production using automated systems
Dedicated staff for each packing and assembly station
Redesign or re-engineering of parts, such as the shoulder brackets and drag chain mount, to alleviate load off the 3D printer farm
Dedicated staff to run the 3D printer farm
Use of new automated printing technologies to improve printing throughput
Reorganization and labelling of stations and parts to make things easier to find
Use of custom manufacturing certain parts to improve part quality and better control over lead times
We are also working on:
Improved systems to test electronics, as well as making improvements to our electronics themselves
New packing tools to reduce the chance of missing parts in kits
Redesign of machine components to improve manufacturability and performance
A big part of our effort is to improve efficiency, quality, and throughput of our shop to catch up to our backorders. Our goal is to scale our production to be able to handle up to 300 LongMills per month.
Here are some challenges:
The volume of parts that we are now asking from our manufacturers is reaching a point where we may need to have more than one manufacturer make each part
Shipping couriers are sometimes not able to handle the volume on their trucks on regular pick-ups
COVID 19 slowdowns with shipping have affected incoming parts as well as shipping orders. Additionally, shipments going lost or missing shipments have been higher than before
Hey everyone, meet Dana from Bucky’s Customs! Dana is one of our first sponsored creators that we’re working with to create content using your LongMill. Whether it’s your first time using your CNC or your hundredth time, we want to make the journey of learning the ins and outs as fun and easy as possible.
As Dana says “My intent is to learn as I go and bring the viewer with me on that same journey. I know how lost I was in the beginning and I feel I should try to create and share content I wished I had when I started.”
With me and Chris being so busy trying to keep machines going out the door and all the other projects done, we haven’t had a whole lot of time to get new educational content for all of our LongMill and Mill One users. This is why we’re working on getting other LongMill users to help share their knowledge and experience with the community. This is part of our effort to create a more complete base for new customers as they learn to use their machines. We believe that supporting video content like what Dana is creating is part of creating a community where people can learn from each other and become more proficient with their CNC machines.
Interested in becoming a sponsored creator yourself? Please fill out an application form below!
Hi everyone, we have been working on a bit of a mysterious problem with touch plates over the last little bit and we finally figured out the reason.
If you’ve found that your probe does everything correctly, but when you press “return to zero” on UGS, your bit either crashes or moves to the incorrect location, please read this post as it may pertain to you.
TL;DR
If you don’t want to read all of the nitty gritty, change your units in the jog controller from “inches” to “mm” before running the probe cycle and pressing return to zero. Once you complete this process, you can change it back to “inches” for jogging if you wish.
Doing this before every cycle will ensure that your machine performs its probing cycle correctly.
Please note that we are currently working on solutions to this bug, and we hope to have it fixed soon.
The nitty gritty technical details
If you are using UGS, there is a bug that can cause the touch plate to move farther than the expected origin of your workpiece, which can plunge the bit into the machine bed. This is due to how the probing module is programmed. When you press “Measure outside corner,” UGS enters the probe cycle process, where it sends commands to the machine to move at a specified speed until either the touch plate is contacted or the machine is done travelling the specified distance. This repeats twice for the X, Y, and Z axes, once fast and once slow.
For the probe process, whenever UGS is specifying co-ordinates for movement, it dictates that the coordinates are in millimeters using the “G21” command. Immediately afterward, it will call the default units from the jog control with either “G21” (mm) or “G20” (inches), which is handy because if your probe cycle fails midway, you can still jog your machine the proper amount. This basic pattern of [mm] [action] [co-ordinates] [inches] continues but stops at the last few lines, where the co-ordinates of the measured offset distances were supposed to be in millimeter values, but because UGS did not put “G21” to call it out in millimeters, UGS assigned the co-ordinates to be in inches, as it was the last command to have been sent. Therefore if the machine was supposed to move 2 mm to get to the origin of the workpiece, then it will now move 2 inches.
Hi everyone. I hope everyone had a restful holiday season. We have now returned from holidays on Jan 4th and are back getting into the swing of things.
We have started shipping general parts, end mills, and other supplies this week, but machines will start shipping next week (Jan 11). If you placed an order recently that isn’t a LongMill, please note that although most items ship within 1-2 days, there may be some variances in when items ship.
If you are reading this because you are planning on ordering a machine, I ask that you please read this update carefully as will provide important information and answer many of the common questions you may have. If you have any other questions that are not answered in this post, please check the FAQ. For any info not provided in this post or in the FAQ, feel free to get in touch with us.
LongMill production
With COVID-19 numbers rising, most of our staff are currently working from home. Our staff who went away over the holidays are working from home with the 14-day mandatory quarantine. Some of our core staff members on the operations team are currently working at the office to continue shipping orders out and running the 3D print farm.
Lead times for new orders
The current lead time for LongMills is 4-6 weeks.
We expect lead times to remain around this range for the next little while as we have had a large influx of orders come in during December and into January. We currently sell machines than we are able to build per week, which means that our lead times will not decrease until we are further able to scale production even more.
We are currently in the process of hiring additional staff to help us decrease our lead times, as our current bottleneck is from how quickly we can pack and assemble kits.
I am expecting some volatility in the lead time near the end of February and March, as we will likely be running out of gantries and rails around this time. We are currently working on producing more parts but there have been steel shortages and fluctuating aluminum prices that have affected the industry.
Once we begin to run out of these parts, lead times will likely change.
Besides rails and gantries, we have ordered 1000 machines worth of other stock, such as lead screws, electronics, motors, v-wheels, nuts, fasteners… so these items should keep us going until March/April.
Currently, about 40% of Batch 4 has been sold.
Current lead times
Orders #27725 and onward are expected to begin shipping Jan 11th. We expect to ship around 40-50 units per week until we are clear of the backlog of orders.
Orders #27725 to #27883 expected to ship week of Jan 11
Orders #27885 to #28016 expected to ship week of Jan 18
Orders #28017 to #28092 expected to ship week of Jan 25
Orders #28094 and onwards expected to ship after Feb 1st.
Commonly asked questions
If you are interested in ordering a LongMill please read this section.
Is there any way to skip the line/get my machine faster?
No. To keep things fair for all of our customers, we ship all orders based on when they were ordered. There are no exceptions. The only way to get a machine faster is to order one sooner. If we have updates to the lead time, they will be posted here and on the forum: https://forum.sienci.com/t/list-of-shipped-machines/1215. If you want to see where you are in the queue for your order, please check the forum.
Does it make a difference in when I get my machine if I pick it up?
The only difference it will make will be that you will not have to wait for the shipping/transit time for the machine to ship. Typically, machines take around 1-3 days to ship within Ontario. Otherwise, there is no difference.
When do you charge my card/take payment for my order?
Your card will be charged at the time you place your order. This is to ensure your place in line, purchase parts ahead of time, and have the most accurate estimates on production and delivery.
How can I cancel my order?
You can cancel your order with no penalty any time before your order ships. Please contact us through our website or email us with your order number and a request to make a cancellation. A refund will be processed through your original method of payment.
Can I add other items to my order before it ships?
If you’ve ordered a LongMill and wish to add other items to your order afterwards before it ships, please choose “Local pickup” (for free shipping) and add your LongMill order number. Some items (such as the T-track sets) cannot be combined for shipping.
Hi everyone. I’m happy to announce that we now have 1/8″ Precision Collet Adapters for Makita RT0701 Routers available on our store. These collets are specially designed for Makita RT0701 routers which are commonly used on LongMills and other hobby CNC machines.
1/8″ Precision Collet
This collet serves as an alternative to the popular 1/4″ to 1/8″ Collet Adapter that is widely used with routers that come standard with a 1/4″ collet only.
Having the ability to use 1/8″ shank bits is great as
It can save money from buying smaller size bits with a 1/4″ shank as 1/8″ shank bits are significantly cheaper
It offers a wider variety of bits you can use
In most applications, users should not see any perceivable differences between using the Precision Collet over the Collet Adapter, especially for woodworking where overall tolerances needed for runout are fairly low. However, here are some benefits of using the Precision Collet
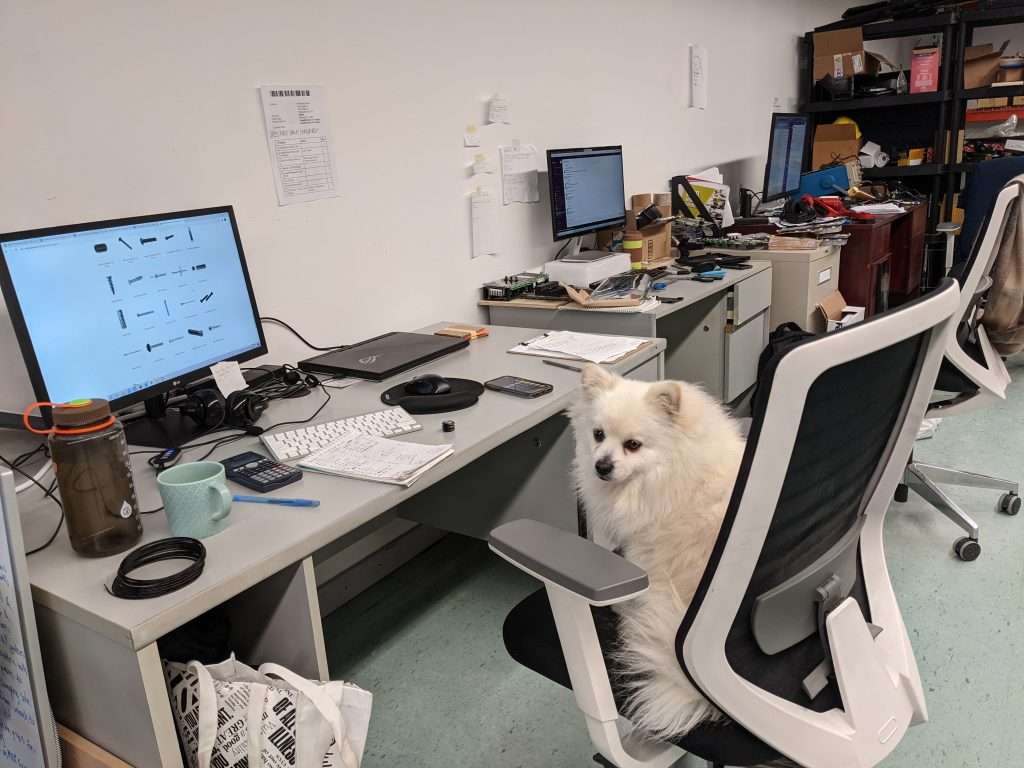
Some bunnies to test collets. With general woodworking both types work great.
Routers rely on a certain degree of concentricity when it comes to getting accurate cuts and lower vibration. This means that the center of the bit must align with the rotational axis of the router. We refer to the distance between the center of rotation of the router and the center of rotation of the bit as runout.
Runout plays an important role in how accurately your cuts can come out. Imagine that you have a 1/4″ (0.25″) end mill. If you were to drill a hole with this end mill, you should expect to have a hole that is exactly 1/4″ (0.25″) in diameter.
Now imagine that you have a run out of 0.005″. This means that your hole would cut 0.251″ in diameter instead of 0.25″. In the real world, we should expect a certain degree of runout from any rotating tool, and in some cases, may affect the accuracy of your cutting as well.
Checking the runout on a 1/4″ end mill
I have measured and tested collets to see how they look in terms of runout.
I would preface that the measuring tools that I have aren’t great and aren’t the most precise, but they are generally good enough to get an understanding of the relationships between the different parts. I also have done some real world testing by running some projects with the collets to make comparisons.
Here are some notes:
All the measurements were taken on Makita RT0701 routers one was almost new, while the other one has been used for several hundred hours. Runout on both was around 0.0015″ (measured from the shank above the nut)
Measuring runout with the 1/4″ stock collet using a 1/4″ bit produced around 0.0015″ of runout. This was actually surprisingly accurate, as this means that there is almost no runout in the collet.
Measuring runout with the 1/4″ to 1/8″ Collet Adapter using the stock 1/4″ Makita collet produced around 0.0045″ to 0.006″ of runout.
Measuring the runout with the 1/8″ Precision Collet produced between 0.0015″ to 0.003″ of total runout.
The runout of both the Collet Adapter and Precision Collet was lowest with the shank seated over the complete length of the collet.
This means that the overall runout between the Collet Adapter vs the Precision Collet can have up to a 0.003″ difference.
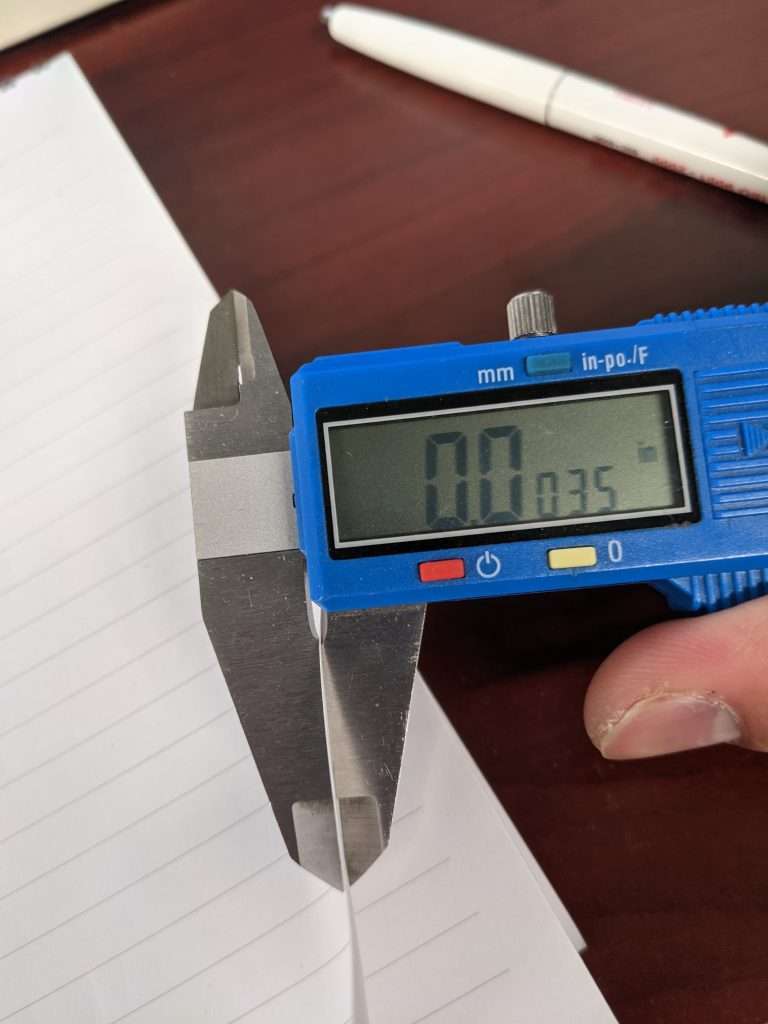
In most situations, this difference will have no perceivable impact as 0.003″ is about the thickness of a sheet of paper. However, in some applications, the extra precision may make a difference for example with:
Precision metal milling
Small engravings and inlays
PCB milling
Thickness of a sheet of paper
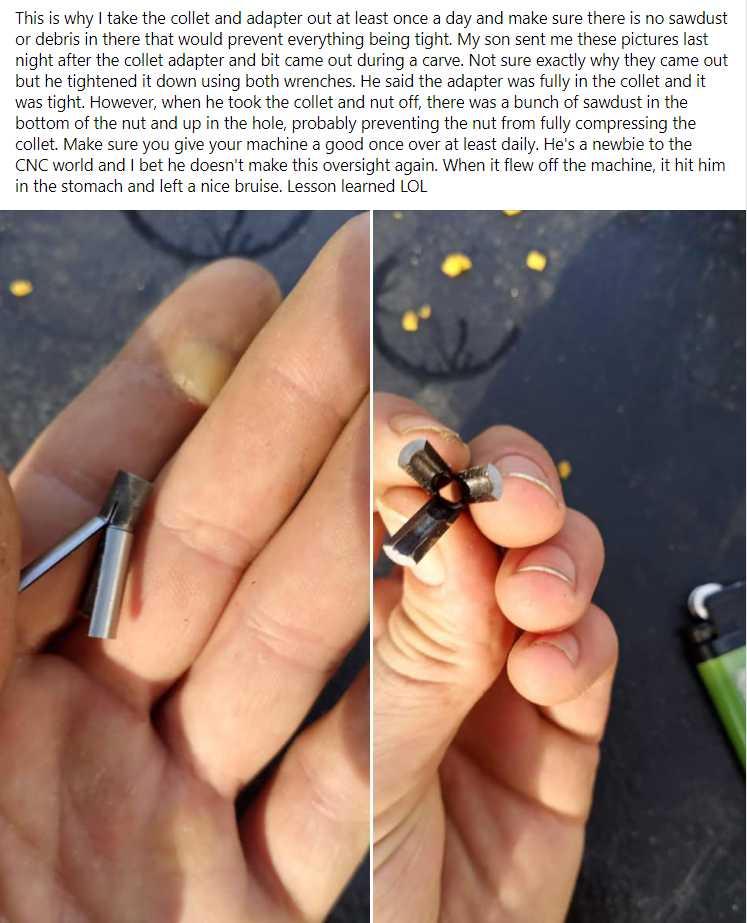
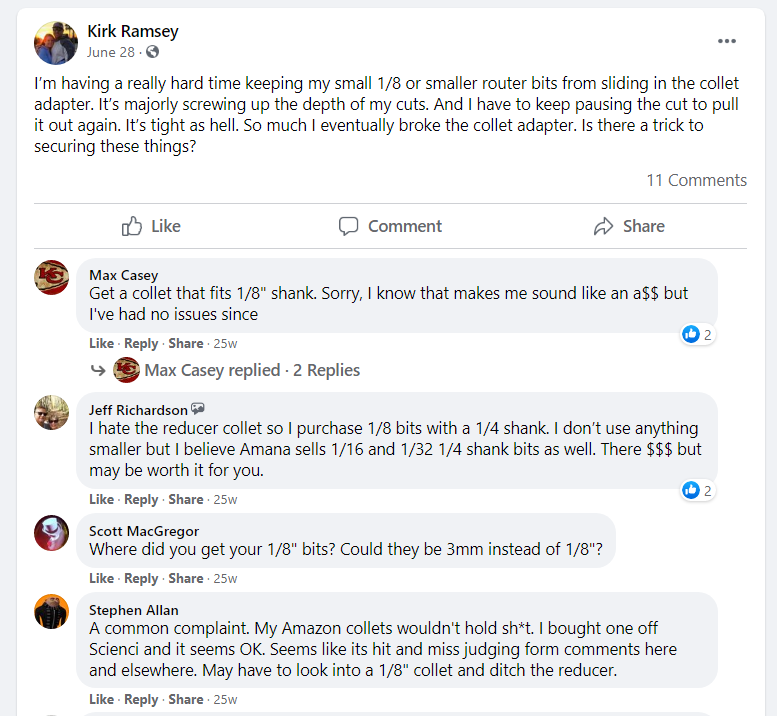
The other factor to consider is reliability. The Precision Collet eliminates the chance for a user to install the collet adapter incorrectly or in the wrong position. With the Precision Collet, there is no adapter that can fall, and as mentioned earlier, the better the “hold” on the bit, the less runout there is.
The Precision Collet should also reduce the chance of the bit falling out during cutting or being pushed into the router with every plunge cut with its more reliable bit holding.
Fully seating the bit in the collet decreases runout
Conclusion
The 1/4″ to 1/8″ Collet Adapter offers an inexpensive and relatively accurate way to use 1/8″ bits with your 1/4″ router. With most users, the difference will be minor at best. On the other hand, if you want to dive into cuts that require more precision, or want the comfort and convenience of a collet that can go directly into your router without an adapter, the 1/8″ Precision Collet is a great option.
Hi everyone. This is a quick notice about our holiday schedule this year.
We will be on holidays from Dec 24th to Jan3rd.Our office will be closed during this time. Normal operations will resume on Jan 4th.
Cutoff time for shipping bits, parts, and other items that are in stock is Dec 23rd at 10AM EST. All orders that that come in after Dec 23rd will ship in the new year.
If you placed an order for a LongMill, we will be working to ship the cue until Dec 23rd, and continue shipping on Jan 4th.
During holidays,
Shipping will be on pause
Pick-ups will be on pause
We will not be taking phone calls
Email and Contact us queries through our website responses will be delayed or responded to after the break
Technical help tickets and general will be delayed or responded to after the break
Contact through our social media channels may be delayed or responded to after the break
Thank you everyone for a wonderful year, and we’ll see you in the next!
Hi folks, this is our November production update pt2.
If you are reading this because you are planning on ordering a machine, I ask that you please read this update carefully as will provide important information and answer many of the common questions you may have. If you have any other questions that are not answered in this post, please check the FAQ. For any info not provided in this post or in the FAQ, feel free to get in touch with us.
Parts for the next 1000 LongMills
Since the middle of the year, the LongMill has seen tremendous growth, thanks to users all around the world. Thank you to everyone who’s taken the time to recommend the LongMill to their peers and community.
We have been struggling for the past year to keep up with the demand and have been working on scaling operations. Batch 4, our latest batch will consist of 1000 LongMill units and I expect this batch to last at least for the next 4 to 6 months, letting me have a breather (since I’m the one mostly in charge of ordering all of the parts for the machine) and finally shorten the lead time on the LongMill. Things have really come a long way since October 2019, when we first started shipping the first LongMills.
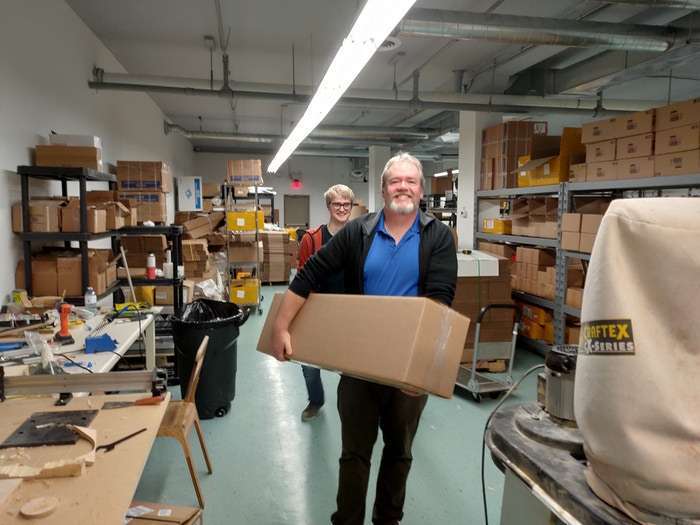
The first production LongMill going out the door, back in October 2019
Current lead times
For a full, up to date list of shipped/machines to be shipped, please visit https://forum.sienci.com/t/list-of-shipped-machines/1215. We typically update this page with orders that are waiting to be shipped to help customers see where they are in the queue.
If you have already ordered a machine, you can likely find an estimate on when your machine will ship.
New schedule —
Order #27081 – #27264: Estimated to ship Nov 26 to Dec 4
Order #27265 – #27354: Estimated to ship Dec 7 to Dec 11
Orders after #27359: Estimated to ship after Dec 14*
*Most orders after #27359 will likely ship the week of Dec 21st and beyond
Lead times for new orders
New orders for LongMills are expected to ship in 4 to 8 weeks. We will continue to update lead times as production progresses.
Some things that may impact the lead times:
Delays in shipping for incoming parts
We expect to have inventory to ship 800 units arrive by the end of December as well as enough stock to ship the remaining backlog of orders.
Holiday season delays
Sienci Labs Inc. will be on holidays from Dec 24, 2020 to Jan 4, 2020. We are currently working extra hours to pre-pack units to make up for the lost week. However, depending on our incoming volume of sales this may cause some delays.
Some staff will be available on reduced hours to assist with customers.
Shipping times during the holiday season also tends to be a bit dicey as well.
Quality checks
If the incoming parts do not meet our quality standards, we may need to remanufacture or reorder parts to meet these standards.
Current bottlenecks
Dust shoe brackets
Current stock: <60pcs
Incoming stock: 500pcs
Estimated arrival date: Dec 4 In stock
Router mounts and motor spacers
Current stock: <80pcs
Incoming stock: 1000pcs
Estimated arrival date: Dec 17First batch of 75 has arrived. Remaining parts expected to arrive first week of January
Driver boards
Current stock: <180 sets
Incoming stock: <1000 sets
Estimated arrival date Dec 23In stock
We will continue shipping machines with the stock available and resume shipping once new parts arrive.
Holiday schedule
Sienci Labs Inc. and our staff will be on vacation for the holidays between Dec 24, 2020 to Jan 4, 2021. Communication and shipping during this time may be limited.
For questions and inquiries, we recommend emailing us through our contact form as one of our staff may be available to help during this holiday season.
Commonly asked questions
If you are interested in ordering a LongMill please read this section.
Is there any way to skip the line/get my machine faster?
No. To keep things fair for all of our customers, we ship all orders based on when they were ordered. There are no exceptions. The only way to get a machine faster is to order one sooner. If we have updates to the lead time, they will be posted here and on the forum: https://forum.sienci.com/t/list-of-shipped-machines/1215. If you want to see where you are in the queue for your order, please check the forum.
Does it make a difference in when I get my machine if I pick it up?
The only difference it will make will be that you will not have to wait for the shipping/transit time for the machine to ship. Typically, machines take around 1-3 days to ship within Ontario. Otherwise, there is no difference.
When do you charge my card/take payment for my order?
Your card will be charged at the time you place your order. This is to ensure your place in line, purchase parts ahead of time, and have the most accurate estimates on production and delivery.
How can I cancel my order?
You can cancel your order with no penalty any time before your order ships. Please contact us through our website or email us with your order number and a request to make a cancellation. A refund will be processed through your original method of payment.
Are there any holiday discounts coming up?
We will not be offering any holiday discounts such as for Black Friday/Boxing Day. We generally do not offer discounts since we prefer to offer the best price for our products so that you get the best deal for our products regardless of when you purchase. This also helps keep production levels stable throughout the year and ensure we produce products of the highest quality. So if you place an order now or later, be rest assured you’ll be getting the best deal.
Hey everyone, a quick announcement to make. Carveco recently got in touch with us about reselling and promoting their software. You can subscribe to Carveco Maker ($15USD/month) and get your first month for free. For more details, please visit the product page.
If you’re not sure if you should get paid software or free software for your CNC, please check out our blog post on this topic.
If you’re looking for paid CAM and design programs for your CNC machine, Vectric VCarve and Carveco Maker offer excellent options for beginner users. Today we’ll be comparing the two options to help you decide which software to go with. Aleks and I (Andy) have been using the software for several weeks now and we hope to offer a good comparison between the two.
Please note, we make money from each sale of software. That being said, I will aim to be as unbiased as possible for both of the software we will be discussing today. We also try to be as accurate as possible to compare the two programs,
We will be primarily focusing on Vectric VCarve Desktop and Carveco Maker as we feel like they are the most applicable for hobby use, but will touch on other versions that are available.
Introduction
CNC software traditionally focused heavily on industrial applications, which came with large price tags and very complicated features. Software like HSM and MasterCAM cost thousands of dollars per seat but power the machines that make car parts and airplanes. Even though full-featured software is compatible with LongMills and other hobby-level CNCs, they are generally too complicated and expensive for most people to use.
Having recognized that, software companies have moved to offer lower cost alternatives to their industrial software for use with hobby and semi industrial machines over the last couple years as smaller, budget-friendly machines become more popular.
Independent developers and CNC manufacturers now offer a wide range of free and low-cost CAM software that are generally very simple and are designed for hobby level projects. Some include Kiri:Moto, EstlCAM, and MakerCAM, which are free or very inexpensive compared to industrial software, but come with limitations that would make it unsuitable for industrial applications.
On the other hand, Vectric and Carveco are offshoots of an industrial-focused software created by Delcam called ArtCAM. From there, both companies created their offshoots from their flagship software to other software better suited for beginners to capture a larger audience, thus containing higher-end features originally found in industrial software that has been simplified for consumer use.
I expect that there will continue to be growth and additional competition in this space as CNC becomes more popular with hobbyists especially as CNC hardware continues to improve over time.
Features
Both programs have similar basic software feature sets such as:
● Easily switching between 2D and 3D views ● Importing vector and raster 2D files (with automatic image tracing) ● Importing a wide variety of 3D files for relief carving ● Full 2D vector creation and control (lines, text, graphics) ● Basic manipulation of imported 3D files (moving, scaling) ● Include a library of premade relief models ● A variety of milling toolpath types – profile, pocket, v-carve engrave, drilling, inlaying, chamfering, fluting ● Fully animated toolpath simulation with a variety of materials
Overall, both software provide a full set of features that you should look for your CAM.
Some of the unique features that each software offers that the other does not include:
VCarve Desktop
2 sided machining
Thread milling
4th axis machining
Laser module (extra $50USD)
Carveco Maker
Vector doctor/repair
Laser toolpaths
There is a major limitation to VCarve Desktop, at least in our opinion, that may contribute to your choice between the two software, which is the 24″x24″ size limitation. While Carveco Maker does not impose a size limitation, the maximum project size that VCarve can do is 24″x24″, which means that everyone with a LongMill 30×30 will lose a small chuck of their working area.
This is something I have talked to Vectric about and something that they are considering, but it may be some time until an alternative comes out.
If you like VCarve Desktop, but need the extra inches, you will have to upgrade to VCarve Pro, which does not have any size limitations. The price for VCarve Pro is $699USD (double the price of VCarve Desktop).
Price
VCarve Desktop: $349USD
Carveco Maker: $15USD/month or $180USD/year
One of the major differences for Vectric Desktop and Carveco Maker comes down to not just the price but the pricing structure.
Vectric offers their software for sale as a perpetual license that can be used as long as you’d like without ever paying another cent. Vectric offers free upgrades to the latest version of your software for 12 months from the date of your purchase. You also can easily upgrade between higher tier products by paying the difference.
Carveco on the other hand provides both monthly subscription options as well as perpetual license options, but for the Maker tier option, only a monthly or annual subscription option exists. The lowest cost perpetual licence, the Carveco Maker Plus, costs $1200USD.
It should be noted that you get all updates for free while subscribed to Carveco, which is great if you want to stay up to date with new features and bug fixes.
If having a perpetual license is important to you, Vectric generally offers more options for perpetual licenses, and their two higher tier options, VCarve Pro and Aspire, run for $699USD and $1995USD, which may be worth considering over Carveco Maker Plus for $1200USD.
Otherwise, Carveco Maker at $15/month offers a very affordable option that is within the budget for most hobbyists.
Trial Period
VCarve Desktop: unlimited trial, with limited saving and export options
Carveco Maker:First month free with a subscription that can be cancelled at any time
Vectric highly recommends their customers to try out their software before purchasing by allowing you to evaluate the software for an unlimited period of time. However you are limited to being able to export their own trial projects and there are some restrictions on being able to save and export projects.
Carveco Maker on the other hand only offers a 1 month free subscription, which requires you to sign up with a payment method, and if you don’t cancel within the first month, you’ll be charged with another month’s worth of subscription at $15USD/month.
I feel that one month of either software provides more than enough time to evaluate which program you like better, which I would recommend folks to do.
Ease of use
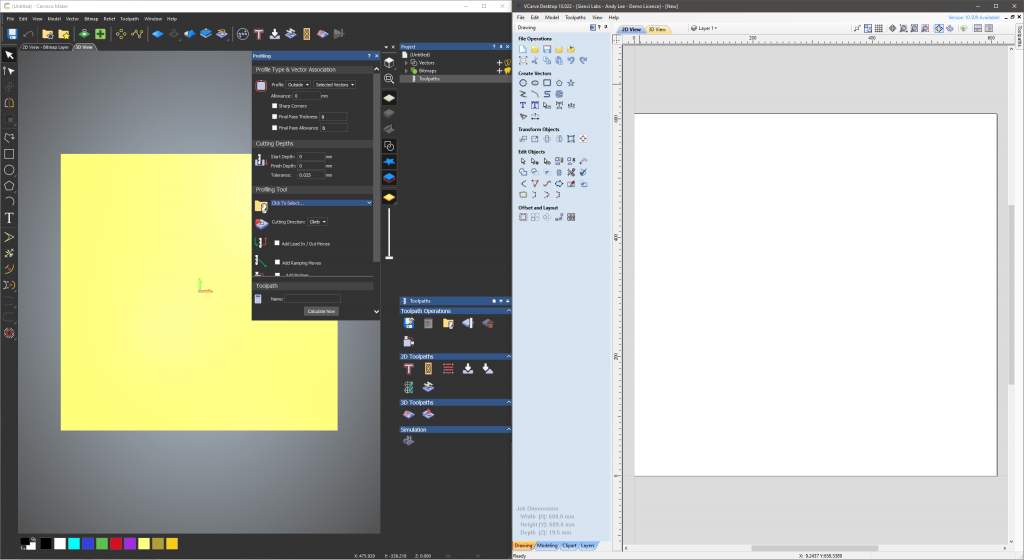
From our initial use, we found both software to work very similar to each other, especially in workflow.
Both programs start with asking you to choose your material/working size, then allow you to either design and upload designs in 2D and 3D.
Generally I have preferred to use the 2D vector tools on VCarve, but working with 3D reliefs was a bit smoother of an experience with Carveco Maker. Overall I feel that the differences are minor, especially if you are going to be using outside programs to do your modeling.
The general online consensus (just from our research) seems to indicate that VCarve is a little bit easier to use. It also offers more online resources and tutorials, likely due to being on the market for longer than Carveco Maker.
Conclusion
These are my personal opinions of each software and my recommendations for each of them. I still highly recommend downloading both programs to test run them before choosing one. Both programs are excellent and there are many happy customers for both.
Overall, I have preferred the experience working with Vectric software, as overall it feels more intuitive and better laid out, especially with some of the toolpath creation and vector editing. Some exclusive features are nice to have, such as flip-milling. There are also a lot more tutorials and other resources available which I feel should help improve the user experience for beginners.
However, due to the 24″x24″ limitation with VCarve Desktop, I feel like for LongMill 30X30 users, using Carveco Maker may be a better option since I find that often times my projects extend all the way to the full working area of the machine. Alternatively, consider getting VCarve Pro to utilize the full extent of your machine.
so…..
If you’re on a budget and want the lowest cost option
Go with the Carveco Maker subscription for $15USD/month. It should provide you with most of the features you need to get started, and you can cancel anytime if you want to switch software or decide to upgrade. However, if you are going to use the same software for over 2 years, it will cost less to buy Vectric VCarve Desktop in the long run.
If having a 24″x24″ size limitation doesn’t matter to you
Then get Vectric VCarve Desktop. It’s easy to use with lots of resources. If you eventually want to work with projects larger than 24″x24″ (without tiling), then you can upgrade to the VCarve Pro later by paying the difference between the two products (around $350USD).
If you want the full 30″x30″ working area but don’t want to spend $699USD
Carveco Maker is the way to go as it does not have size limitations.
For all other production updates and company news, please check out the blog: https://sienci.com/blog/
If you are reading this because you are planning on ordering a machine, I ask that you please read this update carefully as will provide important information and answer many of the common questions you may have. If you have any other questions that are not answered in this post, please check the FAQ. For any info not provided in this post or in the FAQ, feel free to get in touch with us.
Current lead times
For a full, up to date list of shipped/machines to be shipped, please visit https://forum.sienci.com/t/list-of-shipped-machines/1215. We typically update this page with orders that are waiting to be shipped to help customers see where they are in the queue.
We are currently slightly ahead of schedule. Orders between #26650 to #26675 have now already been shipped (originally estimated to ship the week of Nov 16).
New schedule —
Order #26685 – #27059: Estimated to ship Nov 19 to 27
Order #27066 to #27232: Estimated to ship week of Nov 30
Order #27235 and newer: Estimated to begin shipping Dec 14*
*Remaining orders are estimated to ship 30 to 50 units per week from mid-December.Please allow up to 8 – 12 weeks from the date of your order for your machine to ship to account for delays**.
**There are some parts that require to arrive to our shop to be assembled and packed before they can be shipped out. These estimates rely on these parts to arrive on schedule. Delays may occur if these parts do not arrive on time. Delays can typically take 1-3 weeks.
Current production bottlenecks
We have a couple of parts we are waiting for to arrive to be able to start shipping machines. We expect that once the couplers arrive we will be able to ship the first 58 units (the number of remaining power supplies that we have), with the remaining 50ish units ready to ship once the power supplies arrive at the end of November.
6.35mm to 8mm couplers
Current stock: <10
Estimated arrival date: Nov 13 – Nov 18
Power supplies
Current stock: 58
Estimated arrival date: Nov 27
We have over 100 sets of all other parts that can be used to ship units after these two parts arrive. Please note that the shipping times may vary (usually by a few days) so they might not arrive exactly at the specified time.
We expect all other parts (1000 sets) to arrive between the last week of November and mid-December.
Commonly asked questions
If you are interested in ordering a LongMill please read this section.
Is there any way to skip the line/get my machine faster?
No. To keep things fair for all of our customers, we ship all orders based on when they were ordered. There are no exceptions. The only way to get a machine faster is to order one sooner. If we have updates to the lead time, they will be posted here and on the forum: https://forum.sienci.com/t/list-of-shipped-machines/1215. If you want to see where you are in the queue for your order, please check the forum.
Does it make a difference in when I get my machine if I pick it up?
The only difference it will make will be that you will not have to wait for the shipping/transit time for the machine to ship. Typically, machines take around 1-3 days to ship within Ontario. Otherwise, there is no difference.
When do you charge my card/take payment for my order?
Your card will be charged at the time you place your order. This is to ensure your place in line, purchase parts ahead of time, and have the most accurate estimates on production and delivery.
How can I cancel my order?
You can cancel your order with no penalty any time before your order ships. Please contact us through our website or email us with your order number and a request to make a cancellation. A refund will be processed through your original method of payment.
Are there any holiday discounts coming up?
We will not be offering any holiday discounts such as for Black Friday/Boxing Day. We generally do not offer discounts since we prefer to offer the best price for our products so that you get the best deal for our products regardless of when you purchase. This also helps keep production levels stable throughout the year and ensure we produce products of the highest quality. So if you place an order now or later, be rest assured you’ll be getting the best deal.
New projects we are working on
We’re excited to announce that we have onboarded two new software developers to our team, and we are continuing to work on different hardware and software projects with our current team. We aim to continue to provide new development and technology to this field to make CNC more accessible and easier to use for everyone. Here are some of the things you should watch out for in the next few months:
Toolchain selector (a tool to help you select the best software to use for your project)
Improvements to CAMLab (our 3D CAM software powered by Kiri:Moto)
A new gcode sending program (which aims to be a simple to use, stable option over CNCjs and UGS)
New controller, driver, and firmware improvements (to make motion control on the LongMill even better)
Redesigning 3D printed parts on the LongMill to steel sheet metal parts (reduce 3D printing bottlenecks and improve strength)
Hi everyone, Andy from Sienci Labs here. Today we’ll be covering the topic of free vs paid software for your CNC, or more specifically, CAM programs for your CNC.
Here is a list of free CAM programs we may refer to:
Easel
Carbide Create
CAMLab
Fusion 360
Here is a list of paid CAM programs we may refer to:
Vectric products
Carveco products
Please note that if you buy software from our website, we get money from each sale. Even though this is the case, I will try to provide the most thorough consideration for paid and free software. I will also provide my personal recommendations for each topic as well.
Let’s start with the most important question, “is paid software worth it?”. Of course with most questions, the answer is “it depends.” However I believe that with most beginners and folks that are starting out, which make up the majority of our customers, the answer is no.
Starting out with free software provides a good option to get familiar with your CNC for making basic projects and understanding the features you may be looking for in the future if you choose to upgrade to a paid program.
That being said, for certain customers, especially folks that are using their machine as a business tool, paid software may be a better option for you.
Designing/CAD in CAM programs
Most CAM programs offer some form of tool to allow users to import design files, manipulate them, or even create your own.
Free:
Most free CAM programs do not have particularly advanced or full-featured CAD or design tools that allow you to design and manipulate your design in the software before you begin to generate toolpaths.
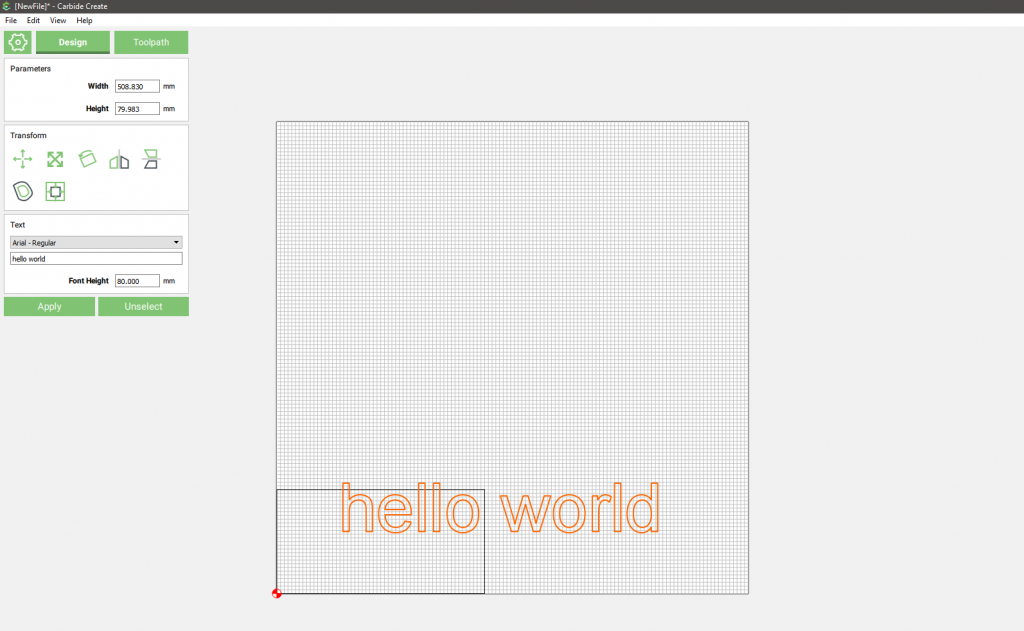
Carbide Create* for example, allows you to make basic designs that are perfectly suitable for creating simple signs and 2D designs. However, making parts with many curves or require precise spacing between each other may become very tedious to create in this type of software as you only have the option to create simple lines and shapes and drag and snap the design onto a grid.
An example of designing in Carbide Create
To design more complicated designs, I would recommend using a different design software to first design your projects, and import them into your CAM program.
Here are some of the design software I recommend checking out:
Inkscape (free)
AutoCAD (paid)
Onshape (paid, but free for hobbyists and educational purposes)
Fusion 360 (paid, but free for hobbyists and educational purposes)
Fusion 360 from Autodesk is an exception to the rule that free software only has basic design functionality. Fusion 360 provides high-level CAD and CAM that is regularly used in industrial manufacturing. However, for beginners, it may be intimidating to use, and recent changes to licensing for personal use may affect whether it is free for you.
*I should note that Carbide Create in V7 recently changed so you need the paid version to export gcode for use on other machines. V6 version still should work.
Paid:
Paid CAM programs generally come with more advanced design tools that allow you to design more complicated projects. This can include 2D and 3D design tools, clip art, and support for more importing more advanced 2D and 3D design files. This means that editing your designs and models is easier and more flexible with paid software.
Example of Vectric VCarve Desktop
This feature is particularly convenient if you need to adjust your design to fine tune your final product and you don’t want to flip through two different software to make adjustments.
Personal recommendation:
Find that using separate design software, Onshape in my case, to create designs and exporting them into my CAM software is the method I prefer. This is because I am better versed in Onshape compared to the design tools available in either free or paid CAM software, which makes it faster and easier to manipulate my designs if I need to.
I have found that in some cases, it can be convenient to have some editing options for 2D files and DXFs built into the software in case there are issues in the design but I have found the tools built into Carbide Create adequate.
Most CAM programs support either DXFs or STLs which virtually all design CAD software can export, so I don’t feel like paid software offers much of a lead as an advantage in this case. On the other hand, if you have no experience with both CAD or CAM, it may be a worthwhile investment to become familiar with the design tools that a paid software provides.
Ease of use
Free:
Since most free software are more basic than their paid counterparts, they are also simpler to use. If you’re a beginner user, using simple software can be a good place to learn the basics of CAM software. Easel, while limited in features, is generally recommended as a good place to start learning as it is the most user-friendly option for CAM.
Where things start to change is for more advanced users. Certain features may be harder to execute with simple software, such arraying your design, using advanced toolpaths such as ramping and lead-ins, and creating workholding tabs.
Paid:
Paid software on the other hand tends to allow the use of advanced features which comes with its own level of complexity.
Some of the features available on Carveco Maker software
With so many settings and options, it can be intimidating to use. In some cases, there can be dozens of settings for a single toolpath. Although this allows very granular control for your gcode, messing up on one setting means that you have to root through a lot of different things to find the culprit.
That being said, the default options and selection of pre-set tools tends to be quite good, and most users should be able to rely on those settings to get their cuts going. The layout and workflow also tend to be well thought out and intuitive, making it fairly straightforward to learn.
Personal recommendation:
I believe that if you’re just starting out for the first time, I would recommend testing out some of the free software to start. Free software uses the same basic concepts as paid software to generate gcode. Once you feel comfortable with choosing settings on the software of your choice, I would recommend playing around with a trial version of paid software to see if you find value in having the extra control over your toolpaths and having the extra features is worth it.
Although I don’t have a strong perspective of a beginner using paid software, I have had a lot of LongMill users speak highly of Vectric VCarve Desktop ($460CAD/$350USD on our store) on how easy it is to use. Although there are a lot of features and settings, I have been told that with the combination of the layout and resources available, the software is easier to use than the free software they had come from.
From personal use with VCarve Desktop, I’ve found that picking up the software was fairly easy to do if you have general knowledge on using other CAM softwares.
I would recommend trying both free and paid software and comparing to see which is more intuitive. Even though paid software may be intimidating with all the extra features, I have found that the software is designed to make setting everything up fairly straightforward by following the workflow.
Toolpathing algorithms and simulations
When you create your toolpath in the CAM software, the program must determine what the most efficient way to move the machine is to reduce the run-time as well as provide the best cut. The more sophisticated the algorithm, the more efficient the toolpaths will be. Most CAM programs offer some sort of toolpath visualization or simulation as well so you can see what your machine will do before you start the job in real life.
Free:
A common complaint about free software is that the toolpathing can be a little baffling. For example, having the machine cut the letters out on a sign in a seemingly random order rather than go left to right for example.
Example of CAMotics showing a simulation of Carbide Create
You can see in this photo that the first rapid movement (shown with the red line) goes from the bottom left to the upper right section of the workpiece, rather than the closest feature to the starting point. This is just an example of the software choosing a less efficient path to complete the job.
With all of the unnecessary movements, the cut time can increase dramatically, from my personal experience, anywhere from 10 to 30%.
For most hobbyists, this may not really be an issue for several reasons. It may not matter to you very much that it takes a few extra minutes to complete a job, as you can just wait around for the project to complete. It may also be more convenient to just let the machine do its thing than spending extra time to find a way to make the toolpath more efficient.
Free software generally only come with a fairly primitive form of simulation, which may either just use lines to show you where the cuts will occur or a model of the final cut in relation to the material.
I find that for simple projects, this simulation or preview is adequate, but if I want to do some more advanced simulations, CAMotics offers a very good free option for gcode simulation. I regularly use CAMotics to troubleshoot bad gcode and even with code from paid software.
Paid:
Toolpathing on paid software is generally more efficient and better though out, and in most cases, have the option to edit and adjust the order of each cut operation. This is particularly useful if you are creating toolpaths to work in a production setting, where shaving minutes off the total cut time means extra profit, or you have a complicated or long-running job that can benefit from the extra effort of setting up the toolpaths.
In most cases as well, the software takes into consideration the type of motion that results in the best quality cuts and increases the lifespan of your end mill as well. For example, depending on the type of cut, the software may automatically determine if you need to use a climb or conventional cut.
Simulation for paid software generally tends to be a bit more accurate and informative, however, I tend to still rely more heavily on CAMotics for simulations if I need more detail.
If you’re running a business where time is money using a paid software can save cutting time, allowing you to complete more projects per day.
Personal recommendation:
A lot of times when I’m working on a project, having a few extra minutes of cutting time isn’t really a big deal, and so free programs are more than adequate. In cases such as when we had to cut the dust shoe bases out of plywood in house, having more efficient gcode made a significant difference in the turnaround time for the parts.
If you are making a lot of the same part over and over again, or want to speed up production, getting paid software is a great option. However, if you’re making a small handful of parts in a non-time-sensitive environment, then it should not make much difference.
Customer support and resources
Software costs money to make, and where that comes from plays a huge role on what sort of motivation companies have to provide additional customer support and resources as well as the method of delivery.
Free:
Software such as Easel, Carbide Create, and CAMLab are primarily funded in part by the sales of the machines and other hardware from each respective company. The companies who created this software has graciously allowed users of competitor machines to use and access their software for free. Because of this, direct one-on-one support from the company may be hard to find or non-existent as the financial motivation to provide support may be smaller than for paid software. In essence, these companies don’t have the financial motivation to provide software support to folks that haven’t paid for their hardware products because they are not providing money to help with the development and upkeep of the software.
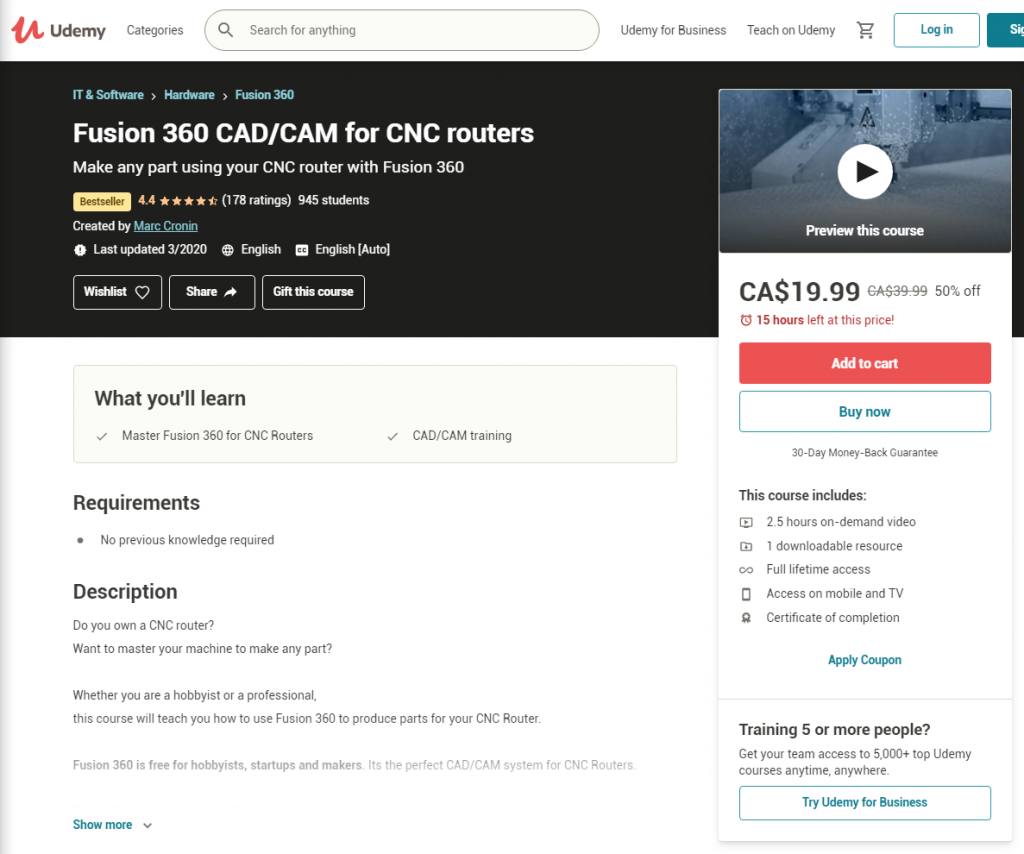
On the other hand, community support for free software can provide a lot of help if you’re having trouble with the software, and for more popular programs, additional resources, videos, and tutorials made by independent creators. For example, Fusion 360 is a hugely popular but also very advanced CAD/CAM program that is widely used by hobbyists. You can find both free and paid courses online that cover all topics for Fusion 360 on platforms such as Udemy and Youtube created by independent creators not affiliated by Autodesk (the company that created Fusion 360).
Paid software generally offers a broader range of support options, including direct one-on-one technical support direct from the company, active community forums and groups, as we as a range of tutorials and resources. Paid software companies will also provide tutorials, project examples, and other additions on a regular basis to keep their users engaged.
You should expect to find web resources and tutorials for every feature of your paid software available directly from the software company rather than scattered amongst multiple platforms.
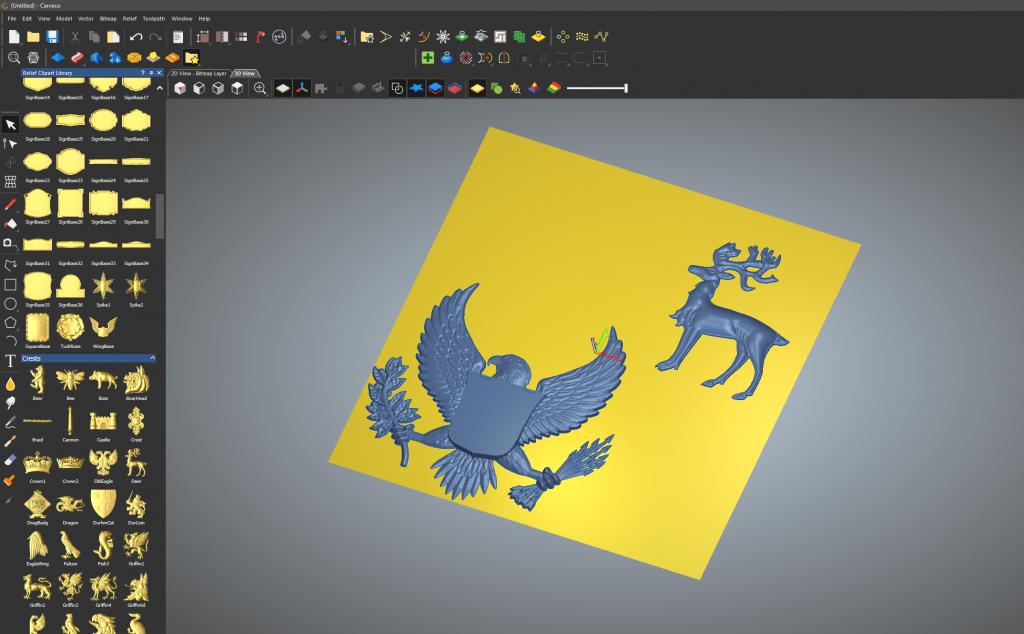
Paid software often also comes with high quality clip art and relief designs that you can use for designing your projects as well.
Free 3D relief library that comes with Carveco Maker
Personal recommendation:
If you’re someone who likes to tinker and “throw the instruction book out”, then the lack of resources or the lack of structure for free software may not bother you. If you prefer to have all of the resources in one place to allow you to cover all of the important topics for your software, as well as if you want to follow along purpose built guides and tutorials, paid software may be better.
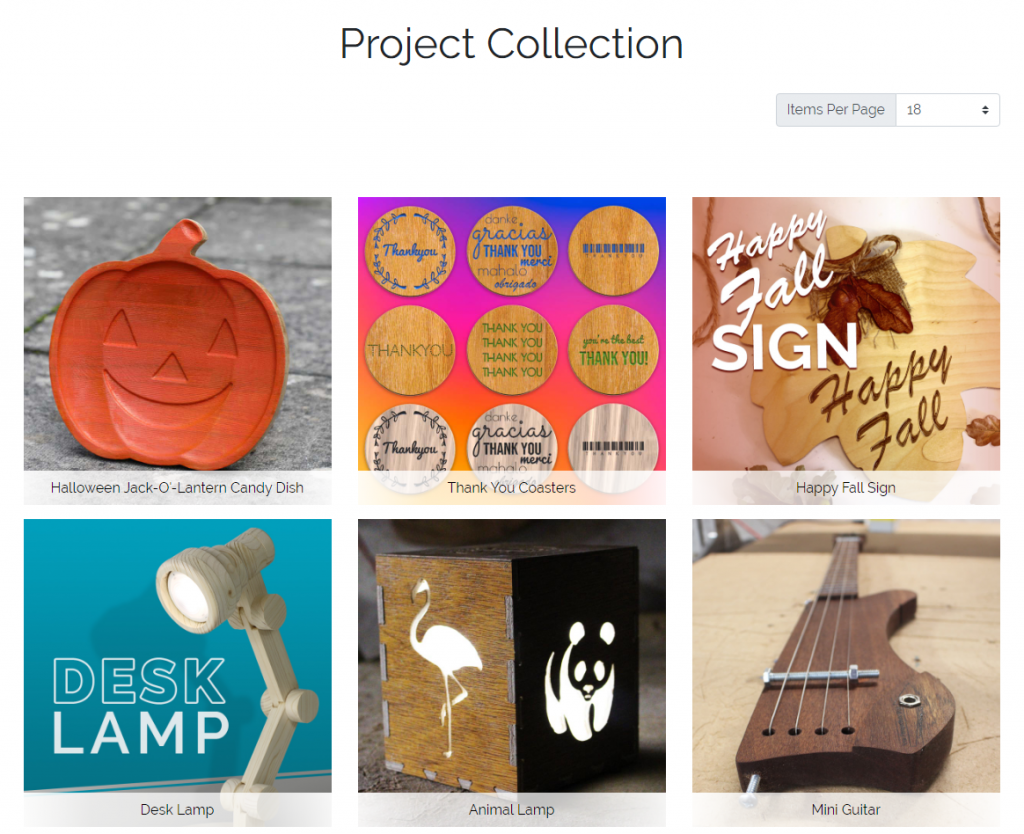
You may also find that having access to free monthly projects like the ones Vectric creates might also be a great selling point if you need inspiration for new projects to try especially if you want to add new products to sell to your repertoire.
Vectric’s project collection
Alternatively, you can also check out this list of sites where you can find free projects and files to use on our More Projects section of our resources.
Conclusion
I hope this article highlights some of the pros and cons between free and paid software and helps you decide whether buying software is worth it for you.
As a wrap up, here are the reasons why I think you should stick with free software:
You’re just starting out and learning the basics.
You would rather set up jobs quickly and spend less time on the computer, even though it may mean waiting for the machine longer to cut.
The type of projects you want to do are fairly simple.
You are proficient at CAD or other design software and can import your design files directly into your CAM program.
Here are reasons you should consider paid software:
You’re cutting a lot of parts over and over again and want to increase your throughput.
You value having more thorough resources and documentation for your software, as well as having access to project samples, reliefs, regular tutorials, and other curated content from your software provider.
You want to take advantage of advanced toolpaths such as ramping, texturing, and more.
You want software that is future and feature proof to your growth and learning.
I hope that gives a good comparison on some of the key differences between free and paid software. If you have further questions, feel free to reach out at hi@sienci.com or consort our Facebook Group and Community Forum!