We’ve been holding our breaths for these boards to finally arrive. They are finally here! We’ll be doing the final assembly, QA, testing, and assembly for the boards before we pack them into kits.
Final board enclosures will be made from stainless steel and acrylic, and will be pre-assembled in house.
Here are some features:
– Detachable screw terminals for power, fan, coolant control, spindle control, probe, motors, and end stops.
– Pause, Play, and Stop buttons
LongBoard enclosureThese boxes hold our boardsTesting jig for the LongBoard
New 3D printers
Adding to our 3D printer bank
With the continual influx of orders, to boost our production rate for printing, as well as the additional dust shoe orders that have come in, we’ve added another 24 printers to the farm, for a total number of around 37-38 total printers!
Some small improvements we’ve made to printed parts:
– Stronger front Y axis mounts
-Stronger, easier to install Y axis drag chain holder
Woodstock Woodworking Show
Thank you to everyone who came out to the woodworking show in Woodstock! We had a blast there. It was awesome to meet a bunch of our backers, as well as other people in the community, and it was a fun way to get our heads out of production work for a little bit and actually get to talk to woodworkers.
Our next show will be in November at the Hamilton/Ancaster Woodworking Show November 8-10th! Learn more at: https://woodshows.com/Hamilton/
First batch of shipments
The first batch of shipments will start to trickle out soon. We will get in touch with backers who will be receiving their machines in the next few weeks via email/phone. If you have not answered your surveys, please do so.
Surveys
Thank you to everyone who’s answered their surveys! Everyone at this point should have gotten their surveys. Please check your inbox!
You might have seen on our last update that we were in the process of looking for a place to move to, or at least move to a different part of the building at 44 Gaukel. As time went on it looked more and more challenging for us to do so, and we focused more of our efforts into moving out to a new building all together.
Given that we only had about 2 and a half weeks to find a place to move, we were in a bit of a rush to find a new place. Luckily, we found a place nearby that had everything we needed, and an awesome landlord that helped us move in early and get the space set up.
All of the filament and other parts have showed up (finally)
400 sets of drag chains packed
All of the filament, as well as other parts have finally arrived last Friday! Getting everything in ended up taking a lot longer than expected, especially because of the customs delays.
This means we will be busy packing up these items over the next few weeks, as well as getting the print farm up to speed on new parts.
1/4″ end other add-ons!
Now that we’ve received and packed all of the end mills, the remaining bits are now on the store!
If you want to order other stuff for your machine, we’ll have a coupon code for free shipping for add on items that we can ship with your machine. It will be included in your surveys when they come out. More details are here: https://sienci.com/2019/07/26/ordering-extra-stuff-with-your-longmill/
If you are not sure of what items you ordered with your machine, you can calculate it out based on your pledge amount. Please check your account and pledge amount if you are unsure of what items you opted in for.
Electronics board design
We have finalized the design for the LongMill’s electronics board. A special thanks to Jeff from JKVC for giving us a once over for the design. Another special thank you to Chris Hajduk for working on this project with us!
We’ve made some changes to the parts and design of the board in the last few weeks to improve its safety and reliability, as well as easier to use features like the end stops and touch plate on the board, especially for people who will be adding their own functionality.
This is our last step in the LongMill’s manufacturing process. Once we have those, we will be able to ship out the machines. Current estimates for production is around 28 days. In the meantime we will be packing as much of all the other things as we can. Stay tuned for more updates on that.
Thank you for everyone who have filled out their surveys. We have sent out surveys for all *Early Bird* backers. If you backed the Kickstarter after the first three days, the surveys for those have not been sent out yet.
We did make one small mistake. In the section that lets us know what add-ons you selected, there is no option if you did not get an add on. If that is the case, please select one of the add-ons and note that you did not order any add-ons in the Kickstarter.
If you have any topics you want included in the resources, feel free to leave a comment and we’ll add it to our list of things to write on.
Electronics boards
Our last batch of parts we are waiting on are the electronics boards. We are expecting them to arrive in approximately 2 to 3 weeks given that there are no delays. There was a delay with acquiring some of the PCB components in China, but the boards themselves have all been made.
Once the boards come in, we will start doing some of the assembly here, which includes putting in the drivers and assembling the cases for them.
Our goal is to pack all of the other components up first and ship as quickly as we make the electronics. As this is our last part, our shipping time is more or less up to when these boards show up, but it should happen within a week once they arrive. We will update backers on the progress. Thank you everyone for their patience!
You might have noticed that the Mill One V3 has been out of stock for a few days. The reason is because we are out of aluminum rails for them (although we think that we might have a few left lying around in the office somewhere). We’re at the end of the production batch for this set of Mill Ones, and we’ve cleared out most of the parts used for the Mill One.
With the recent success of our Kickstarter campaign for the LongMill, and its ongoing sales, we’ve had the opportunity to buy parts and materials in volumes much larger than we’ve ever been before. It has also allowed us to use parts and components that were otherwise harder to obtain in lower volumes. There are also new parts and materials that didn’t exist when we first designed the Mill One which are superior to old parts.
We want to take this opportunity to refresh and improve the Mill One with new parts and a new design. We believe that since we have the opportunity to make a better machine, we should take it.
What does this mean?
The newest version of the Mill One (or Mill Two?) will come with better, higher quality components that will make the machine better.
The new design will be better and more powerful, drawing from years of design and manufacturing experience we’ve gained through building the Mill One and the LongMill.
It will be a few months until we’ll have a new machine available.
If you have a Mill One and need support and parts, feel free to get in touch with us. We’ll still be able to help you out. If you wanted to get a machine but missed out, we still have designs available online if you want to make your own.
Make sure to stay tuned for updates on further development.
Hey everyone! We’ve been getting a lot of excited people for our dust shoes, end mills, touch plates, and all the really cool stuff that we’ll be selling alongside the LongMill.
Brand spanking new 1/4 inch end mills
Don’t worry, we’ll make sure everyone is going to be able to order stuff for their machine, as well as get it shipped alongside everything else.
We are currently in the progress of completing the product pages and doing all the work to get that up, they will be available before your machine ships.
We will be providing a coupon code that will allow you to order items for your machine with free shipping since we will be putting it alongside your machine. We do not plan on releasing that code until all of the items have been uploaded so that customers can make the full purchase in one go instead of having them split up.
Kickstarter backers will get the code in their survey. Folks who placed a pre-order will receive a follow-up email.
You will be able to include items such as:
Touch plates
Dust shoes
End mills
T-shirts
and anything else in the store.
If you want to order something right away and have it shipped, we will ship your items out within a few days.
I will cover some of the details on how production is going for the LongMill. A lot of stuff here is an update on some things in progress from the last update.
Gantry plates
I’m happy to say that the first batch of the gantry plates have come in. We haven’t gotten around to checking them thoroughly yet, but we will do that in the next few days and start to pack them up. As so far as I can tell, they look great!
The remaining plates will be completed next week and will be sent in to be powder coated.
Stacking the first batch of plates in storageAfter gantry plates are loaded into the trunk, the car drops down by 6 inches
NEMA 23 stepper motors
Manufacturing for all of the stepper motors finished on Monday and are being prepared for shipping! Our plan is to ship part of the batch of around 400 motors through express shipping (1-2 weeks) so that we can pack and ship them immediately, and the remaining 1200 motors by boat (4 weeks) so that they will come in when by the time we get through to ship the first 100 machines.
We have done extensive testing on these motors, and we are really happy to say that the quality of these motors and the performance we’ve been getting has surpassed the motors used on the beta testing machines. Not only do they provide more torque, they run cooler (after around 16 hours of running at full power, around 47-50 degrees for the new motors versus around 75 degrees on the old motors. We are using a new supplier that provides higher quality motors.
Power supplies
Testing is complete with the new sample power supply. We ran tests on it alongside our new board for 22 hours straight, as well as over the last two weeks on our LongMill. I am happy to say that the power supply has been working fantastic (running at around 39 to 42 degrees) and as so far, no issues.
The power supplies have been ordered and should also arrive in a few weeks. We will continue to use the power supply to see if there is any other issues that crop up.
Control electronics
We have assembled our prototype CNC control board and have been putting it through rigorous testing. This includes running the board at full tilt overnight as well as using it on our LongMill for testing and cutting. The board has been working reliability with no issues so far.
The drivers that integrate with the board are expected to arrive on Thursday. We will make one final test prototype with some improvements that will improve safety, ease of use, and reliability before making the full batch.
After hours of real world use
Packing progress
So…much…packing
We’ve been packing things as they have been trickling in. Some items include:
– Couplers
– Router mounts
– Aluminum standoffs
– Aluminum rails
and everything else that has been coming in.
We are trying to pack everything as soon as they come in and put them in storage so that they are ready to go ASAP once we have everything arrive.
If you’re in the KW area and want to come pack for us as well (during office hours 10AM to 5/6PM), send us an email at hi@sienci.com.
Rails in the process of getting packedWrapping and labeling aluminum router mounts
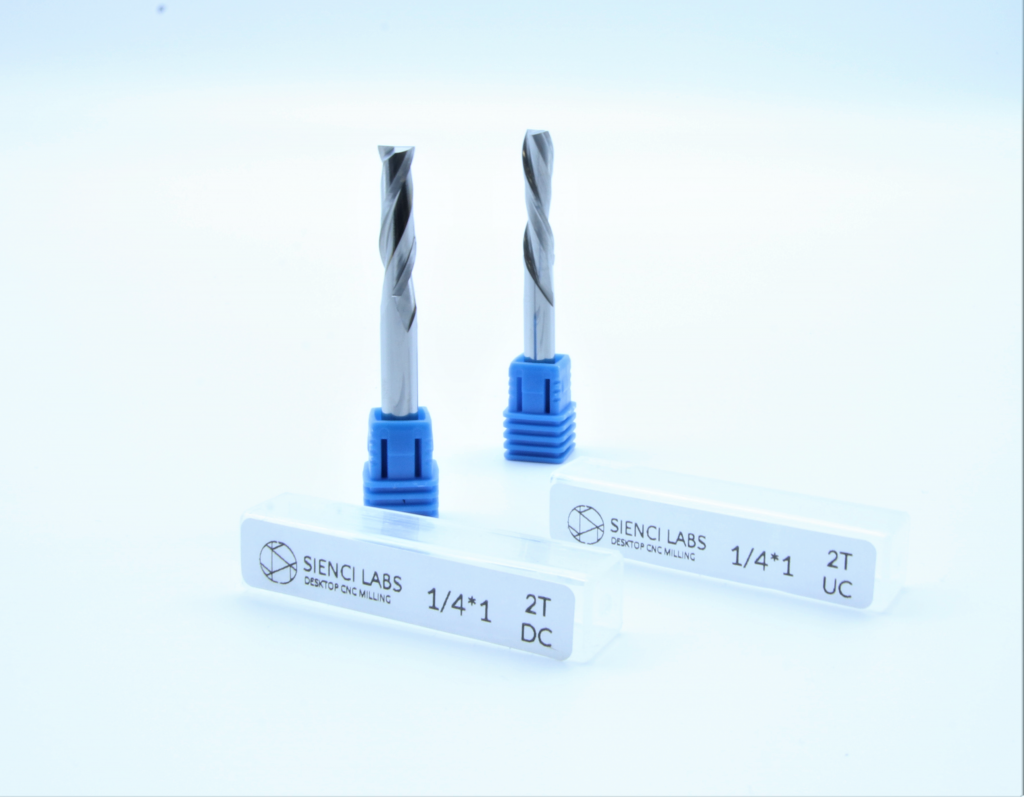
End Mills
We also got in all of the end mills that are supposed to come with the Kickstarter LongMills.
This includes:
– Single flute 1/8 aluminum cutting end mills
– 1/4 inch upcut and downcut bits
– 1/8 flat and ball end mills
There are extra that we will put on the store so that people can order more if they want/need and we will provide a coupon code so that we will ship those items alongside the LongMills for free.
Documentation
We are slowly starting to work on documentation. That means everything from unboxing, assembly, to running your first job. This will be on our website, but we are still working on it. It will be in a similar format to the Mill One resources
Please note that these dimensions may change by a bit, and I would recommend waiting until the final CAD has been released (when machines start to ship) before building things for the machine if they rely on exact dimensions.
Wrapping up the update
Stay tuned for the next update and thanks for following along! Although we are a few weeks behind, thankfully things are moving along and we are still sticking to the plan.
Thank you everyone for their patience and support, until next time.
Progress Update #6
Hi everyone! We are slowly reaching the final stages of our production, and we are working on the remaining details for the LongMill.
Here are the last remaining things that we are working on:
Finalizing the details and design of the LongMill shield before manufacturing.
Complete packing for many of the parts
Continue 3D printing parts
Finalize the design of the dust shoe
Below are more details.
LongMill electronics
We have done extensive testing on the new electronics. We will call it the “LongBoard” for now. I don’t have a better name for it yet. It appears all of the functionality is working well.
Before we go ahead with final production of the boards, we have made some small changes that improve the safety and reliability of the boards. The prototype boards are complete but we are still waiting on some of the components to come in to complete the board for final testing.
Packaging
We are going strong on the packaging, with two people working full time on all of the packaging, we will be implementing a second evening shift to increase our packing speed. We already have been working on packing all of the rails, gantries, fasteners, and other hardware. This week we should be seeing the remainder of the hardware such the lead screws, delrin v wheels, linear guides, and bearings.
3D printing
We’ve put 3D printing on hold for about a week and a half since we have run out of filament. Our new batch of around 500kg is estimated to arrive in the next few days. We will continue to print components for the LongMill on an ongoing basis as we pack and ship units.
Dust shoe
We are making some changes to the dust shoe design to improve the performance and ease of use. We have found that prolonged use and vibration can cause the dust shoe to unclip from the front. The new design is significantly more robust and provides more flexibility on the Z axis to adjust the height of the shoe. We should be able to finalize the design this week and start working on printing the shoes for shipping.
————-
Some other news
New touch plate design
We felt like we could make a better touch plate so we did. Backers who placed an order for the touch plate will get the new and improved touch plate.
This touch plate not only lets you find the Z height, but also find the corner of your part.
The only full complete assembly that reflects the final production machine is the one that is in the root directory (the 30×30). The full complete assembly of the 12×30 and 12×12 have not had a full assembly complete yet.
The parts and design files are a bit messy. Please use them at your own risk. They will be cleaned up and better documented over the next few weeks.
Some of the components may go through some iterations over time.
The link to the open source documents may change.
If you have any questions about the design please hold them for now. We’ll be happy to answer any questions once the design files are complete complete once we start shipping.
Moving?
To add to the fray, we’ve been caught in the middle of a renovation project by the City of Kitchener to demolish our office space at 44 Gaukel to rebuild new offices on the first floor. Our current plan for moving is to go to the upstairs of the building. Moving is of course somewhat inconvenient, especially at this time.
We would still be able to keep the storage and packing space in the back of the building, but in the next couple weeks we will have to figure out where the future home will be for Sienci Labs.
For the time being, the Accelerator Centre and the City have agreed to help us coordinate and assist in the move. Chances are we will temporarily move our operations upstairs before finding a new, more permanent home for the company.
As we continue to move forward, we expect that the company to grow and expand, and that means having a space to house everyone. We’ve gone to a team of 2 to a team of 8 already, and our space is slowing becoming more and more cramped.
Stay tuned for more details!
Again, wrapping up this update.
This feels like a bit of a shorter update. Now that a lot of the leg work has been done, we’ve got a lot of tiny little things to sort out. Thank you to everyone for their support again, and I was very thankful for everyone who’ve been showing their support and excitement online and through messages. It’s also been pretty cool to meet a lot of excited backers who have been dropping by our office.
I’m happy to say that production is moving smoothly for the most part, with the exception of a couple of different parts that we’re still waiting for.
I’ll start off with all the things that are going to slow down production before I fill you guys in for everything that’s moving along well.
I would say first batch of shipping right now will happen in August, but we can do a few things to catch up and ship at a faster pace once shipping happens such as pre-packing the stuff we already have. I will try to hire some extra help to get thing pushed out if need be.
Some smaller things that are in progress:
– 3D printers are running full time, we have about 10 or 11 machines churning out parts
– We are pushing the manufacturers/suppliers to send us parts ASAP. Some delays on shipping/production on that side that we don’t have much control over at this point.
– All of the gantries are in the middle of being cut and painted. Because we have so many parts, they will be batched out over 4 weeks.
Power supplies
We are currently in the middle of dealing with sourcing power supplies. The power supplies that the beta testers have been using are open power supplies, which are a little more dangerous (open mains, exposed electronics), so we are trying to switch to a closed power adapter. Our supplier provided us with a power supply that we set out to test.
Testing was done by basically connecting all of the motors and drivers together to provide a realistic type of load, and we cranked up the load by adjusting the current and speed to the motors.
The idea is to run the drivers and thus the power supply for a long time to see if they fail.
Well, after about 1 hour of testing the power supply, just stopped working. We’re not really sure why, but we opened it up, and we couldn’t tell if there was any physical damage inside. The supplier has arranged to send us another power supply.
Once we get it (hopefully at the start of next week), we’ll put it through testing again to make sure that it can run reliably.
After we complete the testing, assuming that the power supply works well, it will take about 3 weeks for it to be made and shipped to us.
A janky test setupInside of the power adapter
Control electronics
We’ve gotten our physical boards made up, and our next step is to assemble and test the boards.
The last two components, the power barrel plug and the voltage regulator are two parts that we’ve had some issue getting in. We’ve ordered the parts, but we are still waiting on the supplier to ship.
We may be able to put it together partially to test most of the basic functions however, so I will provide an update on that later.
We’re pretty excited about this new board because:
1) It will make it a lot easier for customers to assemble the electronics
2) It will provide support for many features that customers have been wanting, which include end stops, touch probe, spindle control, and more
I expect that the remaining parts will require another week to arrive, and the final production batch to take about three weeks once the testing is complete.
Raw PCB
These are the two things that right now need to be ironed out. Here’s some updates on some good progress we’ve made however.
Lots and lots of aluminum
We got our batch of freshly drilled, milled, and tapped rails in this week!
With 6 people, it looks us just under 1.5 hours to unload all the materials. A good morning workout.
Jason posing in front of the railsRails in our storage room
We’ll be cleaning, wrapping, and packing them starting next week!
Packaging
As we have parts come in, we’re working on getting packaging materials in so that we can start pre-packing materials.
We’ve come up with a basic design of having four cartons on the top and two on the bottom like in the photo. One large carton will carry all of the small parts.
Having these separate cartons should make it easier for us to pack all of the different variations between the different size machines, add-ons, and other bits and bobs. We will try to pack parts into cartons as they come in and set them in storage so that they are ready when we start shipping
Lots of cardboard
Surveys and other details
Please read this part carefully.
You want to make an adjustment on your order/pledge
A lot of people have been messaging us to ask for additional add-ons, changes to the size of the machine, ect. We can help you with that. If you are wanting to make a change, please follow these instructions.
1) If you need to change the size of your machine (eg 12×30 to 30×30), please wait until you receive a survey from Kickstarter, which will ask you for your shipping address and other details. We will have a spot for you to tell us if you want to change the size and to what. Please wait until you receive the survey.
2) If you want add-ons, end-mills, or anything else to ship with your machine, we will set up a page on our website to allow you to purchase those things. We will provide an update with further instructions so that you will receive free shipping on those items.
When will I get my survey?
You will get a survey a few weeks before your machine ships. You’ll have plenty of time to fill it out, so don’t worry that you’ll miss it. When it will come out will depend a lot on how the production comes along, since we want to focus on that first. We’ll put it in the later updates on more clarification on when you should expect them too.
– Lead screws, pulleys, couplers, bearings, collars, acme nuts, and other transmission parts
– Aluminum rails and linear guides
– V-wheels and eccentric nuts
– Arduinos and drag chains
We expect that these items, will be complete or have arrived near the middle and end of June.
The motors however, are estimated to arrive in early July since it takes a few weeks to manufacture.
Here are the things that still need to be ordered:
– Power supplies
– Drivers
– Some of the fasteners
– Gantry plates
We expect to have the remaining electronics parts to be ordered in the next week or two. We were trying to make sure that all of the specs for the electronics are up to par and are as safe and reliable as possible. However, with waiting and testing for samples, things have taken a little longer than expected. For example, making sure that the DC female connectors are able to handle the full current from the power supply, and running the driver for many many (15+) hours to check for drifting and temperature.
Below: Stress testing the drivers for drifting and temperature change.
With this in mind, we expect that parts are estimated to be arriving in mid-July because they are being ordered later in the game. Backers (at this point) should expect shipping to start near the end of July.
A new shield
The beta testers will know that we used a ST25 shield with the Arduino involves a complicated nest of wires. This makes assembly complicated and unreliable.
An ST25 shield
We’ve created a new shield that will make the wiring easier, along with all the features so people can add more easily:
– Endstops/Limit switches
-Z axis probes
– Spindle control/lasers!
New LongMill shield
Some small improvements you can expect
Between the beta machines and the newest machine, here are some minor improvements you’ll see.
– Aluminum router mount (discussed in previous updates)
– Better bearing support on the lead screws that can support more forces
– Some small tweaks to the gantry design to offer a little bit extra travel
– Steel motor plate on the Z axis to improve heat dissipation for super long jobs
– Lock nuts in as many places as possible
Example of the Z axis motor mount plate
Shirts
Thank you to everyone who commented/messaged us letting us know that they are interested in shirts!
T-shirts have been ordered from DNA Screen Printing situated about a block from our office. Shirts should be ready at the end of the month and will be shipped out as soon as they are done. If you haven’t completed your survey yet AND YOU ARE A BACKER WHO ORDERED A SHIRT, please do so.
Also, just out of curiosity, is anyone interested in buying shirts from us? Should we make that available?
New printers in the 3D printing farm
We’ve added a bunch of new printers to our farm! We’re in the progress of testing all of them and setting up them to print parts for the LongMill. We will be making a couple of mods to the printer this coming week to ensure that they provide the best quality prints.
We’ve ordered new filament to be shipped to us (about 500 rolls of filament), but chances are it will take a few weeks to show up. In the meantime, we’ll be ordering filament from a local supplier to keep the print farm running.
Aluminum rails
Material for the rails have been ordered and should be at the manufacturer at the start of this week. From there it should be a few weeks to have them all cut, drilled, and tapped.
Gantries
Design for the Z axis gantry has been tested in steel (versus aluminum like in our last test). Seems a bit more solid which is promising. We are making some small changes to the X and Y axis gantries before having them sent out to be made. I am hoping that the small set of test parts will be ready to pick up this coming week.
One thing that needs to be considered is the coating method for the gantries. Because there is an interface between the aluminum and the Y axis that needs to have fairly high tolerances. Here are some options that we have:
1) Powder coating: this was our initial coating option and the process we’ve used for the Mill Ones. However, it was brought up that the thickness of the coating can vary, and thus creates some uncertainty on how well the aluminum will fit. We can of course, estimate the coating thickness and make the gap slightly wider to accommodate, but of course we want to have the fit to be as close as possible.
2) Black oxide: this is a new process that was recommended by one of our manufacturers. Essentially, it’s the process of adding a black oxide layer to the steel. Most of the bolts used for our machines go through this treatment actually. While this is a good process is good for tolerances since the coating thickness is very very small, the potential downside is that often times a oil or wax coating is added to the material which can leave residues.
3) Bare steel: all of the beta LongMills do not have any coating on the steel. This of course is the fastest, cheapest, and easiest option, but is probably the less attractive looking. From using our machines, there hasn’t been any rust, but of course the bare steel does…just look like bare steel.
I think that we will try to account for the thickness of the gap in powder coating, since according to our manufacturer has a variation of less than 3 thousandths of an inch, which should be small enough to not make that big of a difference, but it would suck to make around 800 plates to have them not fit properly.
We could potentially do the X and Z axis plates first and powder coat them, and throw in a couple of test Y axis plates into that batch, which may add two to three weeks to our schedule.
Ordering parts from China
Almost all of the parts have gotten ordered from China, there are a few more things to be ordered. We expect everything to show up around mid to late June. Some of the things have been pre-packaged for us in China, making it a little easier to do final assembly.
Final thoughts
We’ve definitely have had to be much more careful in ordering parts and manufacturing especially at the volume we are building, and that has slowed down things a little bit. We of course want to make sure that things are built at the highest quality possible, and done right the first time. Luckily we haven’t hit any major snags besides trying to take things at a quick but careful pace.
I think that I was expecting to have had ordered most parts from China about a week or two ago, but it took a little longer from trying to vet the quality of the parts and get the right quantities ordered. I just wanted to mention this so that people can get an idea on where we are along in the original schedule.
The stuff made in Canada is pretty much on schedule still.
Anyways, happy making!
PS. If you know other people want to get a LongMill that missed out on the Kickstarter, we have a pre-order page on our website available here: https://sienci.com/product/longmill/
If you are one of the fifteen backers who backed us at this tier, a survey has been sent to you. Please fill out the survey to help us get your shirt to you.
Payment processing
You should have noticed that your pledges have been processed. There are a very small handful of people who have had issues with your credit card payment. If your payment didn’t go through and you want to stay on the list, please get in touch with us.
Manufacturing updates
We’re going to cover some updates around the manufacturing here on this update.
Just so everyone knows, we’re still waiting on the Kickstarter funding to come in. We talked with the lending company to spot us some cash between the end of the Kickstarter and when the funding comes in, but it seems that the process took a little longer than expected, the fees for the loan are quite high, and it might be better to wait for the funding to arrive first for some of the larger purchases.
Luckily some of the manufacturers we work with have net 30 days or don’t require us to pay for everything up front so the timing should work out for this.
We’ve also been using the money already in our accounts to start off with some of the smaller purchases, but some of the bigger ticket stuff may need to wait a little bit.
3D printing
As you might have saw, we’ve been 3D printing parts on our two Prusa i3s and at a lesser degree on our two Cetus printers. Due to the volume of all of the printing we need to do, it will be hard to keep up with all the printing. We have ordered 8 new 3D printers to add to our farm to let us produce more parts per day.
Just for the record, the 3D printers that we ordered are the Anycubic Mega-S. One of the reasons we got this printer is because of the Ultrabase print surface, a dimpled glass surface that releases prints right off the surface once they are done with very little or no force. In a print farm scenario, this is really important because from our experience, the most force that a printer experiences in its lifetime comes from removing prints, and by minimizing that, the printers can be more reliable and last longer.
I have been testing and printing on one of the Anycubic Mega printers in the office over the last week or so, since I wanted to order one off Amazon to test quickly before making a bulk purchase, and the print quality and reliability have been good.
I expect the printers to arrive at the middle of next week and we will start putting them together!
Aluminum router mounts
On the last update we were talking about the potential to use aluminum mounts versus plastic printed mounts. We received several samples of the mount last week and have been testing them.
Basically what we did to test was to use a dial indicator to measure deflection at the tooltip by applying a force. The Z height for the gantry was kept the same, and the router was moved to be at the same height for both tests. Pulling 10kg (about 22lbs) from the router collet in the Y direction for both types of mounts resulted in approximately 0.014″ of deflection. Since both mounts have approximately the same deflection, we can conclude that the performance for both mounts are approximately the same.
Here are some other things to consider.
We tested the aluminum mount on an aluminum plate. Aluminum is slightly less stiff than steel, so performance may be slightly better when the plate is made from steel.
The height of the router and gantry, and the placement of the mount on the Z axis has an impact on rigidity as well. The aluminum mount may have better performance depending on where the mount is located on the gantry.
Since the performance of both mount are approximately the same (with more potential for the aluminum to be better), we’ll be working on using these mounts over the plastic ones, but we will have the mounting points available to have printed mounts for the non-standard router sizes.
Aluminum rails
We are just finishing up tallying the amount of rails that we need to manufacture and finalizing the design. We’ve reached out to our manufacturer to get the quotes and process finalized as well as the material supplier as well.
I am also working on finalizing the drag chain mounting points and size which the rails will need.
Gantries
We are planning to pick up a couple samples of the Z axis gantry on Thursday to test with the aluminum router mount, and once that is all looking good, make about 400 of them. As mentioned before, the steel should be more rigid that the aluminum.
We’ve made some small changes to the Z axis that will let us get a bit more Z axis travel which is pretty exciting!
Next step is to have the X and Y axis gantries finalized and sent in for manufacturing as well.
Hey everyone. Thank you for your support and being part of far surpassing our goal. If you are a backer, there are a couple of things you should know and be prepared for. Please read this carefully
T-shirts and dust masks
If you backed us by either choosing the t-shirt or t-shirt and mask option, you should expect to see a survey asking for your size and address within the next couple weeks. Please fill out this survey in a timely manner and we’ll have your stuff shipped out as soon as possible.
LongMill kits
If you backed one of the reward levels for a LongMill kit (any size), you will receive a backer survey through email which will ask for your most up to date delivery address and other details to help us fulfill your order. You should expect this to happen approximately a month and a half before your estimated delivery date. Production schedules will continue to be updated on www.sienci.com/longmill/schedule. Please fill out this survey in a timely manner to ensure we can ship your machines shipped out as soon as possible.
Additional add-ons, such as dust shoes and z axis touch plates will also be uploaded online so that if you want to purchase add-ons and you haven’t through the Kickstarter, you can. We will ship any additional items alongside your machine. Please give us a few weeks for us to put these items up on our website. We will update any new add-ons that are available through Kickstarter updates and through or social media channels.