
Hey folks, I’m excited to share some of the work the gSender team has been doing that’ll be coming down the pipeline as Edge releases soon.
gSender 1.6.3 was recently released, but maintenance is not the only thing the team has been working on – we’re continuing to develop new features on our internal builds to expand our capabilities or meet the needs of common customer requests.
Today, I’d like to show some previews of just some of these new features, available soon for testing as 1.7.0-Edge-1.
Visualizer Improvements
Philosophy
The visualizer has long been the centerpiece of gSender’s interface, letting users see their position, explore their toolpath and tool changes, and connect what’s happening on screen with the physical machine. That said, while it’s received a number of improvements over the years, it’s largely been the same component library.
With this upcoming release, we’ve rewritten the existing library for massive performance improvements and new functionality.
New Visualizer Features
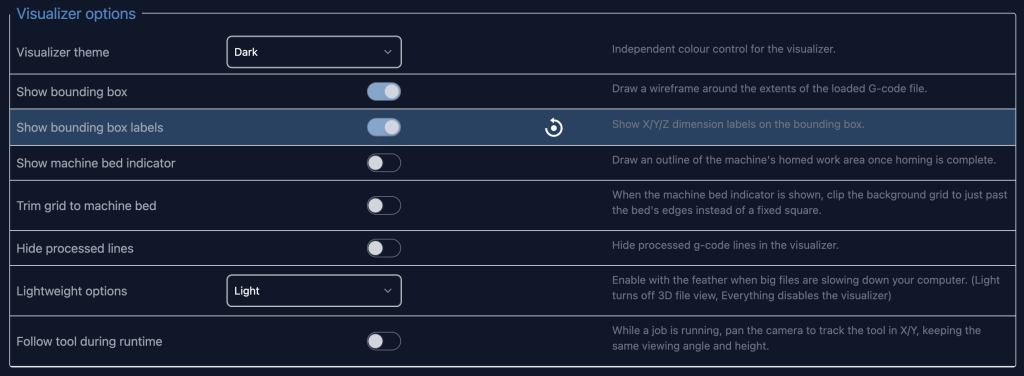
We’ve added so many new functionalities we’ve had to add a new config section just to handle it all, with more to come! That said, let’s go through some of the new features:
Bounding Box and Labels
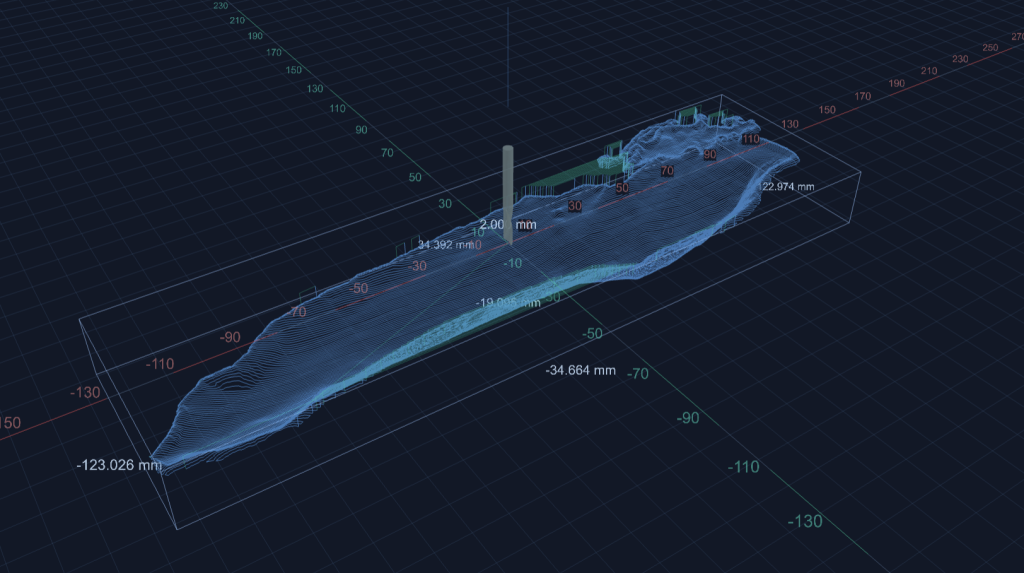
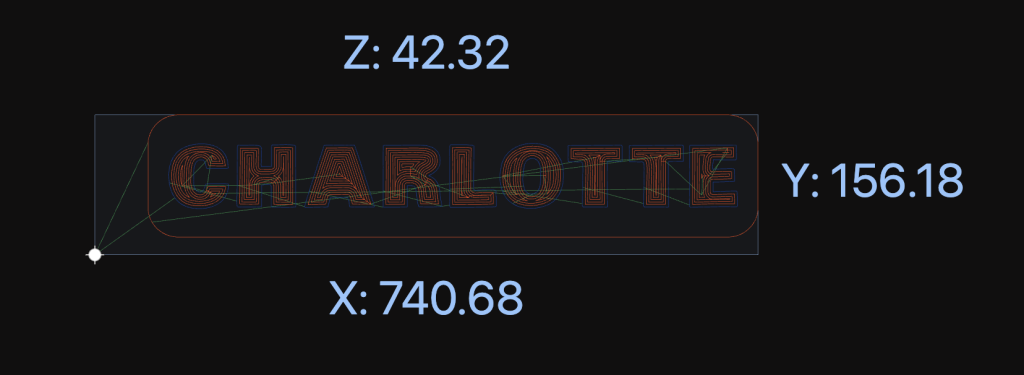
gSender has long included dimensions of your toolpath as part of the file information section. However, it’s not always visible and some users might want to see it represented in the visualizer itself. We’ve added an optional bounding box and labels, to show dimensions in the visualizer itself. This includes min and max values for all 3 axes.
More Colour Themes
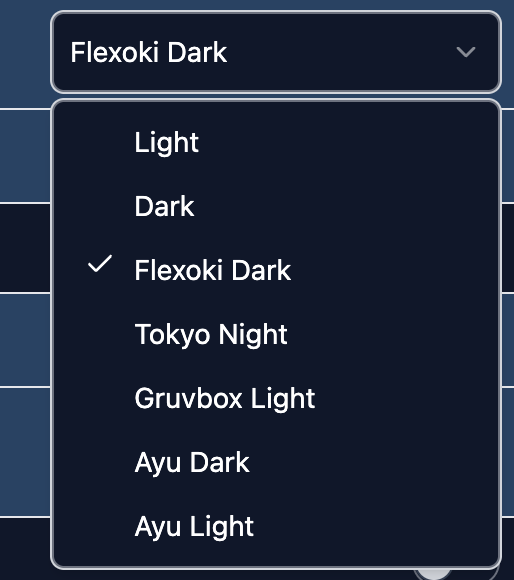
We’ve added a number of new color themes to the visualizer to spice up how your toolpaths look. We plan to expand this with community offerings in the future.
Sharper View
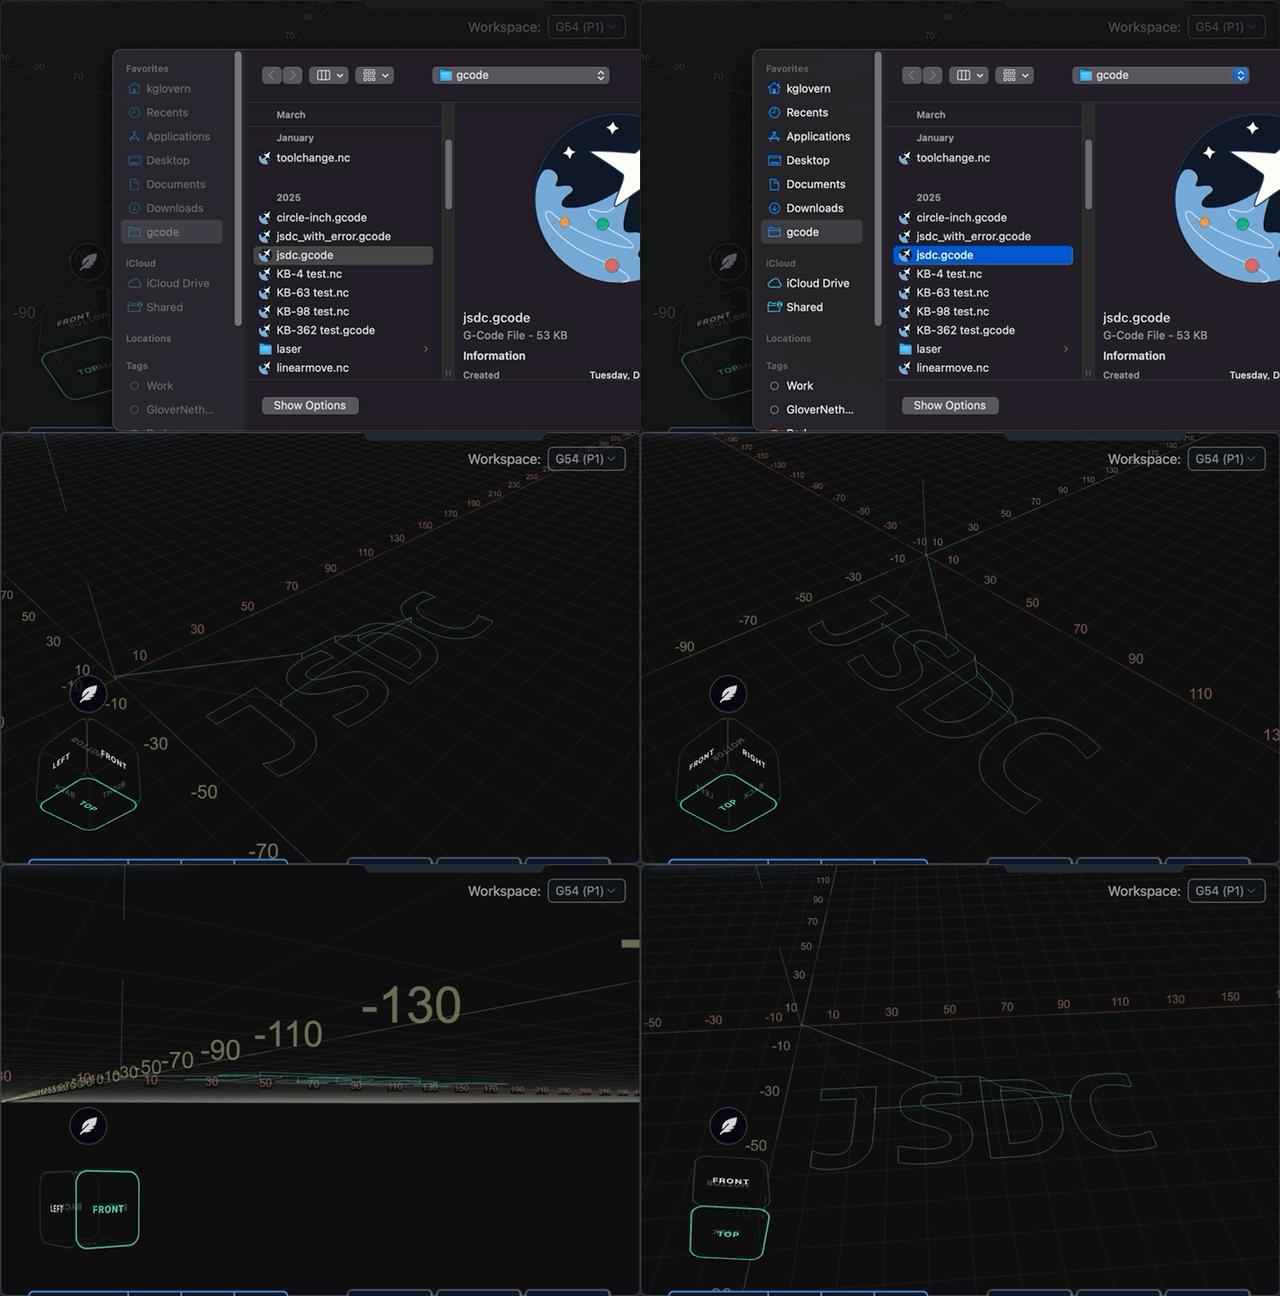
We’ve overhauled how toolpath lines are visualized along with webGL materials used. We’ve reduced the number of axis ticks to cut down on visual clutter and improve performance by reducing the number of sprites. Lines themselves should also look crisper than the previous implemenetation.
We’ve also added smoother camera controls, a fully 3d aware camera cube that lets you easily jump to faces, and better motion control on touch – which adds up to a much nicer experience when interacting with the visualizer.
Better SVG Visualization
SVG visualization should be more performant, due to us aggressively deduping XY coordinates at different Zs. We’ve added a bounding box, and a reference point for where the toolpath zero is located, which is information that was missing in the previous implementation. It’s also now theme aware and includes tool change colors for any files with M6 commands.
On top of that, a simple crosshair now tracks position when running a job – so it’s not just a static image anymore, its a fully usable option when interacting with your CNC.
Machine Boundary and Keepout Indicators
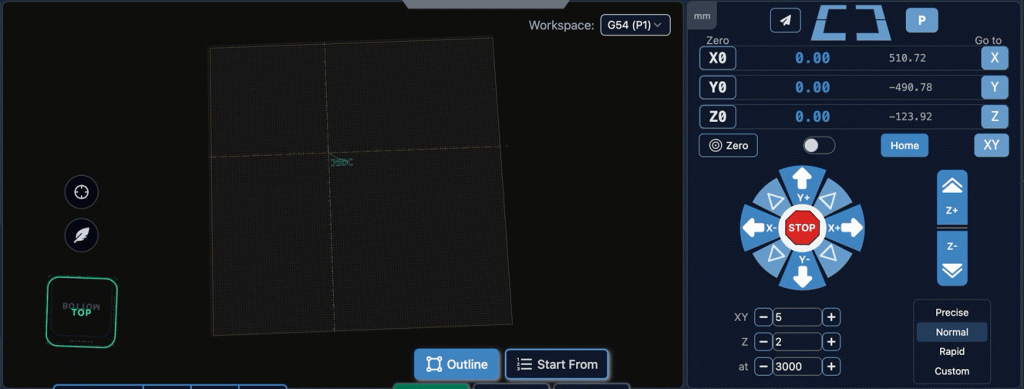
One of the more confusing aspects for new CNC owners is the distinction between workspace coordinates and machine coordinates. With the new machine bed outline and trimming grid options, your visualizer is now a much closer representation of your machine in 3d space.
If your CNC has homing capabilites, when setting a zero, your visualizer will update to show where the toolpath will cut according to your max travel values, making it much more obvious if you run the risk of going outside your limits.
On top of this, if you have an ATC, the keepout area is highlighted, so you’re more aware of the potential to run into that before it happens.
Bringing the visualizer closer to the machine’s actual 3D workspace should make positioning and machine limits much easier to understand, especially for newer CNC users.
3D Visualization
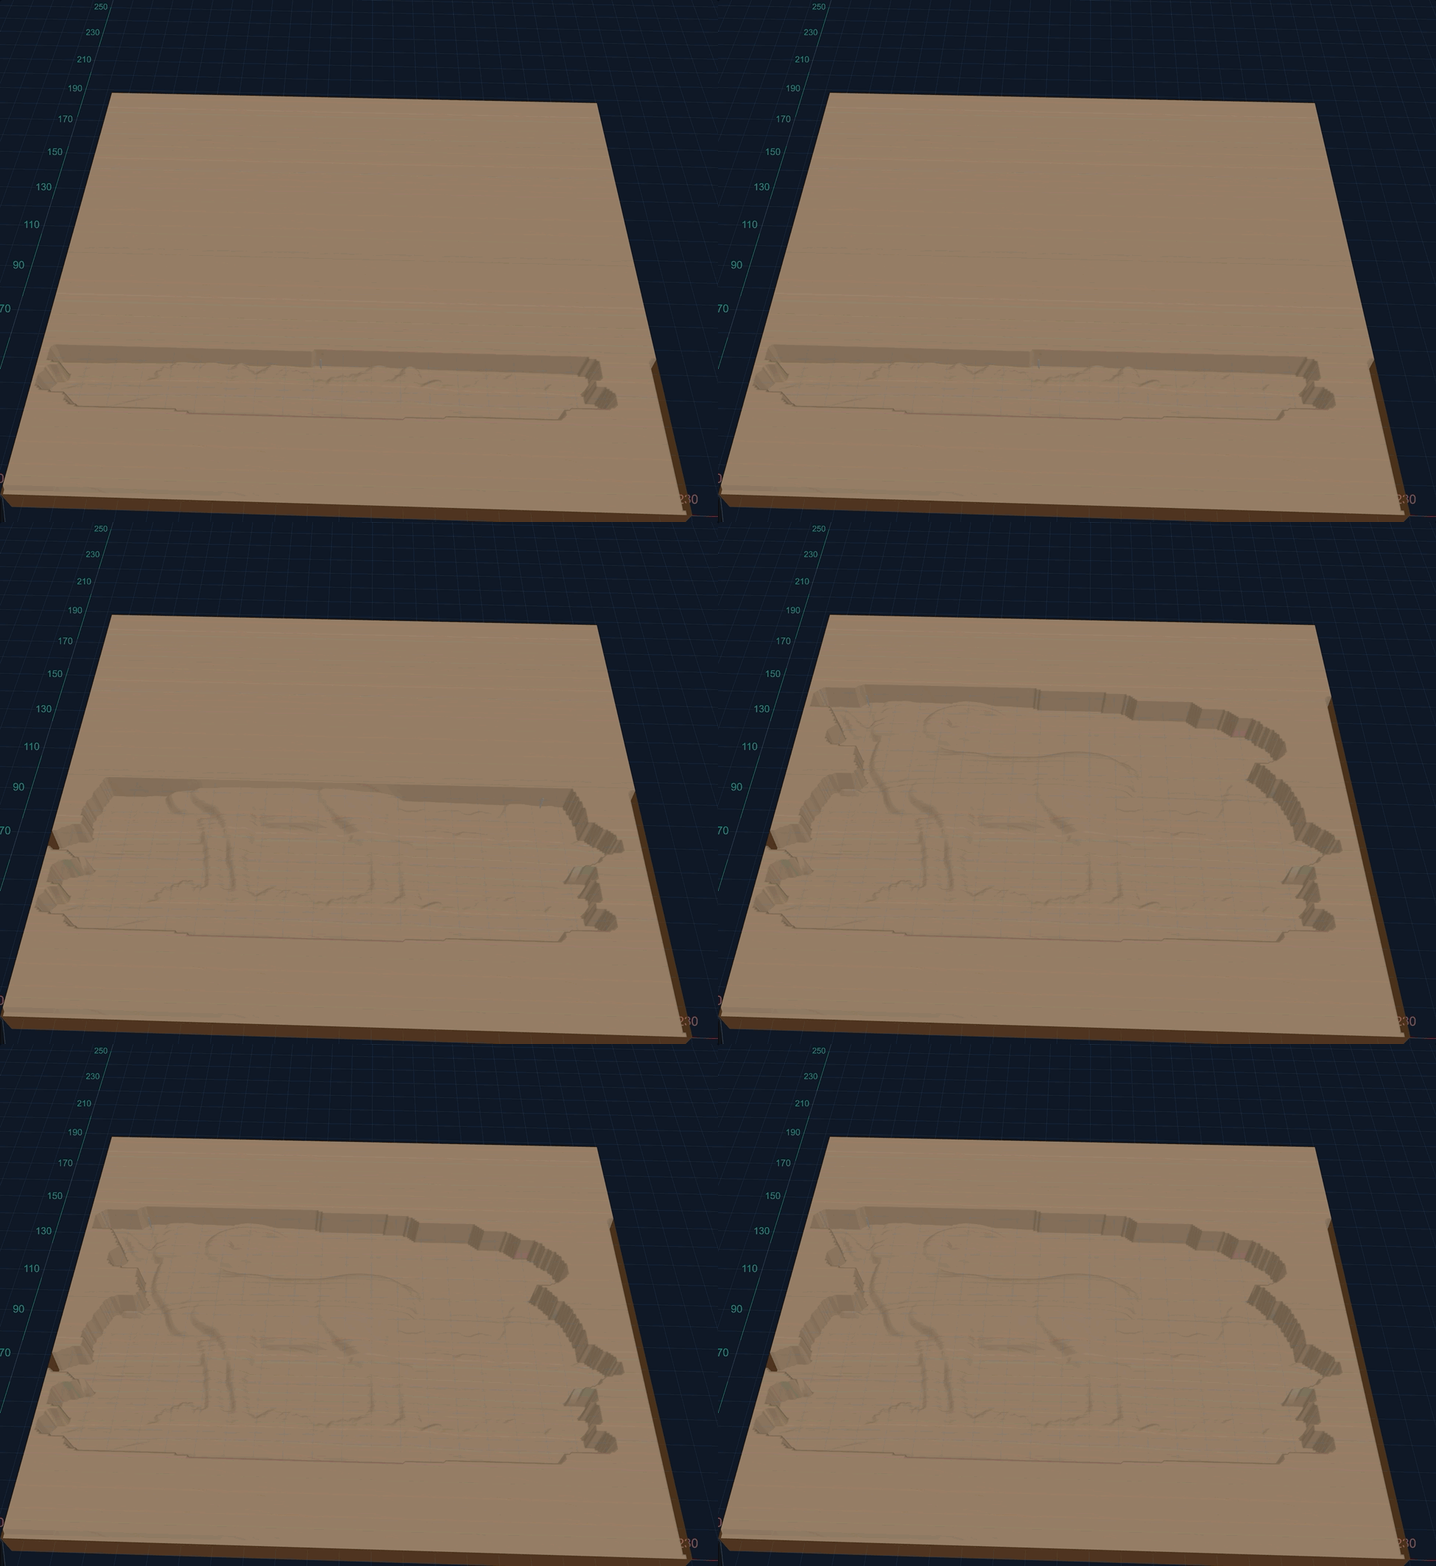
Not ready for Edge-1 but in the works is an even newer way to view your toolpaths – fully 3D! Know what your toolpath should look like before you cut a single chip. We’re not 100% sure where this will integrate yet, but we’re likely looking at a way to step through your file and see the end/in-progress results ahead of time.
Plugins
Philosophy
One of the hardest parts of developing software such as gSender is determining which features we want to add next. Sometimes, functionality is so commonly requested that working on adding it just makes sense. Other times, it’s determined by engineering projects in-house, such as the ATC, which lead to a host of features in gSender. The hard part is determining how and when to tackle the lesser requested features – because not every feature is useful to every user and we don’t want to stray too far from the core value of gSender as an easy-to-use sending software.
Due to this, we’re adding a Plugin system to gSender. A plugin is a standalone tool, usable within gSender, to accomplish any goal the developer sees fit. Plugins are shareable, letting users pick and choose what they want in their sender software.
This also lets the community at large develop features at their discretion for their specific use cases.
One major benefit is that this means functionality can be added to gSender outside the boundaries of major or minor releases – so both community and in-house plugins can become available more often than our normal release schedule.
We’re still honing the user experience, but the goal is to have installing (or removing) a plugin as easy as point and click within gSender, with the ability to disable and remove a plugin with no further issues. Installed plugins are accessible via the Tools page, and managed via the plugins tool.
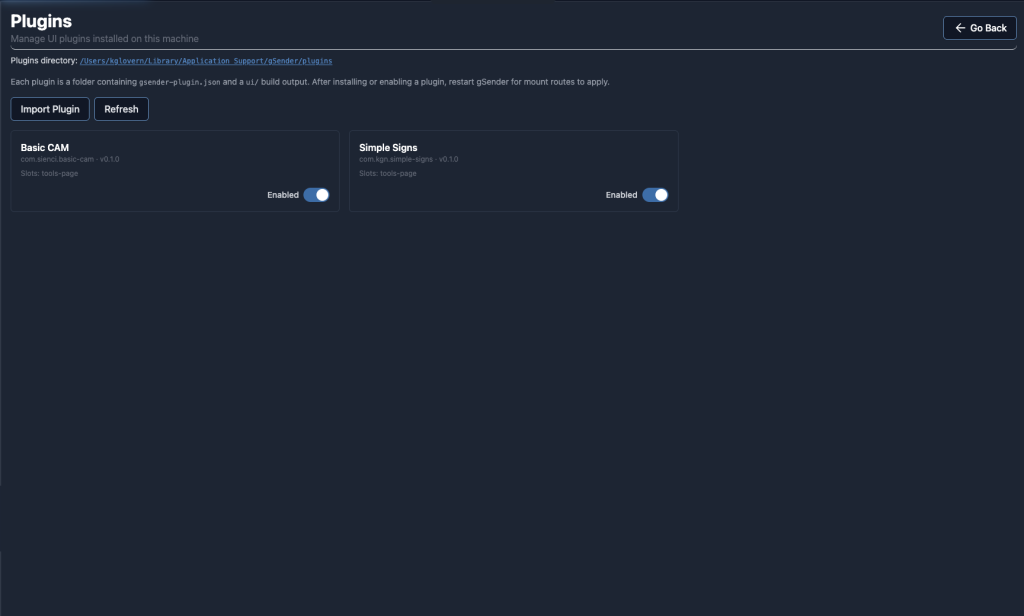
We’re excited to see what the community at large can developer for gSender plugins – but we also have some samples to show off.
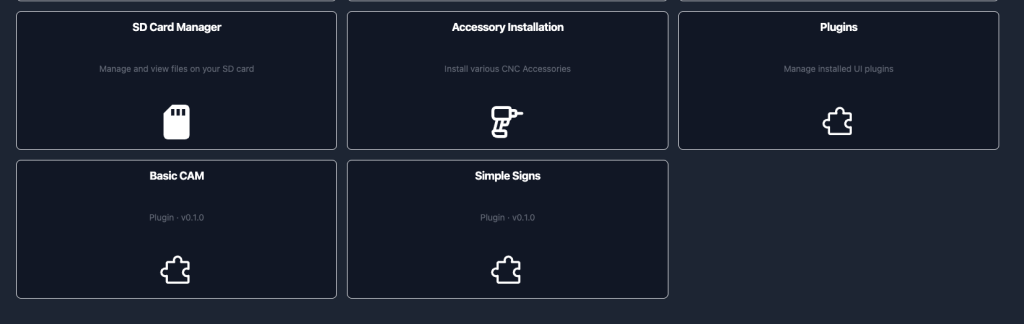
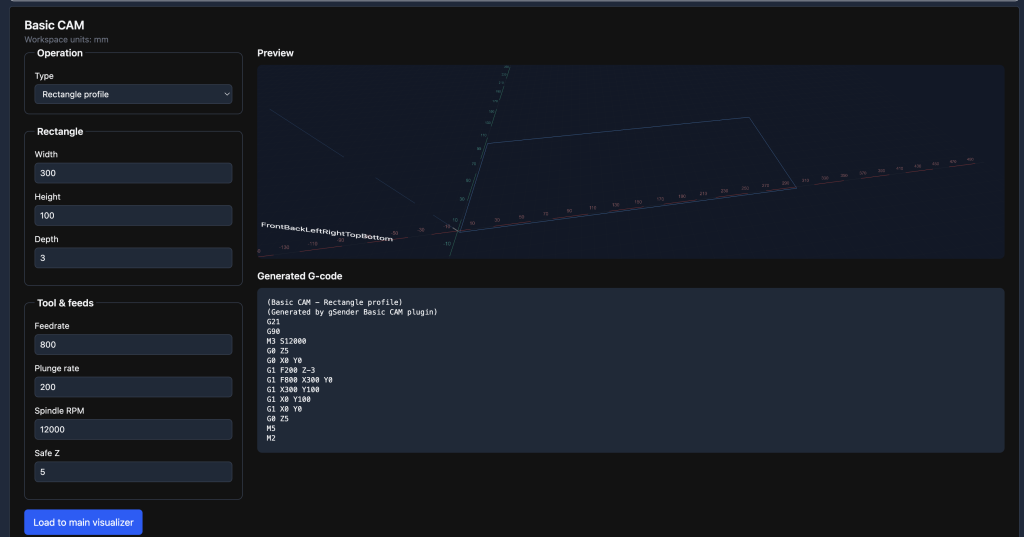
Sample Plugin – Simple Line and Shape CAM
3D Printing has Benchy as a first project, but CNC doesn’t really have an equivalent. You’ve setup your machine, installed your software, and have no easy way to enjoy the fruits of your labour without a massive context switch to some design software. It’d be nice if you could setup a simple project that you can run right away.
The basic cam plugin lets you do this. Setup a triangle, maybe some text, and you’ve got a basic sign – all from within gSender.
We’re going to continue to expand this tool to add a few more options (text coming, for example), but that’s the vibe and philosophy behind it. We hope other plugins that generate more complex g-code will be developed and shared by the community.
Sample Plugin – Simple Sign Maker
One of the problems with onboarding CNC users vs 3D printing users is the context switch from setting up your hardware and software to designing and exporting something to actually cut to see your machine in action.
This plugin hope to address it by making it easy to add some text to a shape for a simple sign – so you can make chips fly and see the results of your efforts, and in the end get a little piece of wood with your name on it.
Pick a preset shape, pick your text and fonts, and you’re ready to carve.
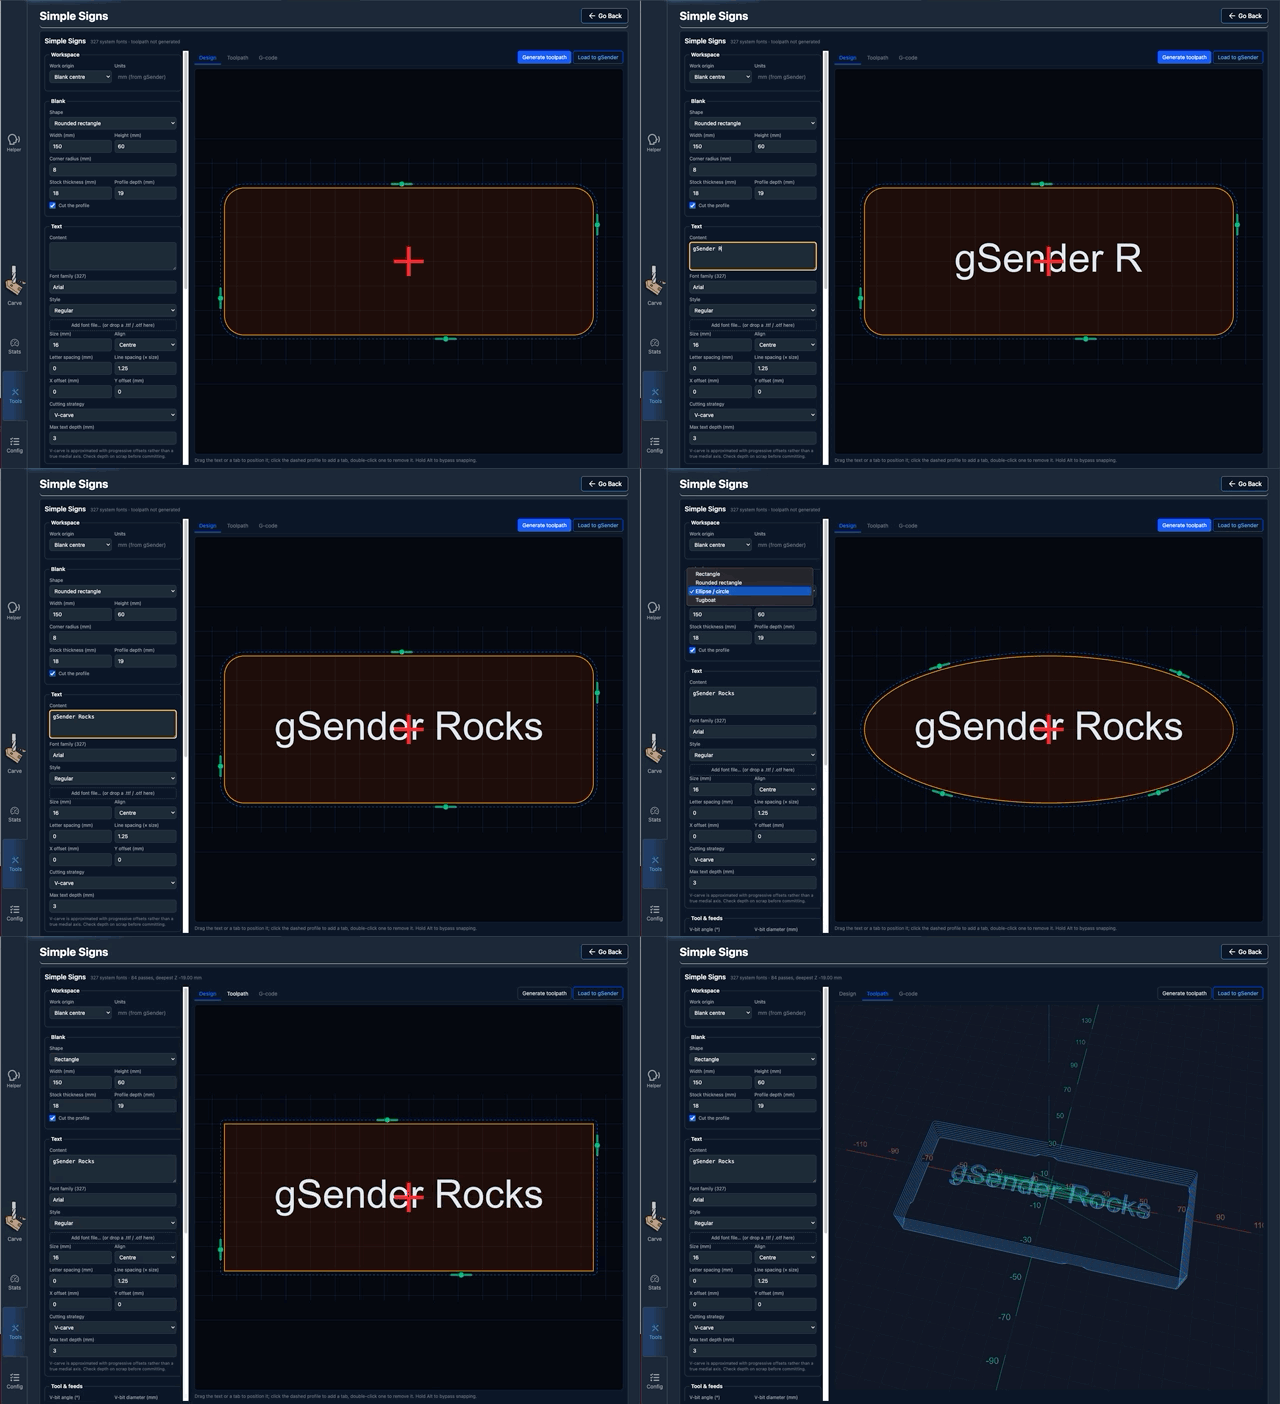
Adding or removing tabs is as simple as clicking on the profile – and they can be dragged around based on your workholding requirements
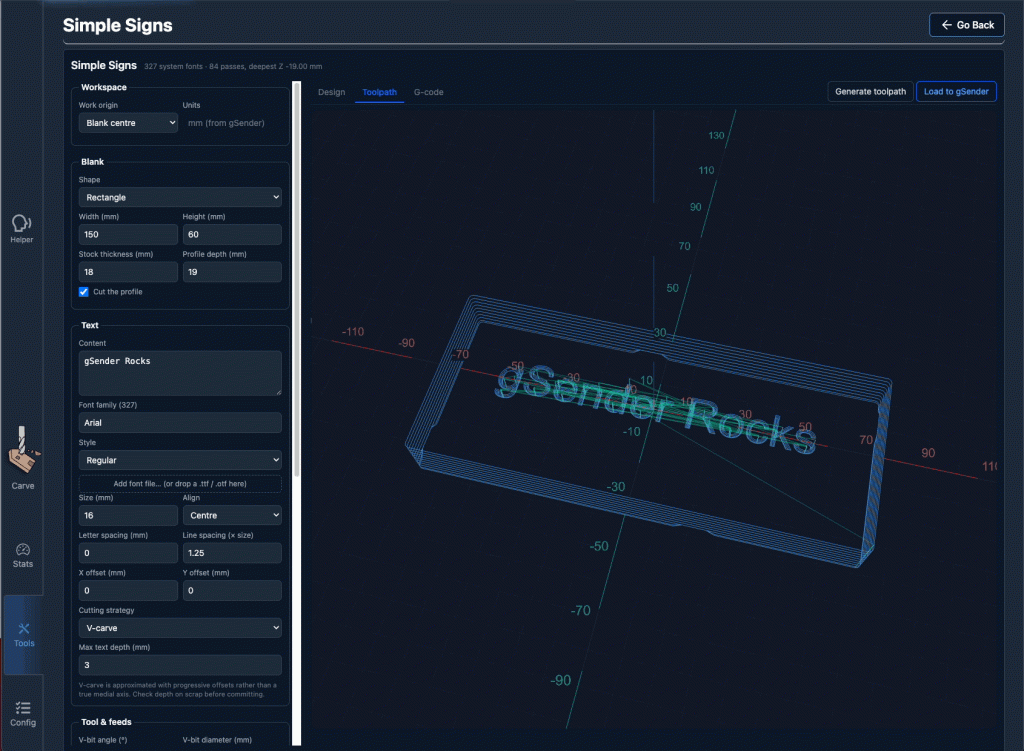
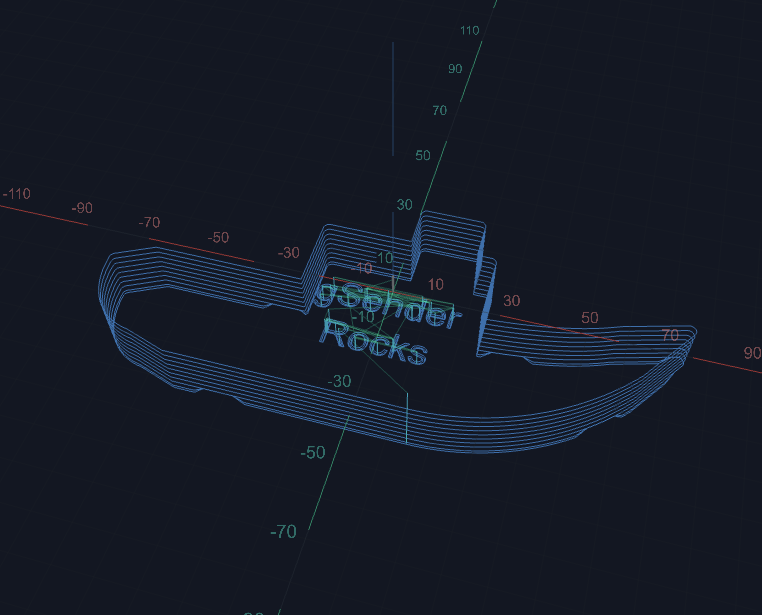
… And yes, we have a benchy
Pendant UI
Philosophy
gSender has been a Raspberry Pi-friendly application since inception. That said, it’s primarily a desktop application, and has historically required a fair amount of processing power to run well.
With recent optimizations, we’re looking at exploring alternative ways to interact with gSender, and are working on a pendant-style view. Designed from the ground up with touch focus in mind, this new pendant view is an entirely new user experience that runs well on integrated CM4 modules.
Featuring noticeably larger buttons, a SVG visualizer, and newly reorganized tools in expandable drawers, it’s the same old gSender in an all new responsive, and touch-forward view.
We hope to have this specific configuration available as both a standalone application and usable within main gSender proper for those who prefer it using an opt-in configuration.
We are internally exploring providing a bespoke CM4/touchscreen offering as a more affordable alternative to the gControl panel computer in the future using this specific application. That said, the application itself will always be free – and installable/usable on the gControl if you already own one and prefer this form factor.
Pendant in Action
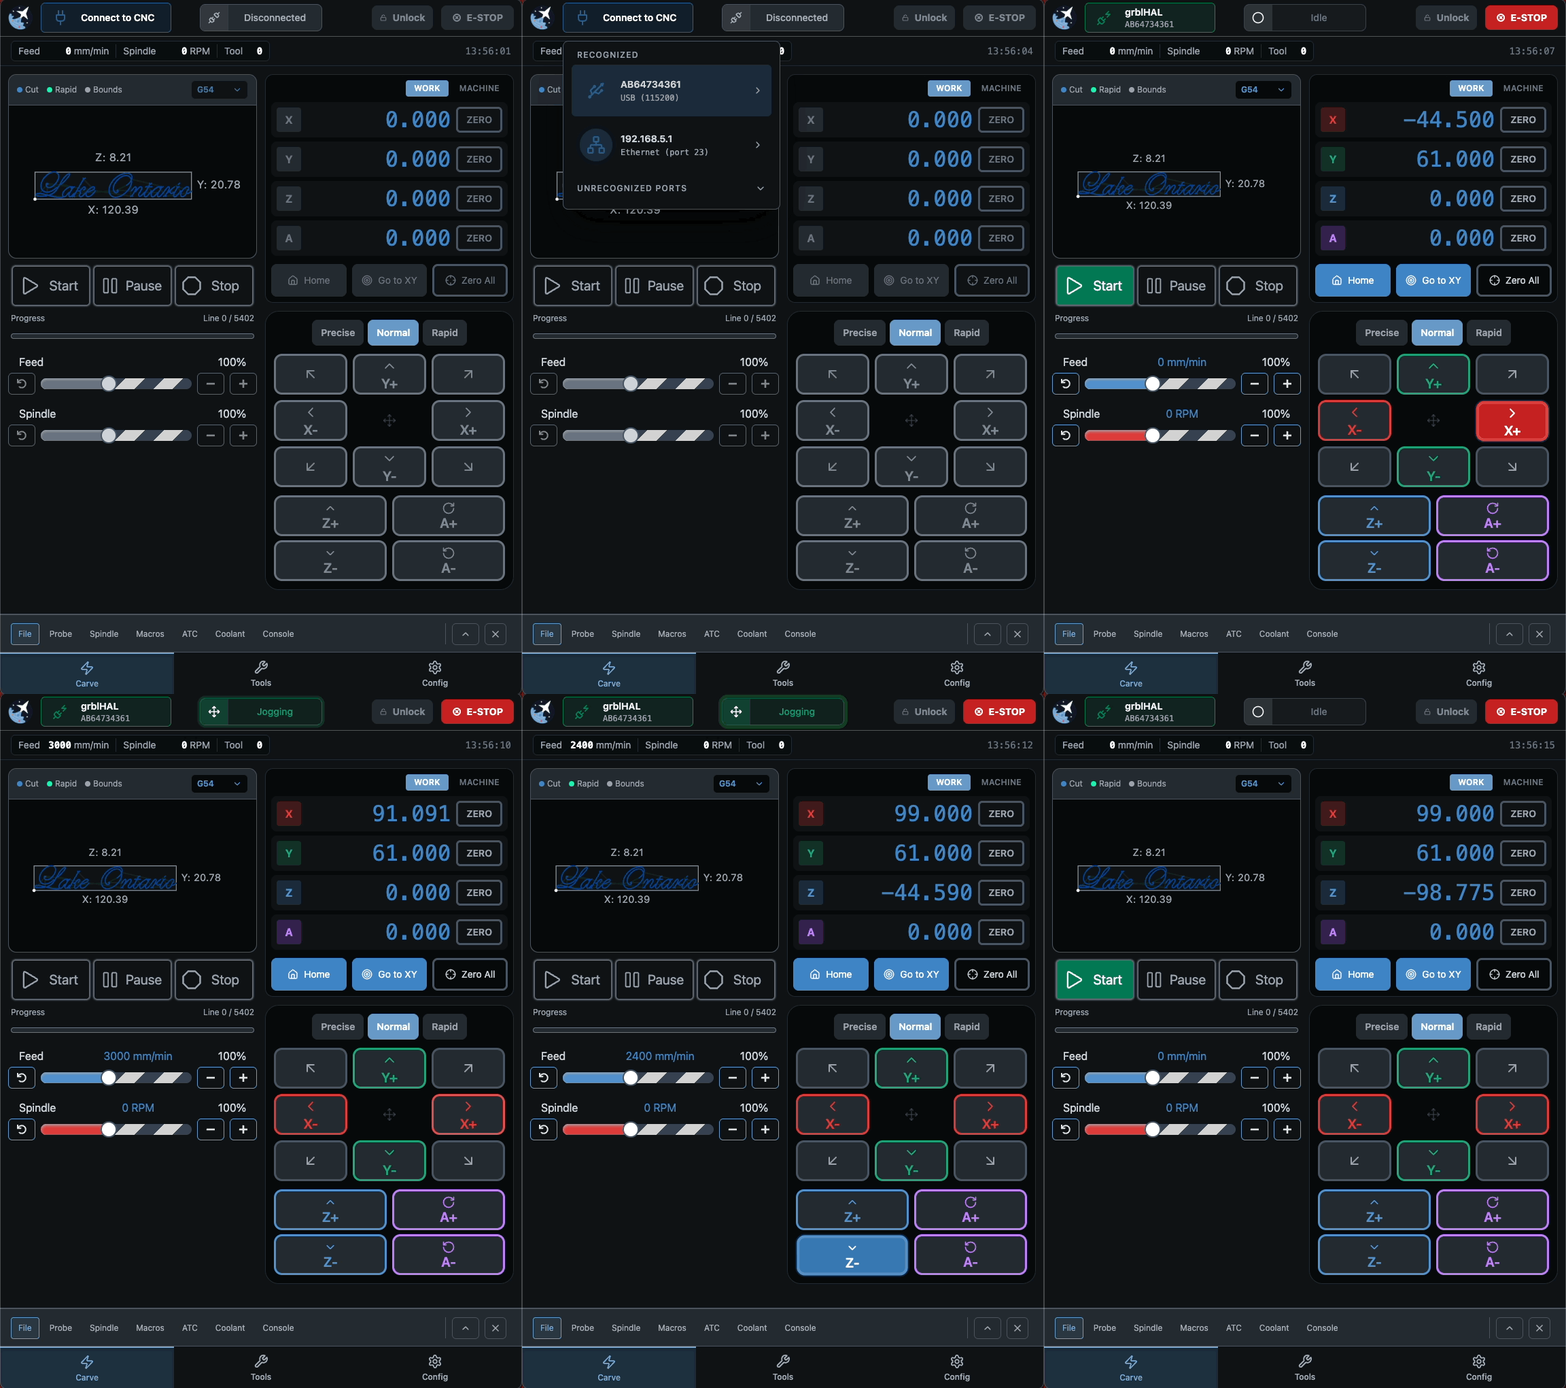
Connection and Job Loading
Connection has been redesigned to be touch focused – one click to list, one click to connect, and you can hold to disconnect.
Machine status has been redesigned to be less intrusive, and includes a number of new animations depending on firmware state.
The visualizer itself is smaller, and limited to a top down view – but you still get important information like the origin and location as the job runs, along with various toolchanges.
Tool Drawers
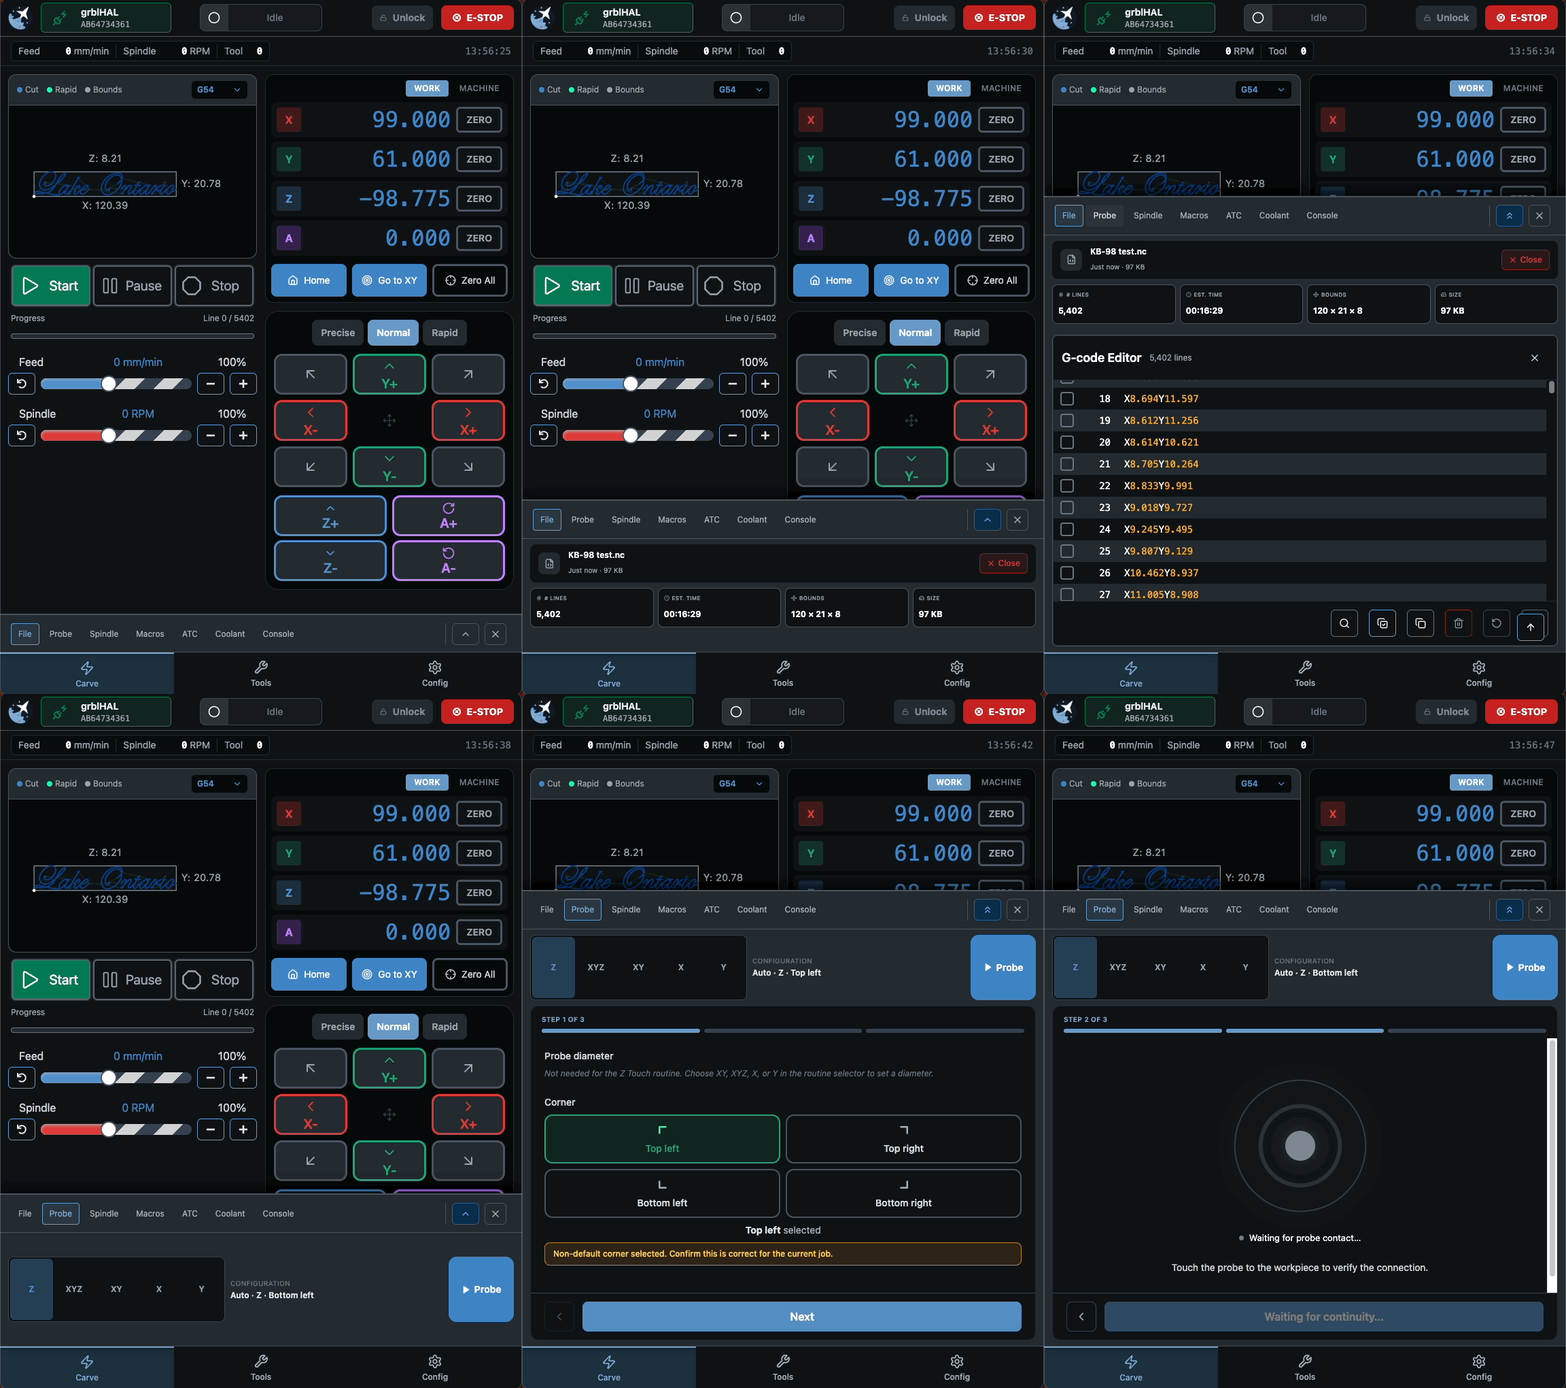
Most of the functionality has been moved into expandable drawers that are only visible when you need them. Drawers have 2 states – partial and fully expanded.
Partially expanded should be the quick info and actions you need. For example, for the file tab it’s the file info like name and bounding box.
For the fully expanded, it’s more rare configuration options or other functionality. As an example, when the file drawer is expanded with no file loaded, you get a full list of recent files. If a file is loaded, you get the contents of that file and the g-code editor.
Same philosophy for the probe drawer – partial expanded shows your current probe configuration and lets you just hit go. When fully expanded, you get a touch friendly guided process to configure your probe diameter, probe corner, and check continuity before running.
Other Small Things
There’s a number of other features you may notice in the upcoming Edge release.
We’re expanding the helper to better tie into our resources, so if you get an error or alarm you’re better equipped to deal with it.
A number of new config options, including probe retract speed and backup settings directories are added.
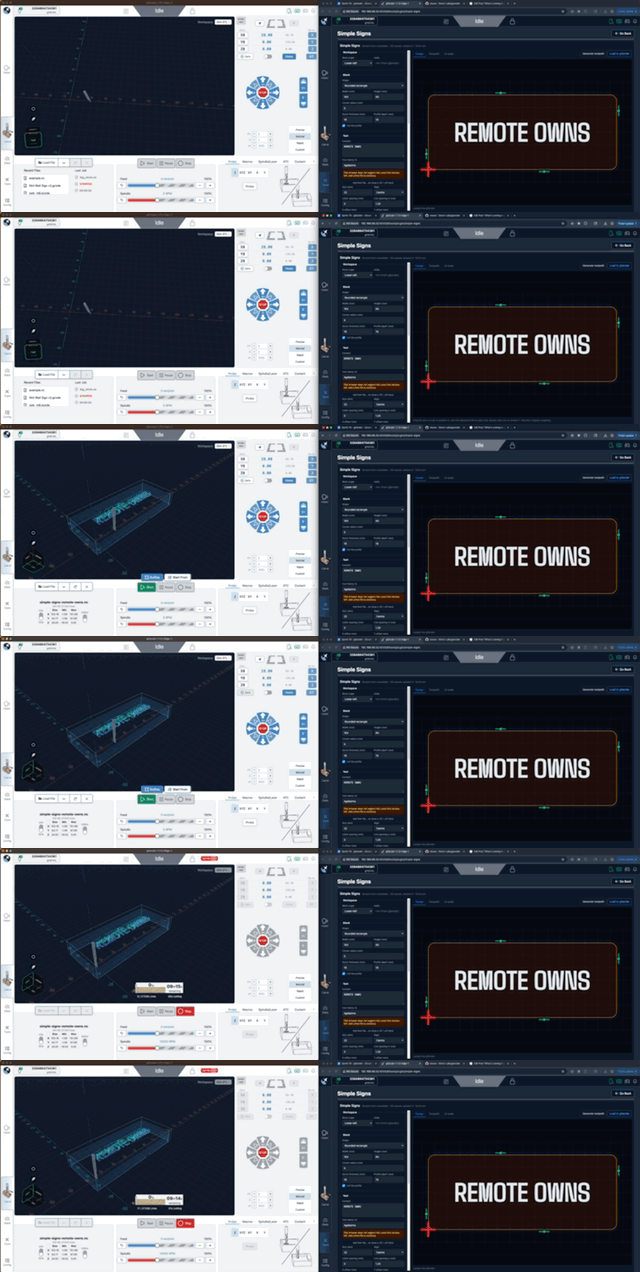
Remote mode now will automatically connect to an open Desktop connection – so no need to reconnect a second time on your remote client be it your phone, tablet, or a shop PC
There’s an added benefit to this for remote users – imagine designing something in a plugin connected remotely on your desktop PC, and with one click of “Load to gSender” it’s already loaded on the desktop client of your shop PC, ready to carve!
We’ve also made a host of bug fixes, UX improvements, and tweaks to dark mode. There will be a more comprehensive list of changes and new features in the official post on release.
…And Much Much More
This is a quick overview of some of the features you can expect in the upcoming Edge-1 release. We also have a number of future improvements and features we can’t wait to share with you – but that’ll have to wait until the next blog post.
We’re really looking forward to the community getting their hands on this version and giving us their feedback. No firm date, but mid-August seems likely for public release – although everything is available on Github for testing now, if you’re technically inclined.