Beta CNC machines in production

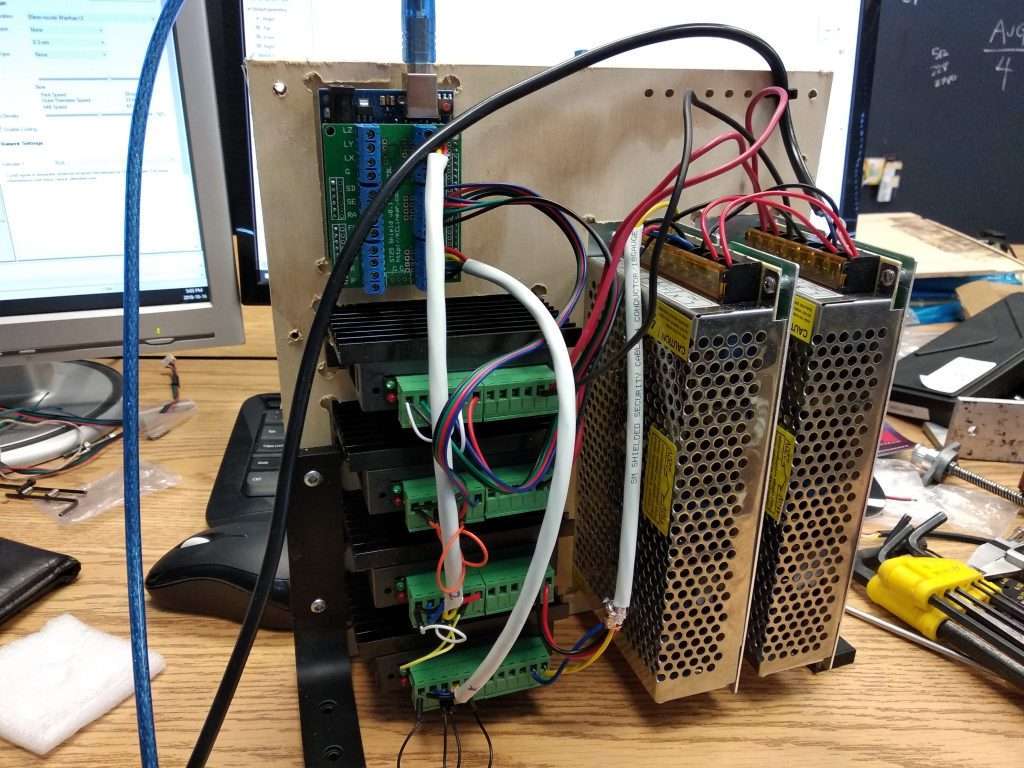
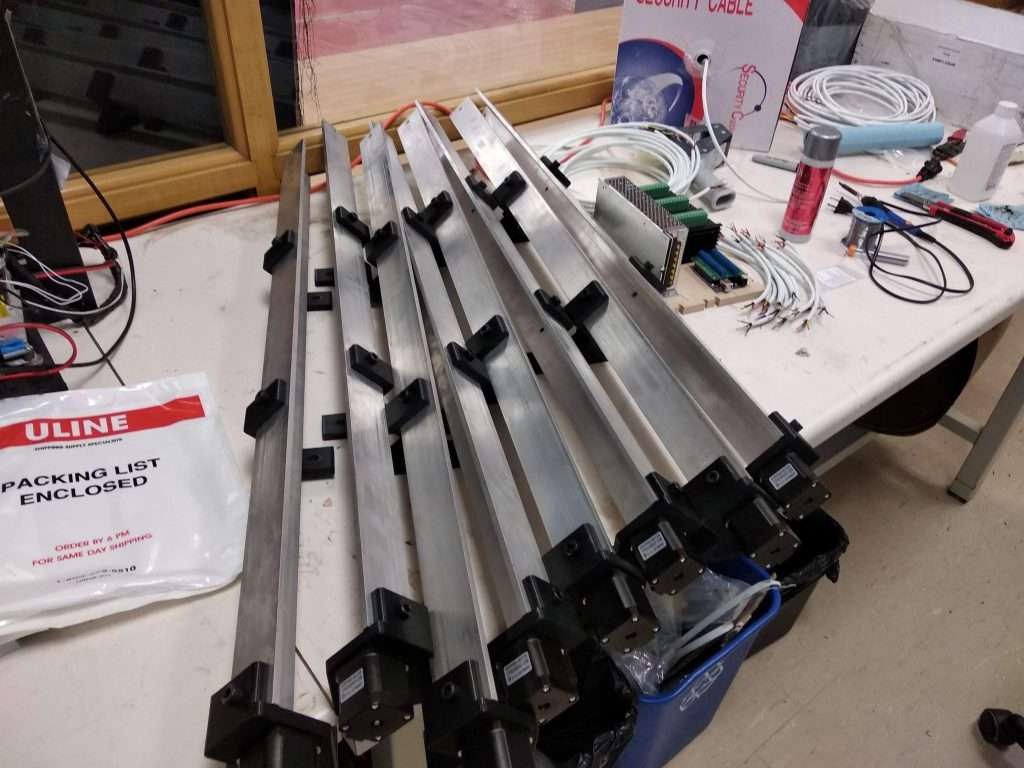
Things have been really busy with the building and development of the LongBoi project. Progress is slow but steady. Some of the assembly was delayed since some of the parts were coming in slowly but we are on our suppliers and manufacturers to get parts in as soon as possible.

Here are a couple of changes that have been made from our initial designs:

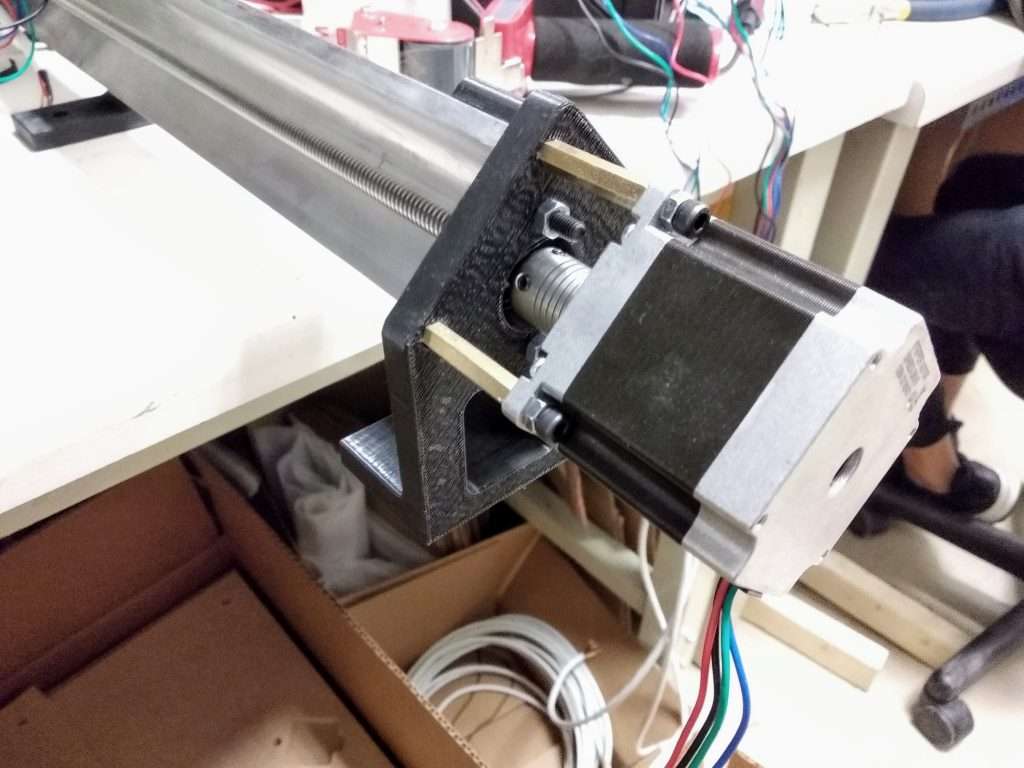
  • Shorter belt loop between the Z-axis lead screw and motor. This brings the motor closer in toward the gantry and improves stiffness in the motor mount.
  • Redesigned Y-axis rail supports and motor mounts. The new design makes it easier to install and adjust M8 bolts along the rail.
  • Additional points across the machine to increase wire management options.
  • Polymer anti-backlash nuts on all axis.
  • Redesigned Y-axis gantry to move the router closer to the axis of rotation.

Stay tuned for more updates on this project!

Interested in becoming a beta tester? Sign up here: https://goo.gl/forms/Rei7ghZIDg6tlMhl2


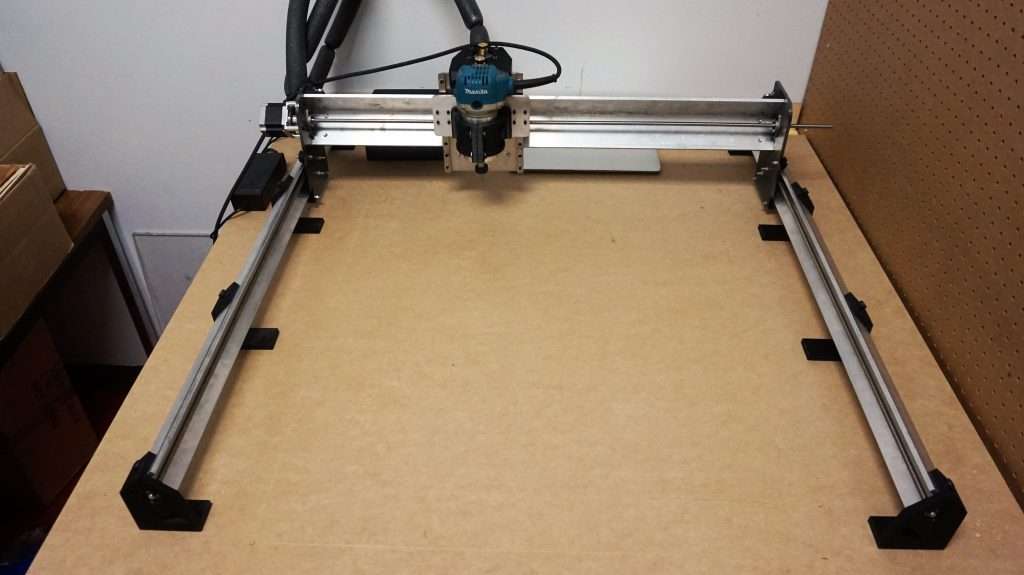
“Big things” are coming to Sienci Labs. A new machine under development.

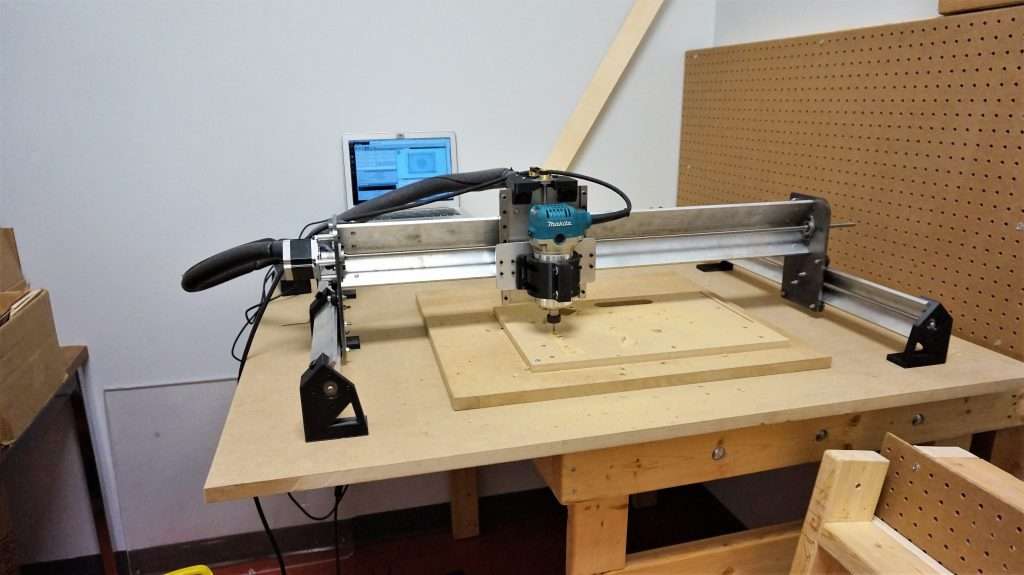
Over the one and a half years that the Mill One has been out in the wild, it has accomplished its role as a simple, affordable desktop CNC machine perfect for hobbyists and makers to dive into the world of CNC milling. We’ve designed a new machine (codename LongBoi) that holds that same focus, but as a new platform to allow for processing of larger materials.

It’s exciting to finally have this new machine out in the world for testing, especially since we’ve been working on the design on and off for the last couple of months. Here are our goals with the new machine:

  • Simplicity: The LongBoi holds the same philosophy as the Mill One to be a mechanical simple machine by reusing design cues throughout the machine, such as utilizing the angle aluminum v wheel design found on the Mill One and using a limited variety of parts.
  • Rigidity: The LongBoi has a 3×3 inch aluminum rail along the X axis, as well as a supported 2×2″ Y axis rail. The Z axis utilizes 12mm linear guides, allowing the Z axis to be rigid and extremely low profile. All gantries are made from 1/4″ steel or aluminum
  • Precision: Unlike some of the other larger, hobby grade desktop CNC routers like the X-Carve and Shapeoko, the LongBoi uses leadscrews on all axis, which means higher precision and no belt stretch.
  • Openness: The design of the LongBoi allows for a variety of modifications, especially with the simple design and use of 3D printed components. The Longboi uses standard and off the shelf parts that can be easily interchanged or replaced.

We currently have two sizes being beta tested, a machine with a 1ft x 1ft work area and a 2ft x 2ft work area. Want to be a beta tester as well? Check out this form to learn more and apply to be a beta tester! https://goo.gl/forms/Rei7ghZIDg6tlMhl2


Mystery packs now in store

A fun way to try new things on the Mill One is to try out new end mills and other hardware. That’s why we created the Mystery Pack! Sign up for the Mystery Pack and we’ll send you an assortment of cool stuff every month.

Are you interested in getting your hands on this Mystery Pack for free? Share your projects with us and we’ll send it to you completely free of charge. To sign up for free Mystery Packs, go to https://goo.gl/forms/ObkEJPFXMklOTBwB3 to sign up and for more details.

Testing with the Mill One V3 Y axis bed design

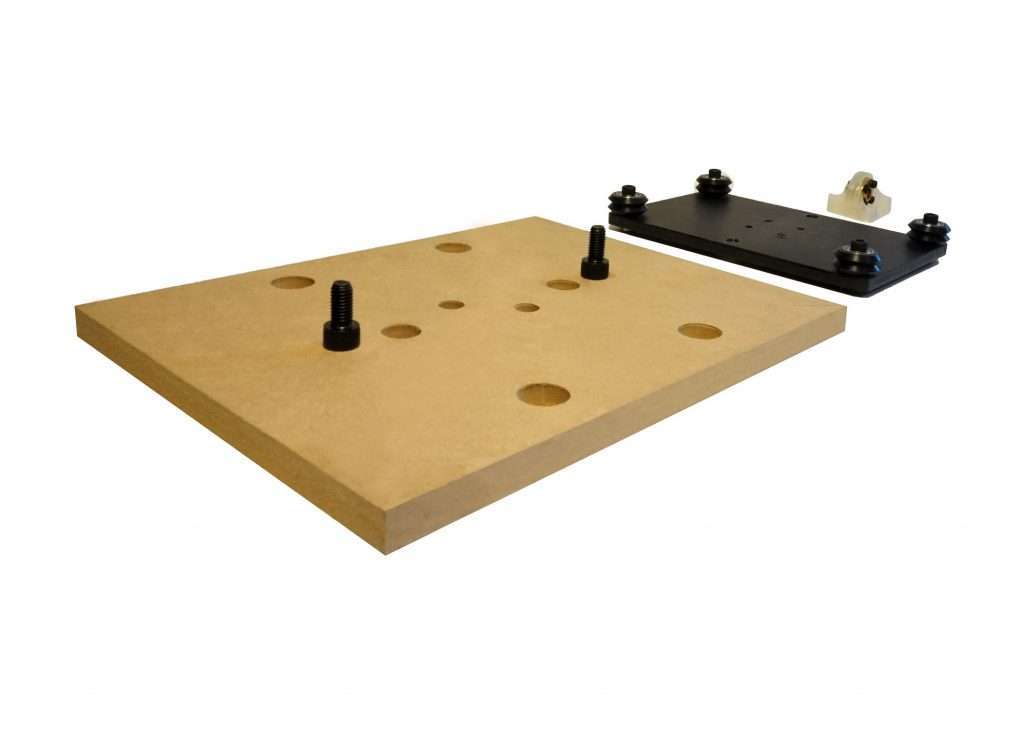
One of the parts that have been significantly changed on the Mill One V3 compared to the V1 and V2 is the design of the Y axis bed. We wanted to improve the rigidity of the Y axis, while allowing for more flexibility for wasteboard mounting and workholding. With this new two-part bed design, users can easily remove and switch out Y axis beds, and users can make their own beds if needed.

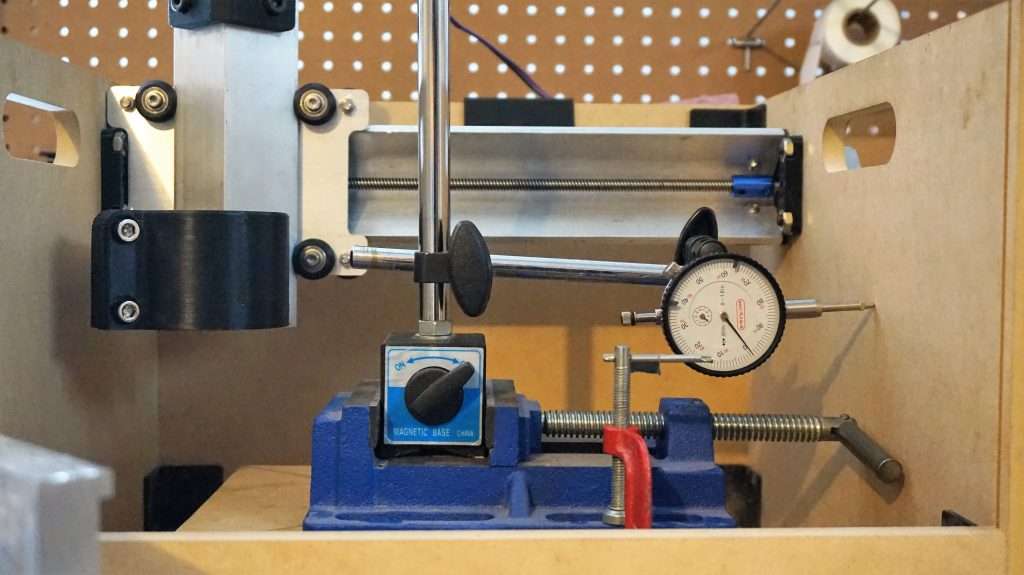
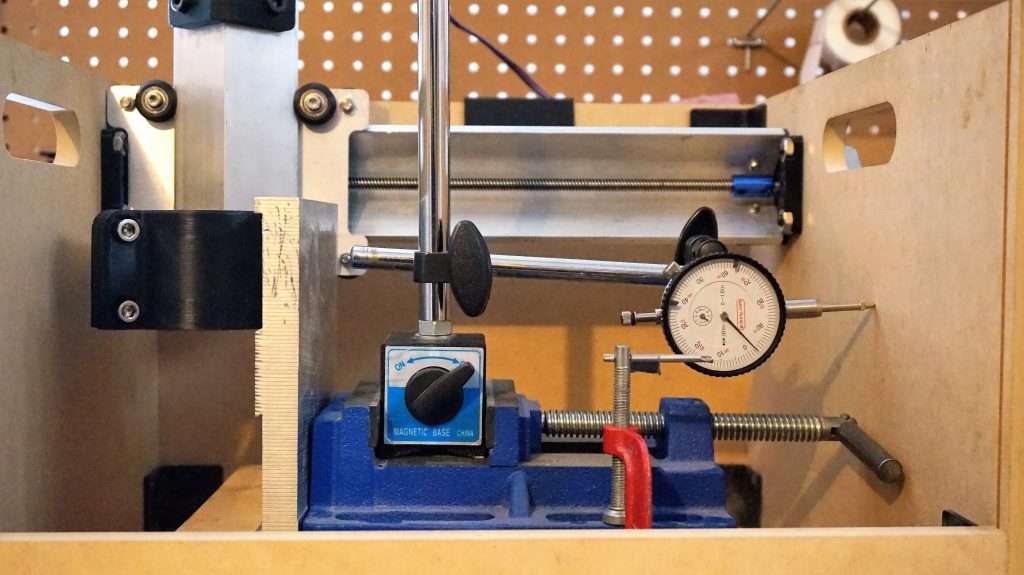
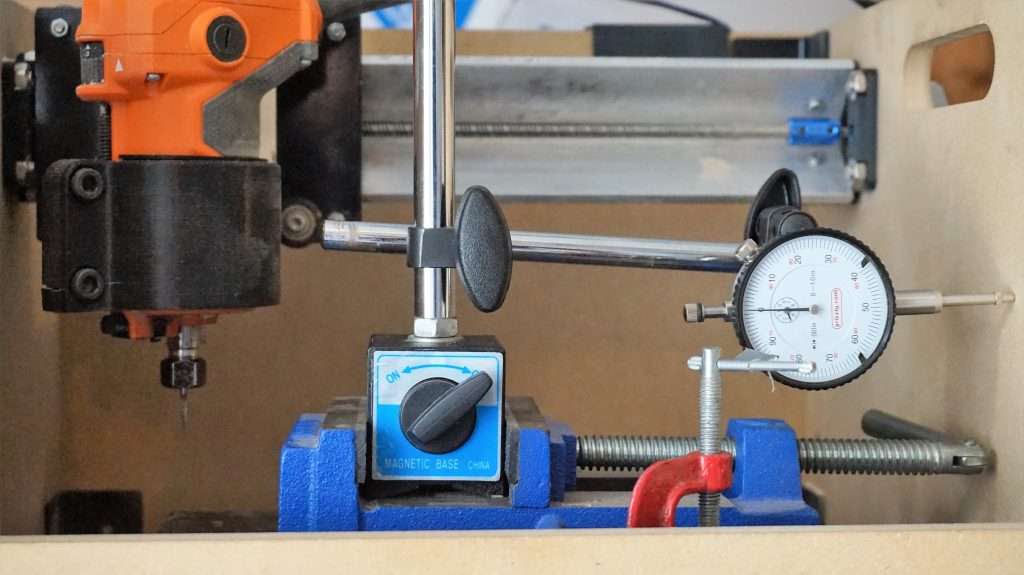
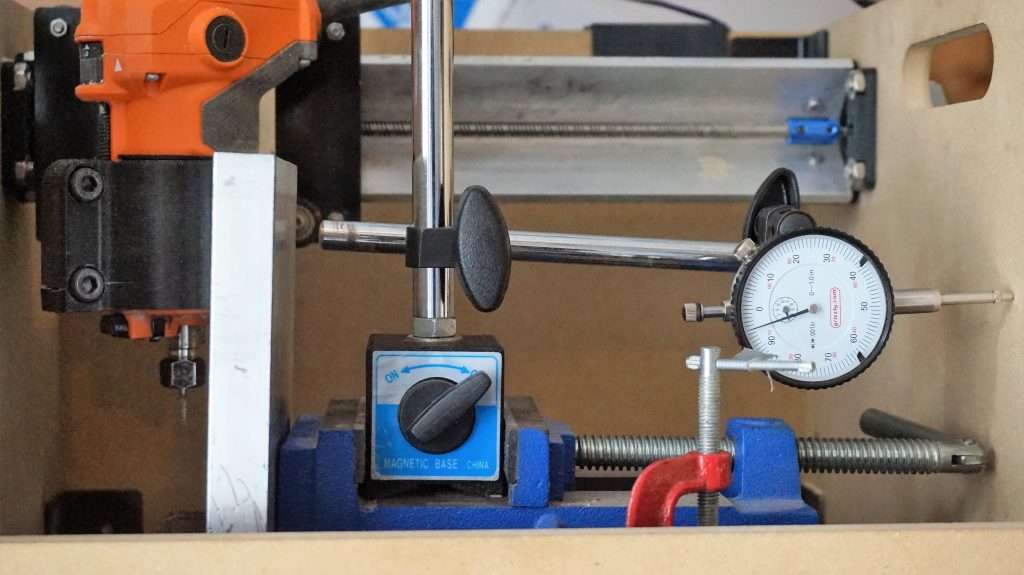
The steel Y axis gantry plate which will come with all V3 machines is far stiffer than the HDPE, which means a more rigid machine. You can see below based on some simple testing with a dial indicator and a 2-3 pound aluminum block, the difference in the amount of deflection that each machine experiences.

V3 deflection: Around 1-2 thousandths of an inch

V2 deflection: Around 5 thousandths of an inch


Testing on the V3 (without weight)
Testing on the V3 (with weight)
Testing on the V2 (without weight)
Testing on the V2 (with weight)

Testing was done on a very simple setup of a dial indicator pressing against the right side of each machine. The vice was lined up against the right edge of the bed for consistency. An aluminum block was placed on the opposite end. This allows us to compare the amount of deflection between the two designs.

One thing to note is that the Y axis gantry was an aluminum prototype that was milled out on the Mill One. Production machines will come with a laser cut steel gantry which is stiffer that aluminum. Because of this, we should be able to expect even better rigidity from production machines than from our prototypes.

Have a V2 machine but want to upgrade this part? You can get a kit that will update your machine here: https://sienci.com/product/v3-y-axis-bed-kit/


Sienci Mill One V3 Updates

The Sienci Mill One V3 comes with both major and minor changes to the Mill One V2 design. A special thanks to our customers, engineers, and community of makers who have helped by contribution ideas and designs that have made its way into this new iteration.

Please note: some of these updates have been iterative and may already be in place in your Mill One V2 machines. Please check your included Changelogs for more information.

Updates:

  • New two-part Y axis bed design. The Mill One now comes with a lower gantry plate on the Y axis with mounting points so that users can bolt on the standard size wasteboard (included in the kit) or make their own custom workholding solutions. The wasteboard design has been created to allow users to easily mill them at home out of any 1/2″ or thicker material. The two-part bed system is significantly more rigid.

You can read our post about it here


  • New XZ gantry design. The addition of notches allows the Mill One to travel further along the X axis, increasing the total working area of the Mill One. ¹

Credits to David Whiddon for the design suggestion.


  • Additional mounting holes on the Z axis for the router mount. Increases rigidity and allows for more mounting options. ²
  • Leadscrew on the Z axis has been shortened slightly, allowing more clearance under the router.

Credits to Tom’s 3D for the suggestion and contribution


  • Change from 45mm to 48mm tall NEMA 17 motors with longer cables.

(Left: new model with better torque use in V3)  (Right: model used in V2)

  • New clip-on type electronics holder, which is less prone to falling off.
  • Improved ACME nut mount design. Prevents cracking during assembly. ³
  • Update from GRBL v1.1e to v1.1g, with faster acceleration and max feedrates. You can read about it here.


Community shout-outs:

  1. Credits given to David Whiddon, who recommended adding notches to the gantry plate design expanding the Mill One’s work area.
  2. Credits for Josh Kubassek and Tom’s 3D for the contribution to adding extra mounting points for the routers to improve rigidity.
  3. Credits to Ilya Nikiforov for sharing his unboxing experience and identifying areas for improvement with our ACME nut mount design.


Firmware Update: GRBL v1.1g

We’ve released a new firmware update for the Mill One. This update will work with all Mill Ones. Download it here:

https://sienci.com/wp-content/uploads/2018/07/GRBL-1.1g-Sienci-Mill-One.zip

This firmware update increases the speed and acceleration settings of the Mill One. GRBL v1.1g has general improvements and bug fixes that improve reliability and performance.

Things to know about this update (please read this carefully if you are updating your Mill One since there are some specific instructions):

  • This firmware update takes the Mill One from running GRBL v1.1e to v1.1g. You can learn more about the development of GRBL on the GRBL Github.
  • You can update your firmware the same way as you uploaded it the first time. Instructions can be found on our Resources pages.
  • Before you start, make sure to clear your EEPROM. EEPROM is where the Arduino stores all of the GRBL settings. Some settings from GRBL v1.1e may persist if you do not clear the EEPROM. An Arduino program in the downloaded firmware folder can be uploaded to the Arduino to clear the EEPROM.
  • If you have installed a library into Arduino for an older version of the firmware, you will have to delete it and replace it with the new version. You can find the old libraries in the “Arduino” folder, which can usually be found in the “Documents” directory. Go to the “Libraries” folder and delete the “grbl” folder. This will delete the library and will let you install a new ZIP library.
  • Installing this update will undo and delete all your old settings. If you made any changes to the firmware, make sure to save all your settings. You can look at your settings by sending the command “$$”. If you need to make changes to your settings after the update, you can refer to the GRBL Configuration wiki.
  • If you run into issues with the firmware, please let us know.

If you want to revert back to GRBL v1.1e, you can download the firmware here.

An update on our HDPE frame testing

Over the last couple days, we have been testing the performance of the black HDPE frames. We’ve gotten a lot of interest in a plastic-based frame over MDF. However, we have found several issues with making the frames out of HDPE that leads us to believe that it is not a good option for our customers and we will not move forward with manufacturing them. If you want to learn why and our impressions of using this material to make the frames, please continue to read.

Stiffness

One of the biggest disadvantages of using HDPE is the fact that it is not as stiff as MDF. This makes the machine less rigid. Initially, we believed that this would be negligible, especially based on our previous experience using the material. However, when we assembled a prototype, we found that the reduced rigidity in the HDPE introduced decreased performance and reduced quality in milled test parts.

One of our tests was to make aluminum bitcoin tokens. On the bottom is the test piece milled on the HDPE frame machine. The one on the top is made on a machine with an MDF frame. You can immediately see that there is a clear difference in the finish between them. Both were made using the same gcode, with 1000mm/min feedrate at 0.35mm stepdown using an 1/8″ bit.

Both samples (above)

Sample milled on HDPE frame machine (below)

Sample milled on MDF frame machine (below)

We noticed far more chatter and experienced a more difficult time milling with the HDPE machine. This is also reflected in the milled part quality.

Warp

When we received the parts for the frame from our manufacturer, we noticed substantial warp in the material. We decided to go forward with testing since we believed that some of the warp would be taken up when the machine was assembled. The warp would be pulled straight by the brackets and rails. For the most part, this did occur, but the fit with the acrylic shield was still subpar. There was a sizable gap with the groove for the shield.

In the future, we would need to look into a more dimensionally stable material or have the material stress relieved to prevent warping. This introduces more cost and perhaps would make this upgrade uneconomical.

Conclusion

Although HDPE looks nice and has great water resistance, due to its lack of stiffness compared to MDF, as well as warping issues, it is not a suitable material to make frames out of. Further research and development will be needed to create a frame that avoids those issues and offers performance comparable or better than MDF. As of right now, we will not be moving forward with manufacturing HDPE frames. Please stay tuned for more updates on frame development, and if you have any suggestions for other materials we can try, make sure to get in touch!

Milling Halftone Images Using the Sienci Mill One

I recently stumbled upon this idea of milling halftone images and found it to be a neat way of transforming regular photographs into CNC millable projects. While it does work with any photograph, I have found that black and white drawings provide the best results, especially when working with a relatively small work area.

I created a youtube video on the process and chose to mill the following two images: 


The images are sourced from Ken Hunt on Deviantart and the software I used was the Half-Toner V1.7 by Jason Dorie.


Using the Software

The software is relatively straightforward to use. You can set the angle of the bit you are using which in my case is a 30 degree v-engraving bit for the dead pool image and a 45 degree bit for the Batman image as well as the dimensions of the material you are working with. You can play around with the size and spacing of the dots depending on how detailed the image is and how detailed you want your print to be. The Deadpool print was simpler and as a result, required lower resolution. It ended up being comprised of around 22 000 dots while the more detailed Batman print was 35 000 dots.

Choosing the Material

The nature of this project requires that you have a very flat piece to mill on as even a slight variation in height can cause variations in the size of the dots. Having a different color beneath the surface of the material helps the dots stand out creating a more defined image. I decided to work with what I had and paint some poplar plywood black.

In my video, you can see I decided to sand and coat the plywood in wood glue prior to milling it. I found that the wood was slightly fuzzy and absorbed a lot of the paint I spayed creating a rough surface. Sanding removed the fuzziness while the wood glue made the surface even smoother and created a barrier keeping the paint on the surface which is why the finish on the Batman image looks significantly better than my first attempt with the Deadpool Image.


Milling the Piece

Halftone images are definitely one of the more time-consuming things to mill using the Mill One, especially when printing detailed images that can be comprised of over 30 000 dots. The Batman print in the video took over 8 hours. Reducing the depth of the dots and increasing the feed rate will help speed up the process. Another option is to use a bit with a higher angle which will allow the mill to create bigger holes at a shallower depth which is why I switched to a 45 degree bit for the second Batman image.


If you create your own halftone images, be sure to share them on the Mill One Facebook Group and If you have any questions about the projects I milled or need help milling yours, I encourage you to reach out.


We’ve reached 1000 likes on our Facebook page!

Can you believe it? We’ve reached our 1000th like on Facebook! I want to thank everyone who have been with us and supported us throughout the last two years.

To celebrate, we’re giving out free anti-backlash nut kits with every Sienci Mill One order (first 30 units) with coupon code “YAY1000”. To use the coupon, make sure to add a machine and an anti-backlash nut kit to your cart before using the coupon, and you’ll get a $25USD discount (the value of the anti-backlash nut kits).

Here’s to the next 1000 likes! If you haven’t yet, make sure to like us and help us get there: https://www.facebook.com/siencilabs/!

Improved print quality, new printers

One of the key areas that we strive to improve on in our manufacturing process is with the quality of the 3D prints in the Mill One kits. Our 3D printed part quality is an area that has a lot of room to grow in terms of improving quality. We have worked with our customers and listened to their suggestions to improve print quality, and over the last couple of months, our prints have become stronger, more consistent, and more precise. Making these improvements have involved testing different print settings, nozzle sizes, bed surfaces, and materials.

One other step that we have taken in improving print quality has been to update our printer farm with two new Prusa i3 MK3 printers. This is to increase our print capacity, as well start replacing printers from our aging fleet. One of our longest lasting printers has close to 3000 hours of printing on it.

If you’re familiar with Prusa as a company, they build industry-leading printers known for their consistency and reliability. They are currently being used to print the ACME nut mounts and the angle mounts, which are parts that require good layer adhesion to provide high strength. Based on our initial tests with the ACME nut mounts, it appears that these new mounts are stronger and less prone to cracking than mounts made by other printers. We have one printer that has been working fairly reliably but still need to fix some things on the other Prusa to have it up and running properly.
Here are some other things that we have improved over the last couple months:

  • Reduce Z banding on the electronics holder and cover
  • Improve bed adhesion for the angle mounts
  • Adjust tolerances on the nut catches on the ACME nut mounts
  • Switch from using the Cetus printers for printing the ACME nut mounts over to the Wanhao i3 or Prusa printers to have a smoother bottom surface (the raft on the Cetus leaves a rough bottom surface)


We’re excited to be using these new printers for creating better parts and continually improving our kit!